
Making a Wooden Spice Rack
The project I am writing about today came from an idea my wife had. Back in December 2020 she wanted to get a friend of ours something that would fit in their new home, and asked me what I thought about this idea, and if I would be able to build it myself.
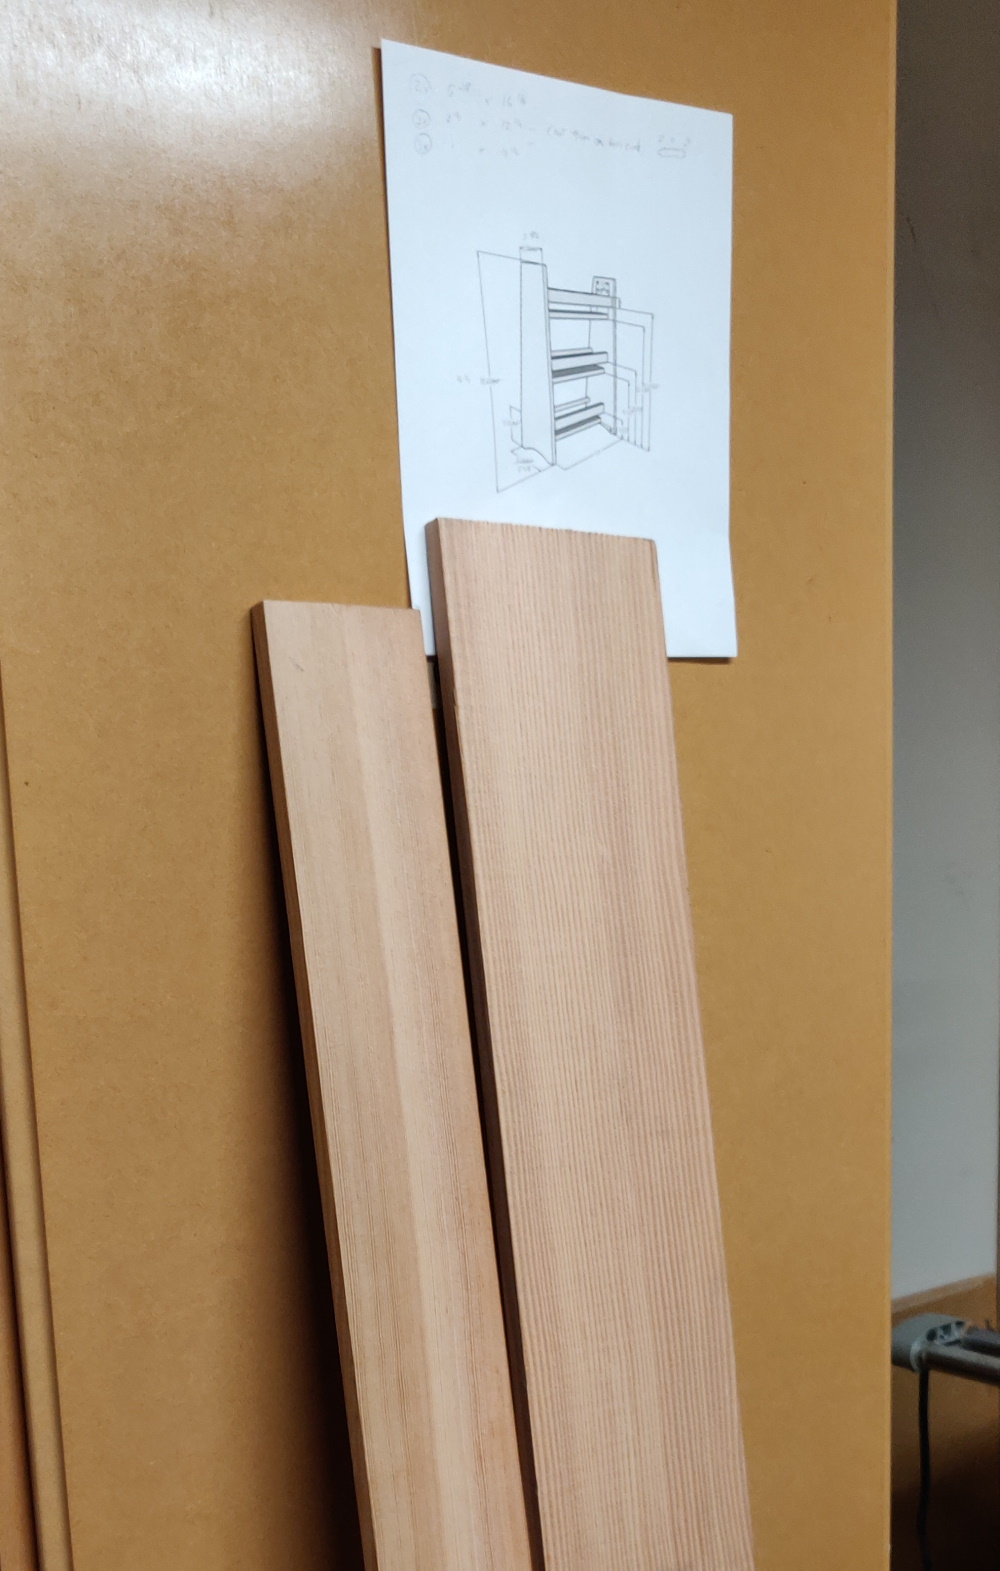
I had already played around with different CAD programs in the past, but never really got the hang of it. But now I needed to come up with a plan that would allow to not just give a cleat vision of the anticipated result, but also would allow to verify all measurements are actually correct.
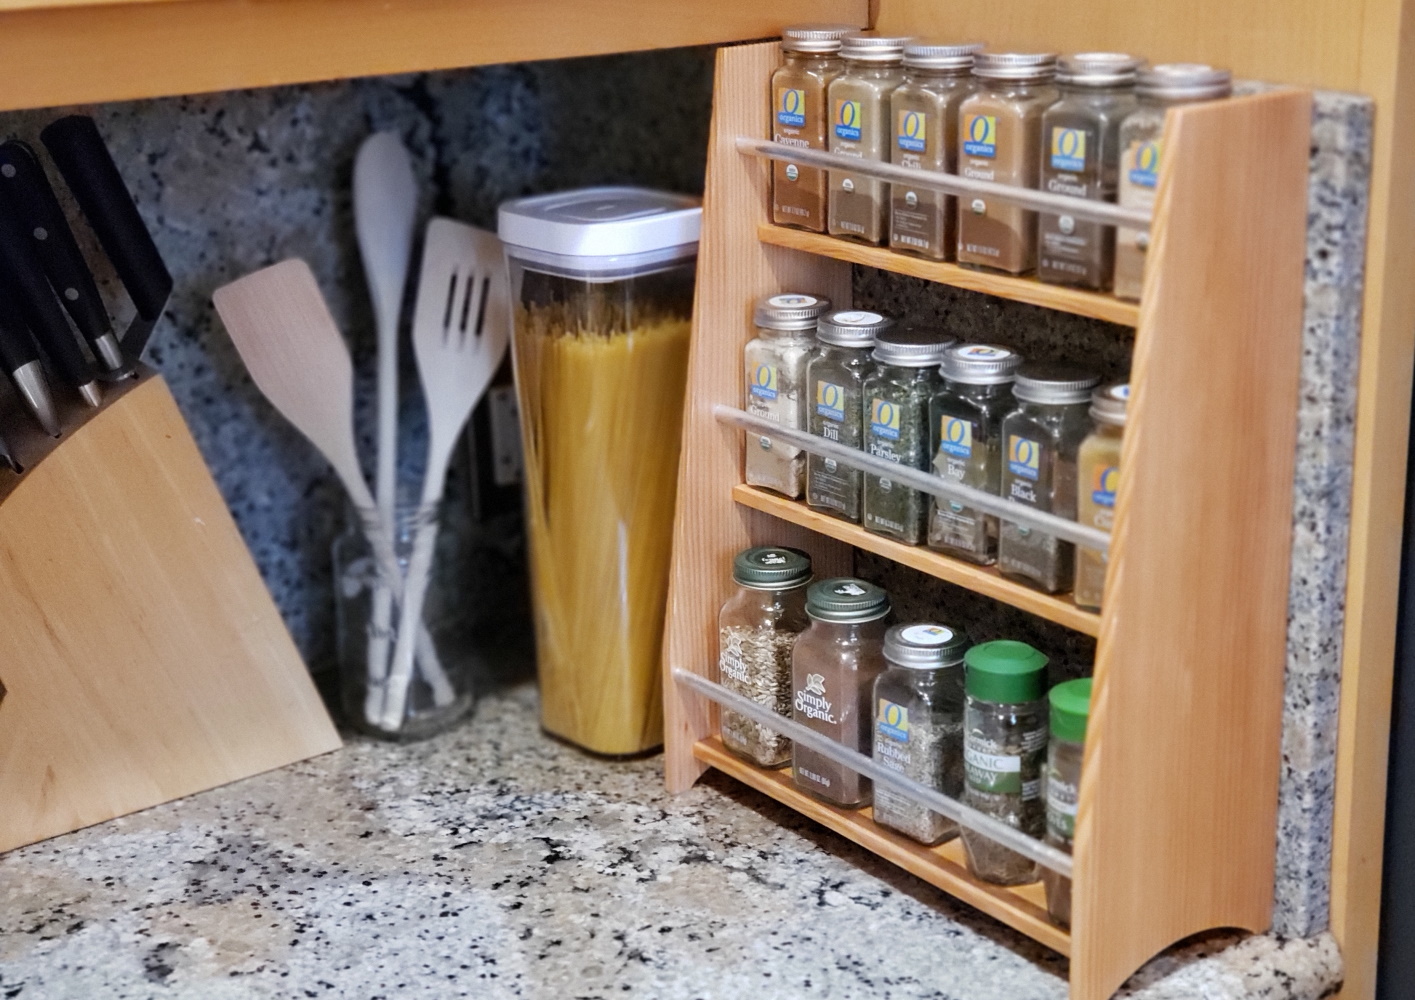
At the end this spice rack build would have to follow specific measurements that ensure it would fit in its space when finished, as well as holding the items it was made for in the optimal way. Also I wanted no visible joints, as well as no screws nor nails.
Preparation
 We had to start with gathering the exact size the spice rack would have, as well as the amount and sizes of the spice jars it would take. When I got this information I started putting my thoughts into a SketchUp draft, learning how to do that as I was going. We had to decide on a final design, so I designed it with some different features, ultimately letting my wife pick what she thought looked best.
Materials
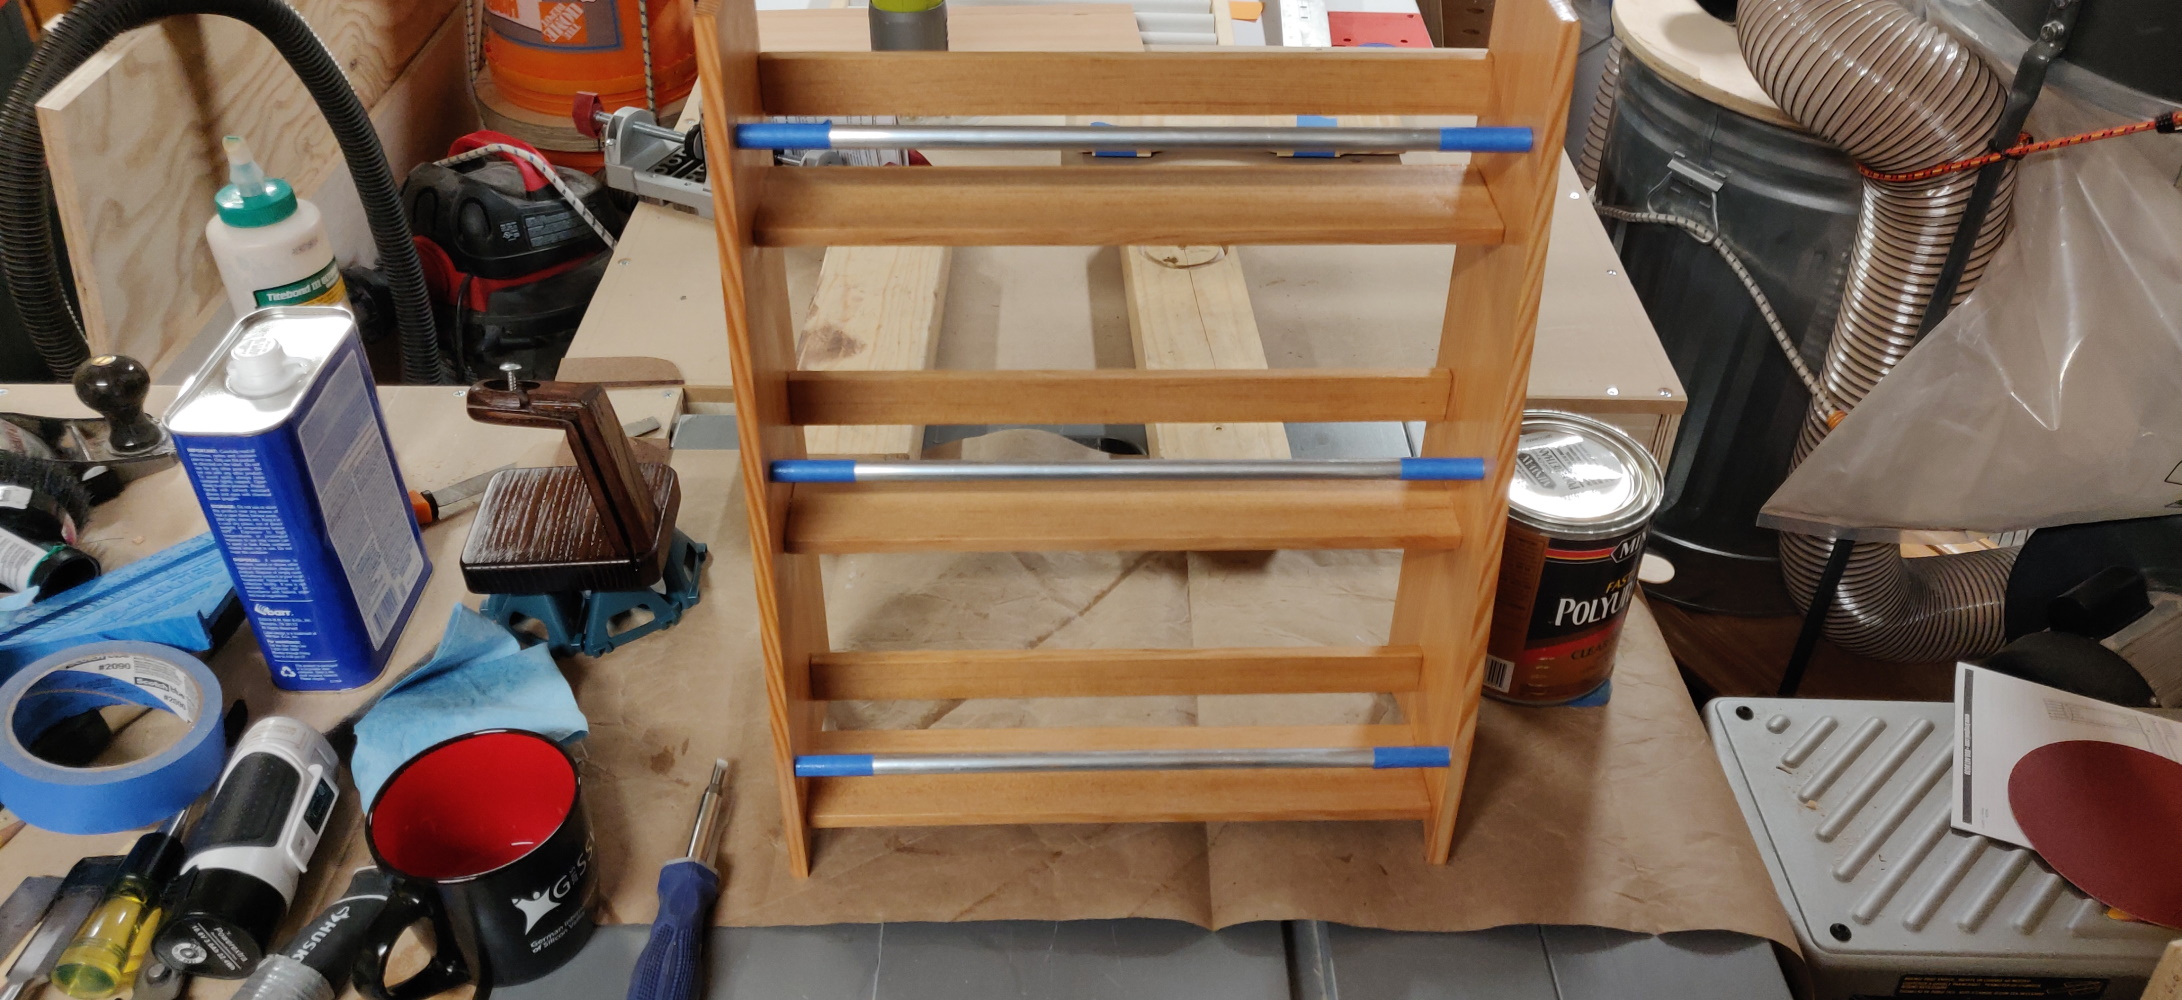
For the materials I decided to go with Vertical Grain Douglas Fir, as this is what our friends kitchen is made of, and some aluminum bars to accentuate the wood as well as matching the handles of the kitchen’s appliances (the pictures only show it in our own kitchen, before we gave it away). The finish was going to be semi-glossy polyurethane, which allows for a nice, subtle sheen that wont catch fingerprints or scratches easily. Since this is an oil based finish it would also highlight the wood grain nicely.
This was the first time that I went to a dedicated lumber store to get some nice wood for a build. So far I only got mainly construction grade lumber and sheet goods from the big box store, or scraps from a construction site. This time I needed something that fits exactly what I had in mind, so I got two really nice boards of Vertical Grain Douglas Fir. The Aluminum bars I got at a local industrial hardware and supply store.
Build
So when the sketches were ready I cut all pieces, marked them so I wouldn’t mix them up later, and then started working on the joints.
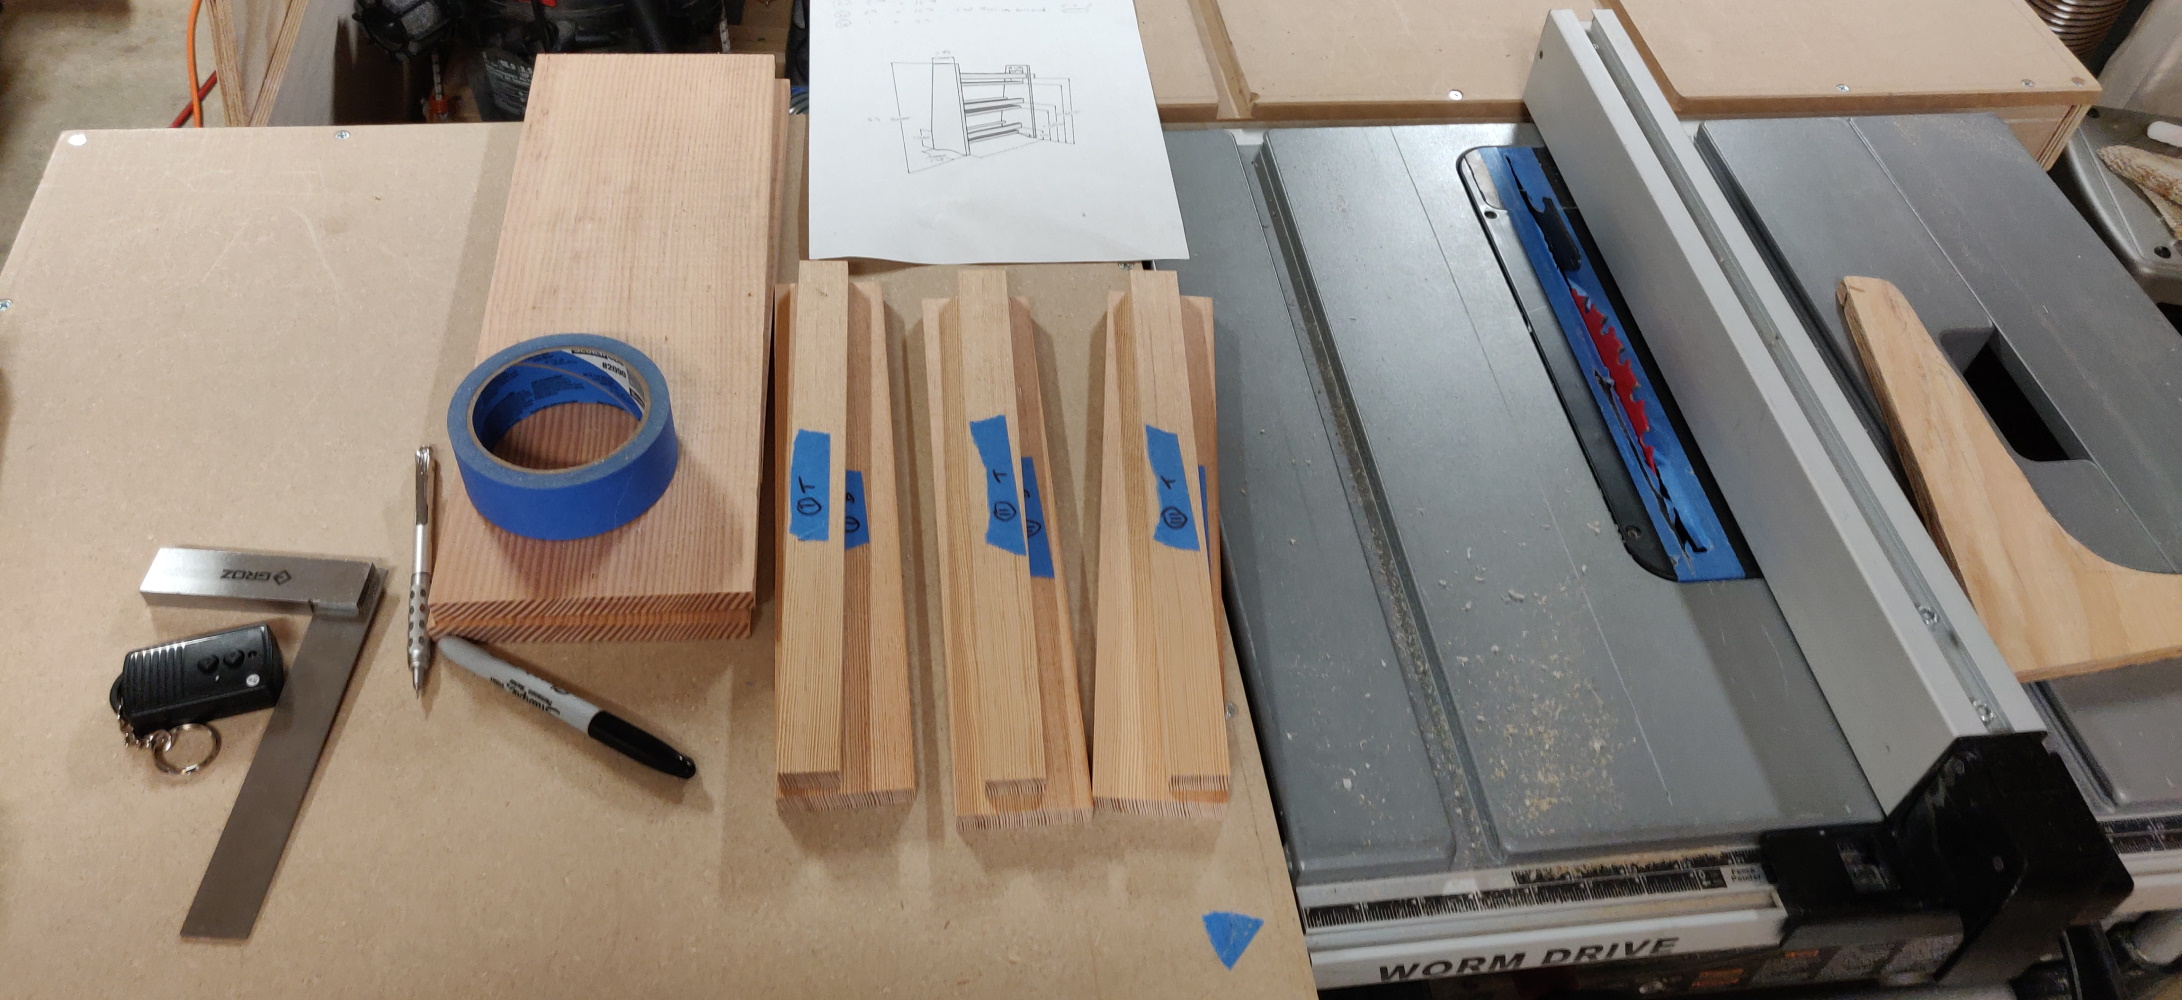
Due to the boards being just 1/4 and 1/2 inch slim I decided to go with mortise and tenon joints - which I never really did before, so there was some more learning involved here as well. The mortises and tenons I’ve cut with a small router bit first, leaving enough room to correct the proper seating of the shelves and rails by hand. Of course I messed some of the joints up, but not so bad that I would have had to start over. All issues I was able to fix with glue, shims and more sanding.
The aluminum bars I put in place by sticking them onto wooden dowels, that I’ve glued into the side pieces.
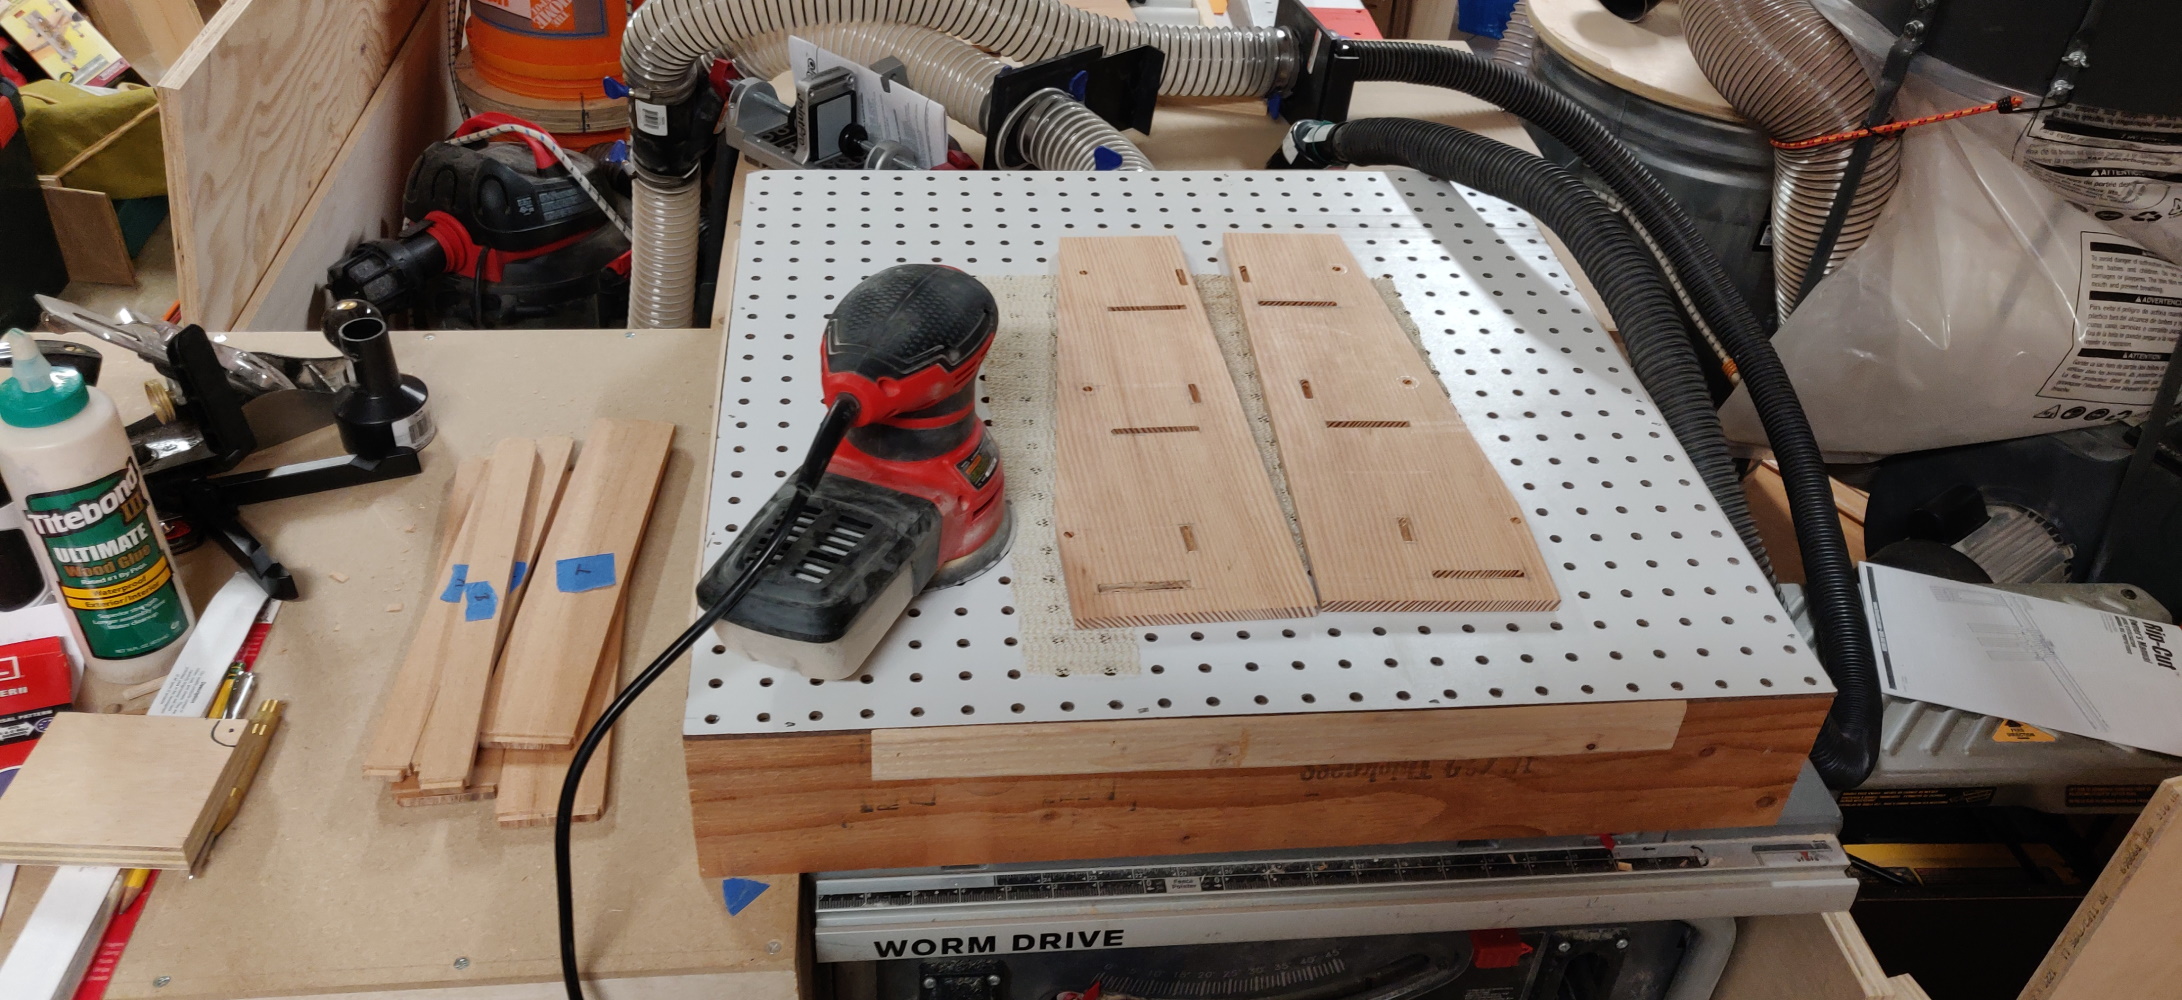
When all pieces finally fit together, I did some sanding, making sure all surfaces were really smooth. Also I’ve broken the edges with a little bit of sanding, just so the were no longer sharp, but also not so they’d be too round. After that came the glue-up, which went surprisingly easy given all the small joints, and the ways everything was still able to move.
Finish
This was also the first time I’ve used polyurethane as a finish. It was easier than I’ve expected, but still frustrating at times, especially when trying to put it on joint pieces and around the aluminum bars. But it worked out, though after that I started thinning my poly for using it on other projects. When the polyurethane was fully cured I rubbed it with some scrubbing sponges to give it a little polish, and that worked out pretty well, too.
Conclusion
This was another build where I’ve done many things for the first time: using SketchUp, planning ahead thoroughly, buying special wood just for this project, and using polyurethane for the finish. Also this was the first item I’ve build for somebody outside of our household.
The spice rack was well-received by our friend, and I am really proud for my work, too.
Comments