Making a Doll Bunk Bed from Scraps
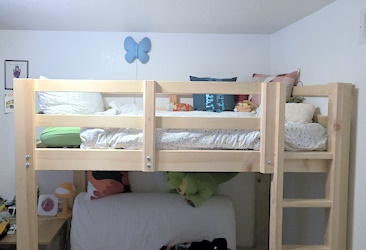
A couple of weeks before her fifth birthday my little girl told me that her favorite dolls Anna and Elsa - two Barbie-sized Dolls of the famous “Frozen” characters - would have nowhere to sleep. She then asked if I could build a bunk bed for them, and obviously I couldn’t deny her that wish. So I sketched a plan out in SketchUp, got a thin board of oak from my scraps pile, two bamboo skewers from the kitchen, and then started working.
Modeling
I used SketchUp to plan out a model based on some ideas that I had in mind. One idea was to take a board I had, cut it into some strips, and then glue them together to resemble a bed.
Usually I tend to put a lot of thought into this kind of preparation, and this project wasn’t any different. I just got my hands onto some boards of oak flooring cut-offs, and at first I thought about milling some of those to the right size. But then I remembered that I had one, which should have the right size, and that was already milled to the right thickness - and which I had no use for during the past 2 years. So after making up my mind about the material I designed a bunk bed with the measurements of roughly 12” x 6” x 9”.
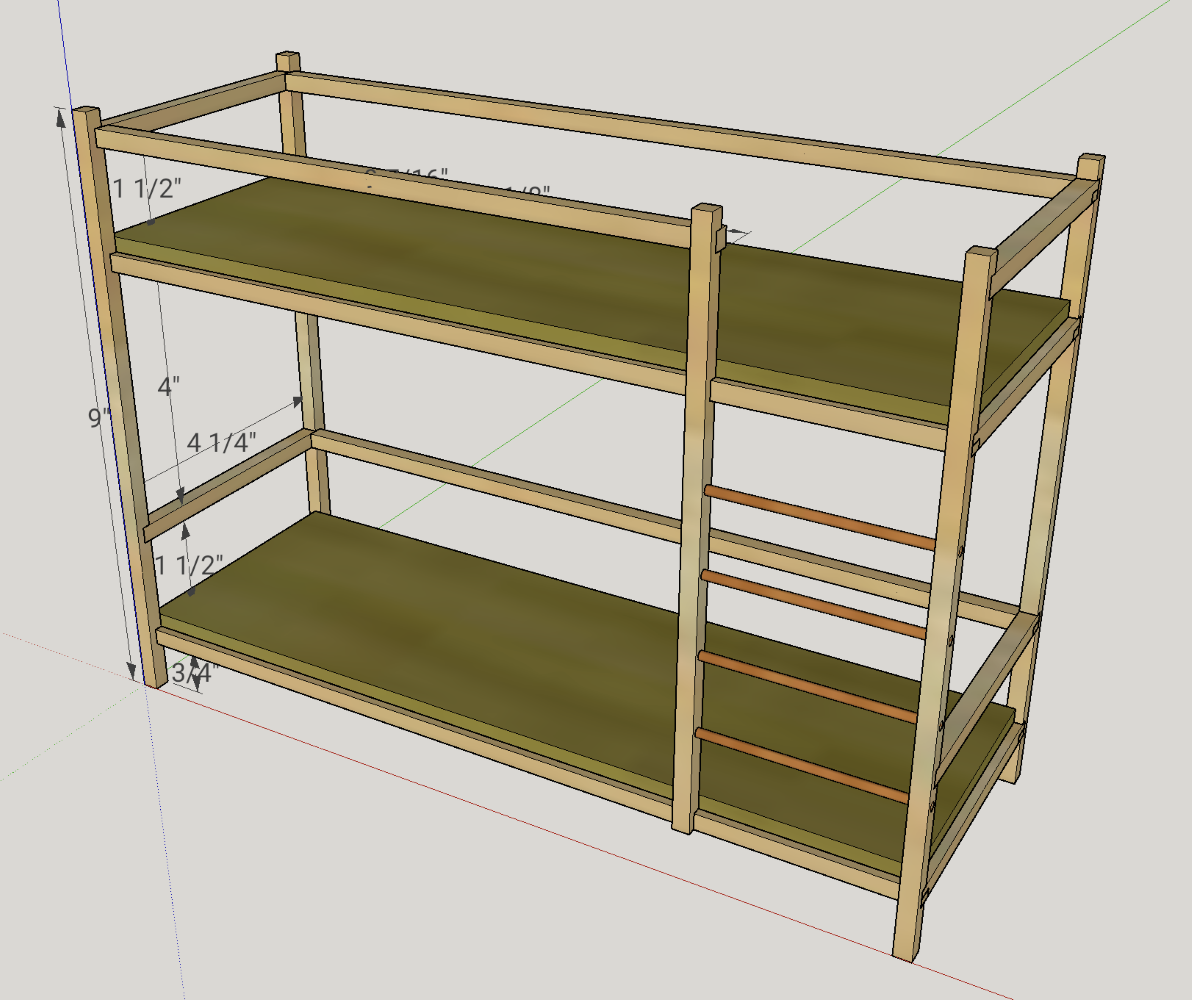
While modeling the details and checking the material requirements I’ve noticed that not only was my model much wider than necessary, it would also exceed the amount of material the board would provide. So I reduced the width to about 4.5 inches. The length I also increased by half an inch to account for the thickness of the stiles that were about to make up the posts of the bed.
For almost all joinery I’ve planned on using half-lap joints, but I felt like I would need to add some extra strength to the build, so it would have a better chance of surviving when my daughter was going to play with it. That’s where the bamboo skewers came into play. They were going to become dowels, used as loose tenons to reinforce the entire structure.
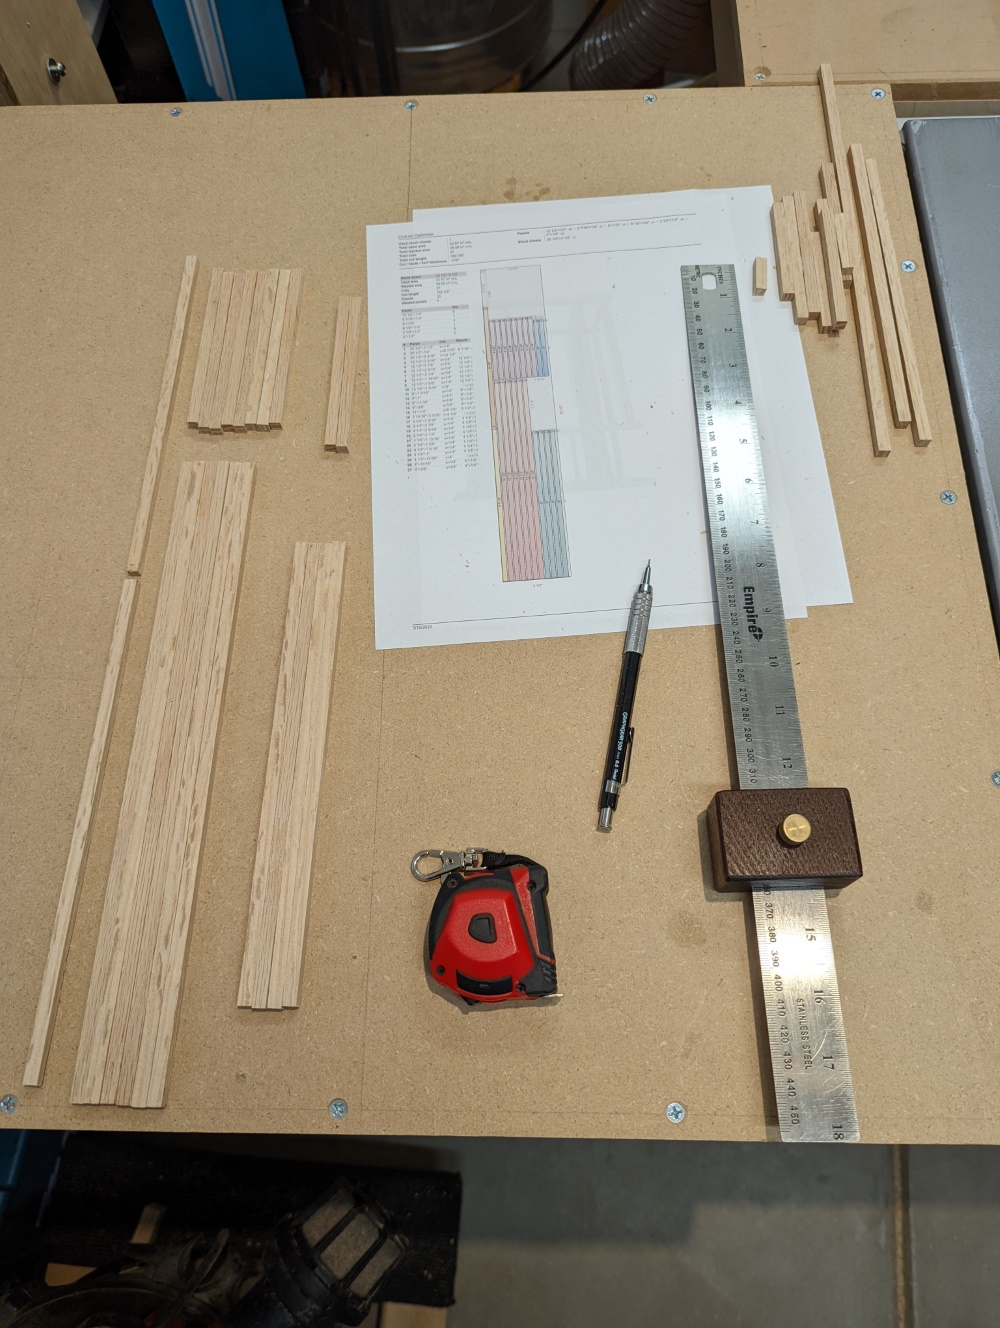
When I felt like my model was done I’ve made a part list. That I fed into my favorite cut list generator that allowed me to not only verify that I actually had enough material, but also gave me a visualization of which cuts to make to get the most out of the board.
Materials and tools
Wood
Square stock: oak board
This piece of oak I had left from one of my earliest builds: a smartwatch charging stand where I used strips of this big box store purchase as miter keys to strengthen some joints. It was roughly of the size 20” x 3” x 1/4”, and I never really found another use for this thin board. But now was the time to finally use it up.

Round stock: bamboo skewers
For the ladder steps as well as the dowels/tenons I wanted some round stock. This I found in the kitchen in the form of two bamboo skewers.
Sheet goods: plywood
For the boards that would make those parts of the bed that hold the mattresses I’ve cut up a scrap piece of a really soft 1/4” ply that I had. In hindsight it would have been better to use either MDF or hardboard because of their much smoother surface, but when I realized this it was already too late and the plywood glued in. Meh…
Tools
There was nothing too special to the tool set, although it likely goes a little beyond what most DIY people have in their garage or tool shed. However, if these tools wouldn’t have been available, a set of hand saws (like japanese pull saws), a chisel and a power drill would have worked out, too - but the effort and required skill level would have been a little higher, I guess.
Table saw
To cut the oak board into strips, the table saw was pretty handy, and better suited, for instance, than a band saw. I’ve used two kind of special blades this time.
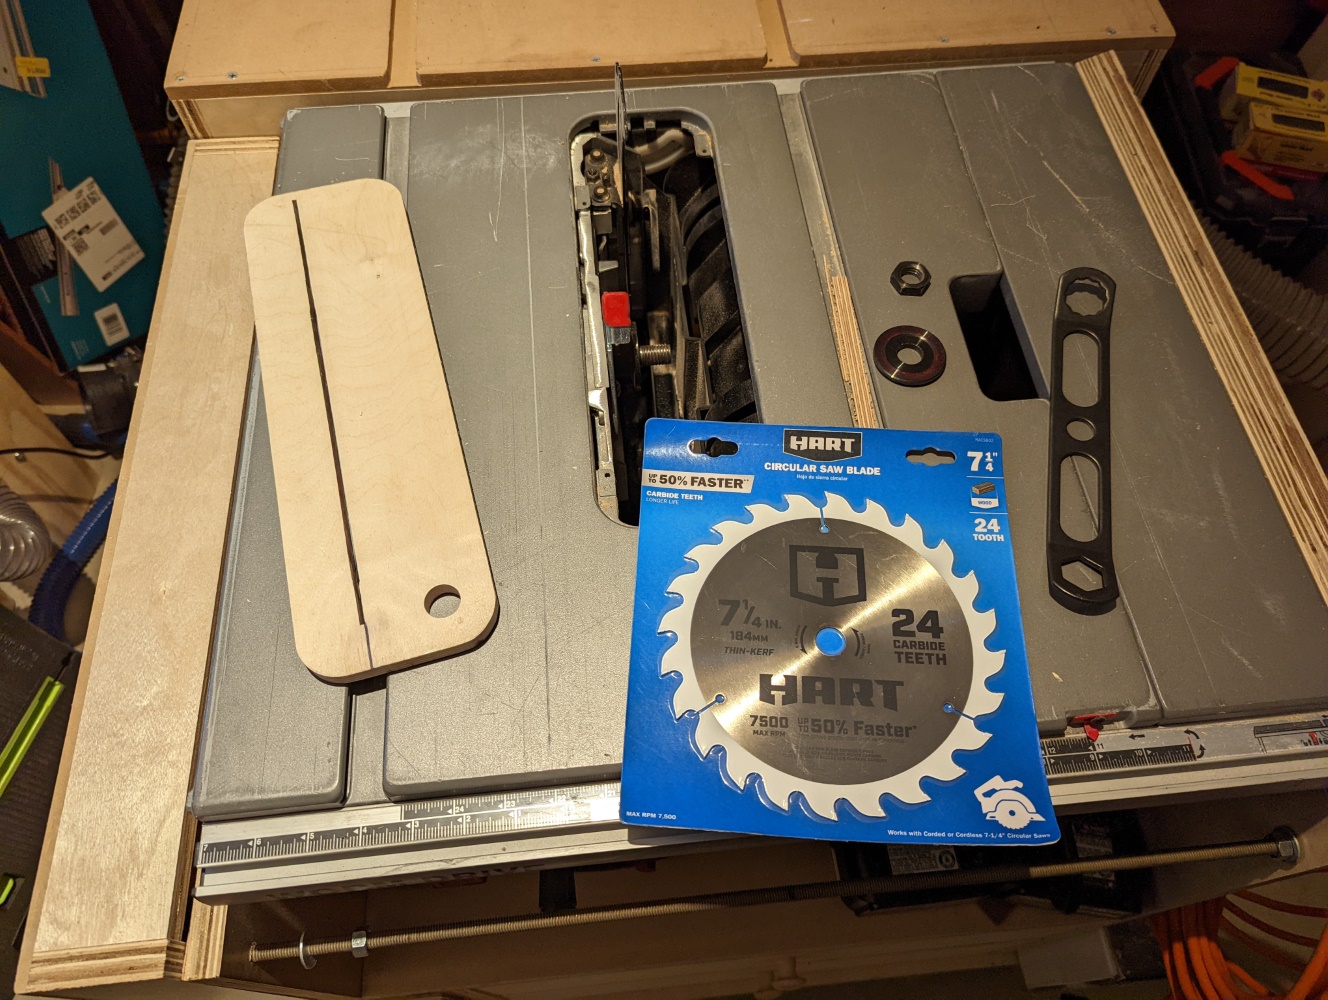

Thin kerf 7-1/4” circ saw blade
Though my table saw is made for 10” blades I’ve specifically chosen to use a smaller blade to cut up the oak board. This helped keeping the waste down: the kerf (the width of the actual cut) is just slightly larger than half the kerf of my regular (full kerf) 10” combination blade, and still a third thinner than a 10” thin kerf rip blade. I got this blade in a clearance sale at a big box store specifically for ripping smaller pieces of wood like this.
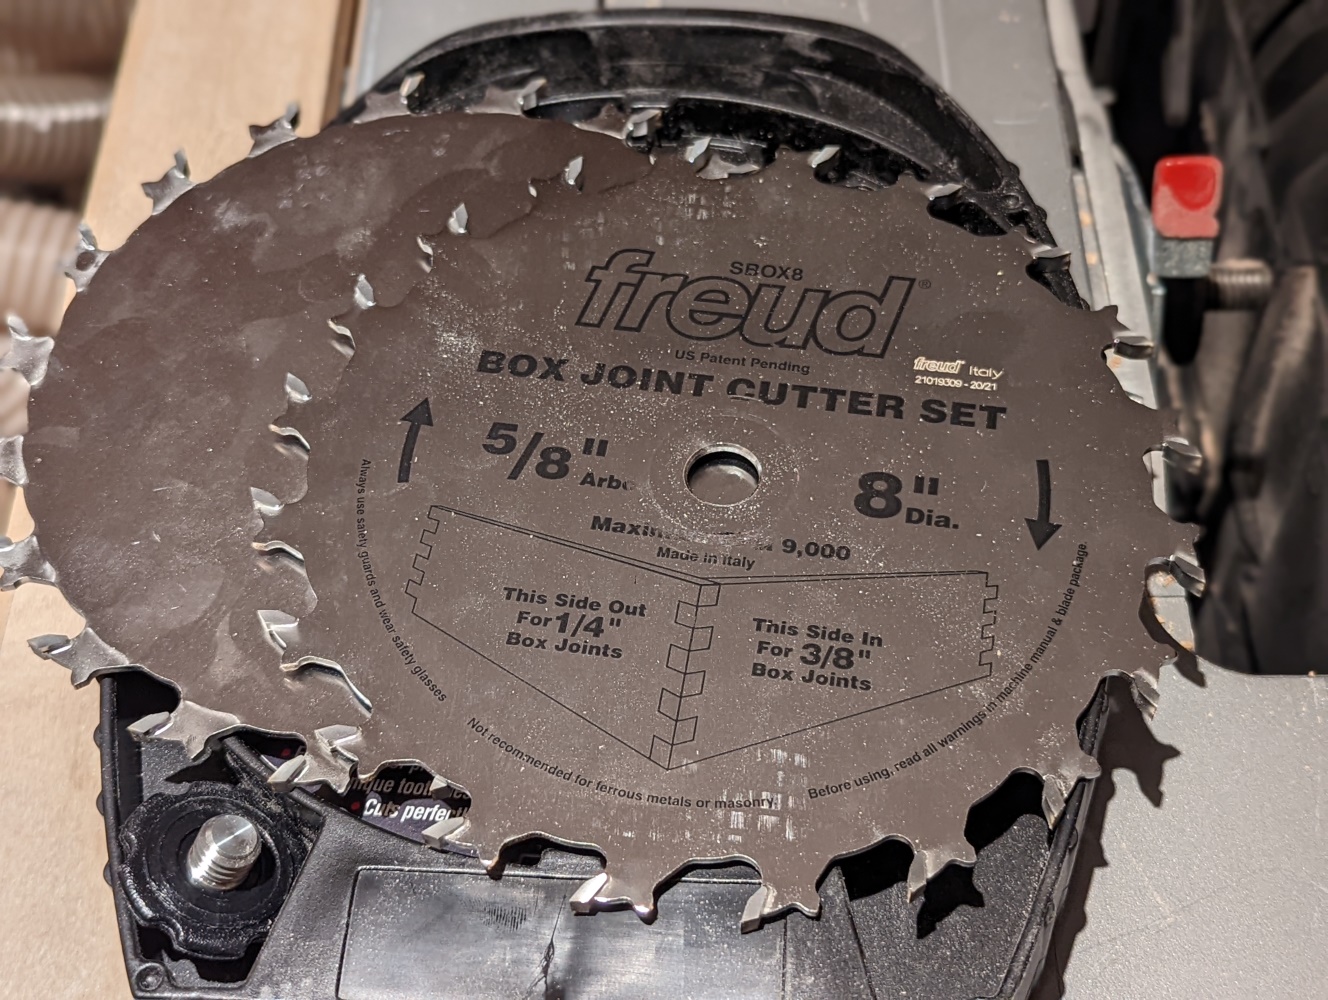
Box joint blade
This is a form of a dado blade made by Freud, just that it lacks the shims and chipper blades that would be used in a regular dado stack. This specific blade set consists of 2 blades with wide, offset teeth, that - depending of the way they are positioned to each other - have a kerf width of either 1/4” or 3/8”. Though this blade set is specifically meant for cutting box joints it works for dados of certain widths as well. Another benefit for my personal setup is that they fit the max size of dado cuts that my table saw can do anyway - and that without even having to get or make a dado insert for the saw.
This blade set I’ve used to cut the half laps into the oak strips.
Drill press
Though it certainly would have been possible to drill the holes for the bamboo skewers by hand I have used my drill press for that as it is a much more stable way to drill consistently perpendicular holes into the oak strips, especially after the glue-up.
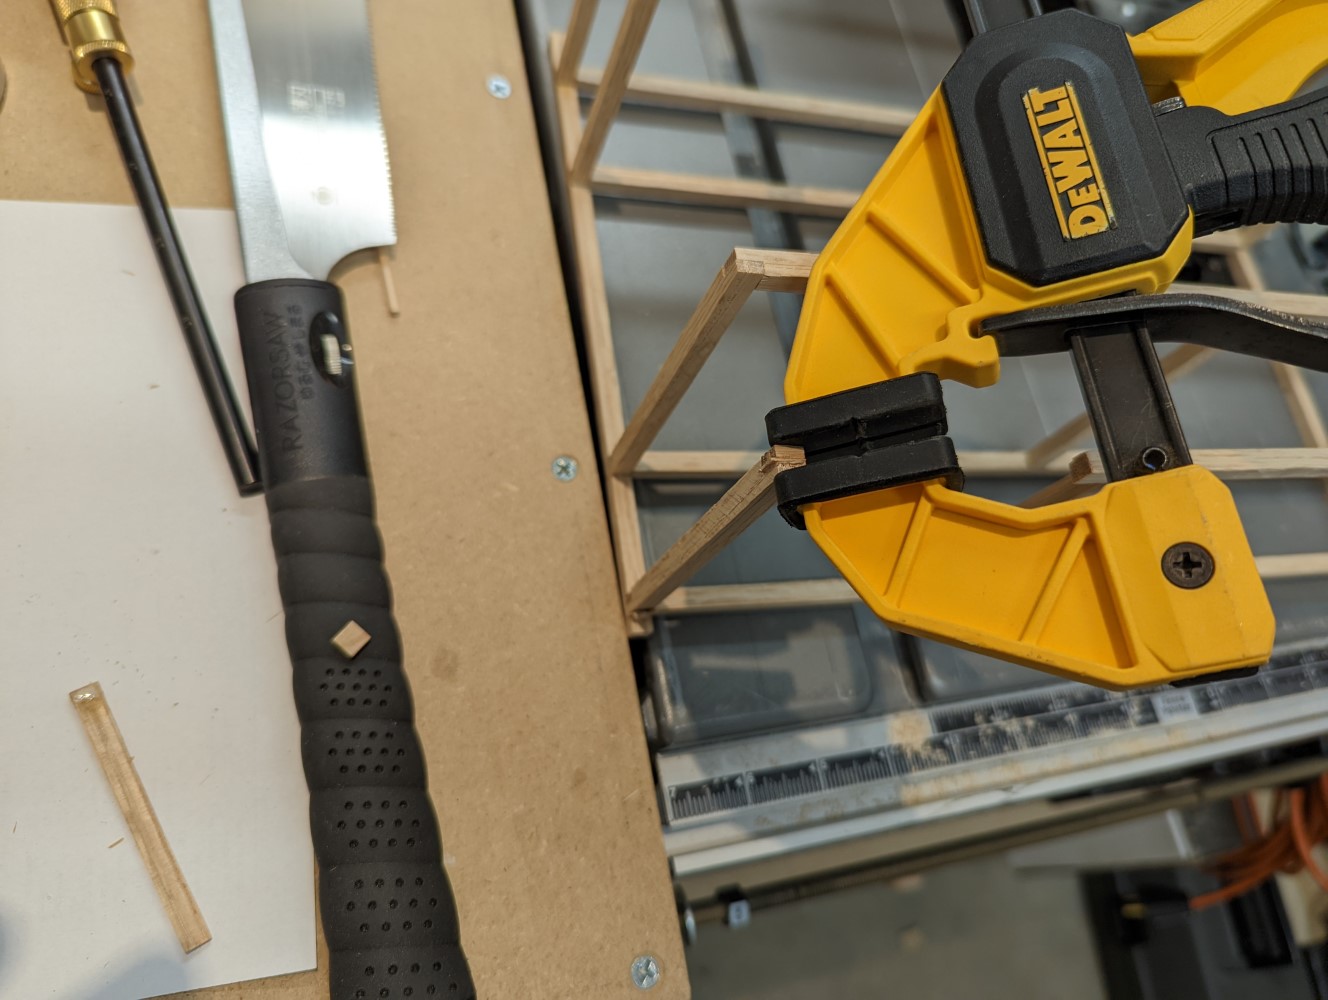
Flush cut saw, chisel
For cleaning up the ends of the skewers after gluing them in I used a flush cut saw as well as chisel. The latter also came to use for the mortises where the stretchers under the boards were added for stability.
Fabrics and filling
For the bedding I’ve used some packaging material: pieces of a rigid plastic foam as mattresses, and some thin, soft foam that came from a TV protective packaging, as filling for the blankets and pillows. The fabric for all these was sewn by my wife, using up some leftover fabric from when she made masks for the kids during the pandemic.
The build process
Cutting
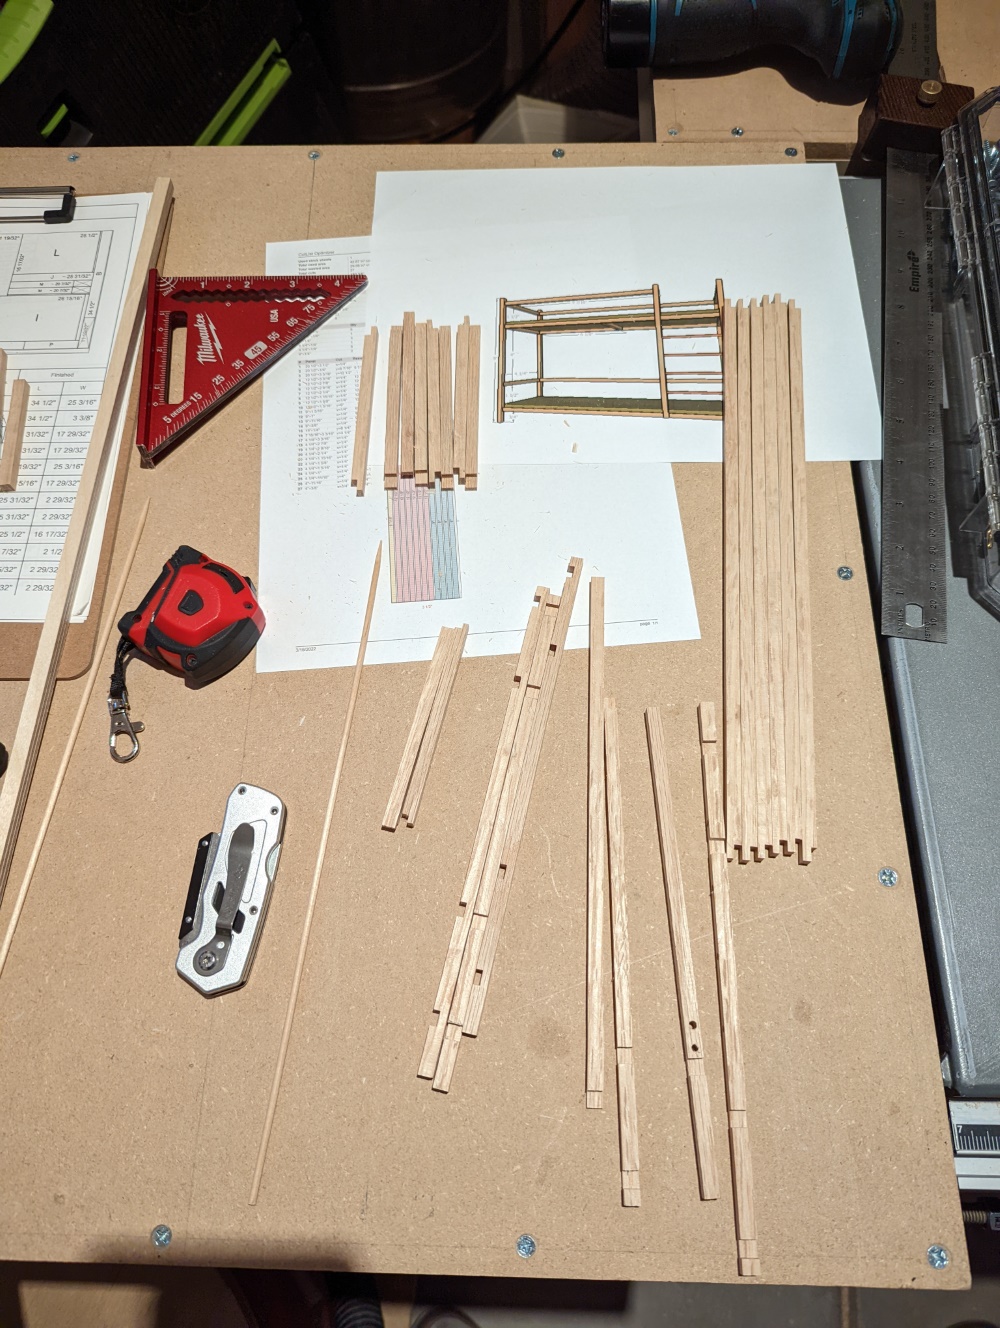
The first step was to rip down the oak board into strips that were 1/4” wide, following the cut list I created earlier. Then the strips were cut to length.
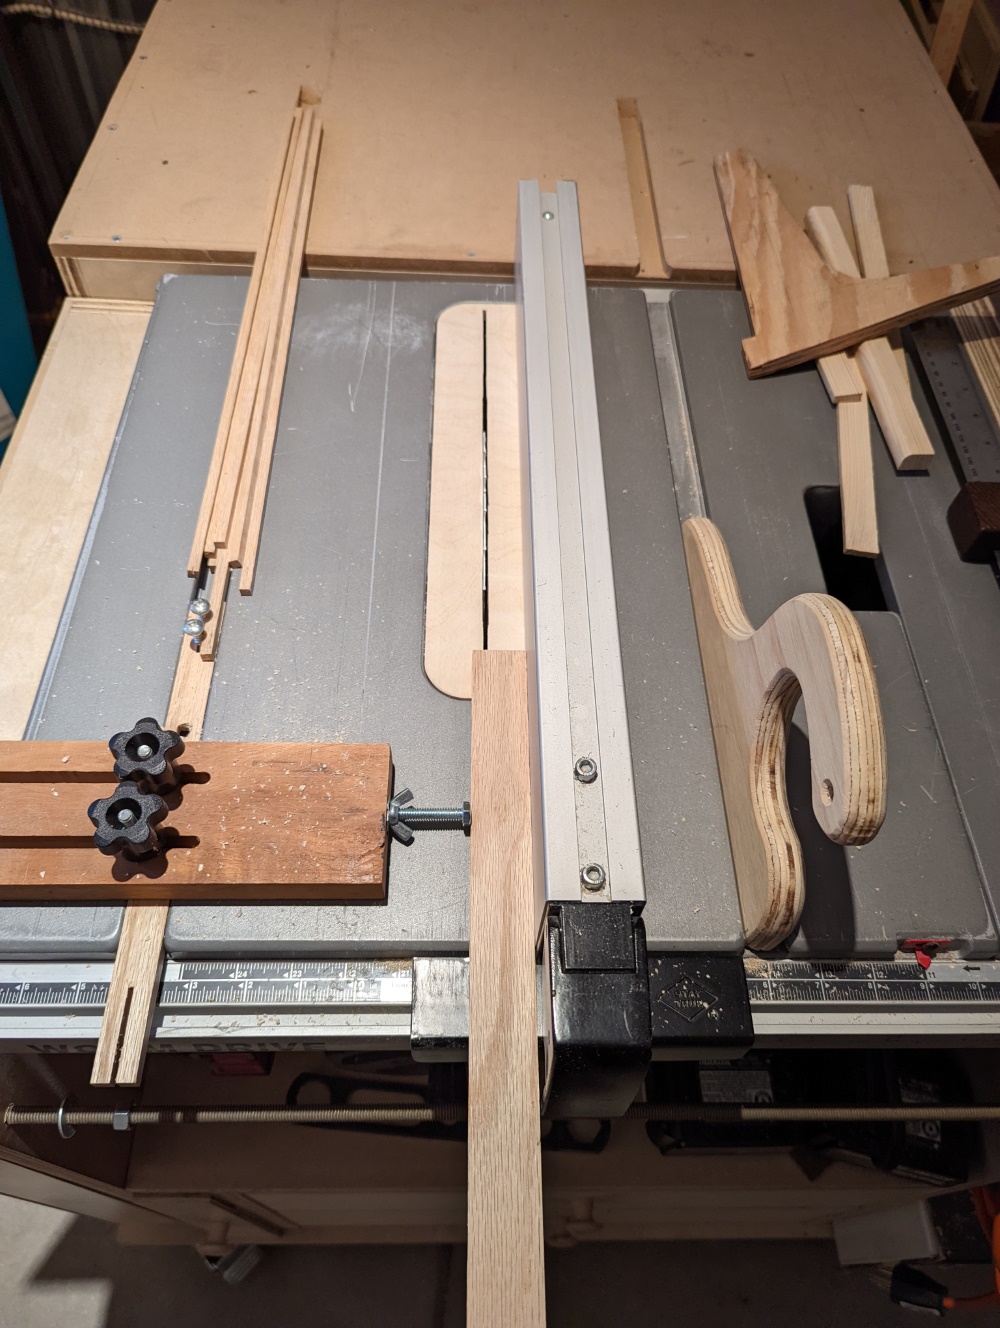
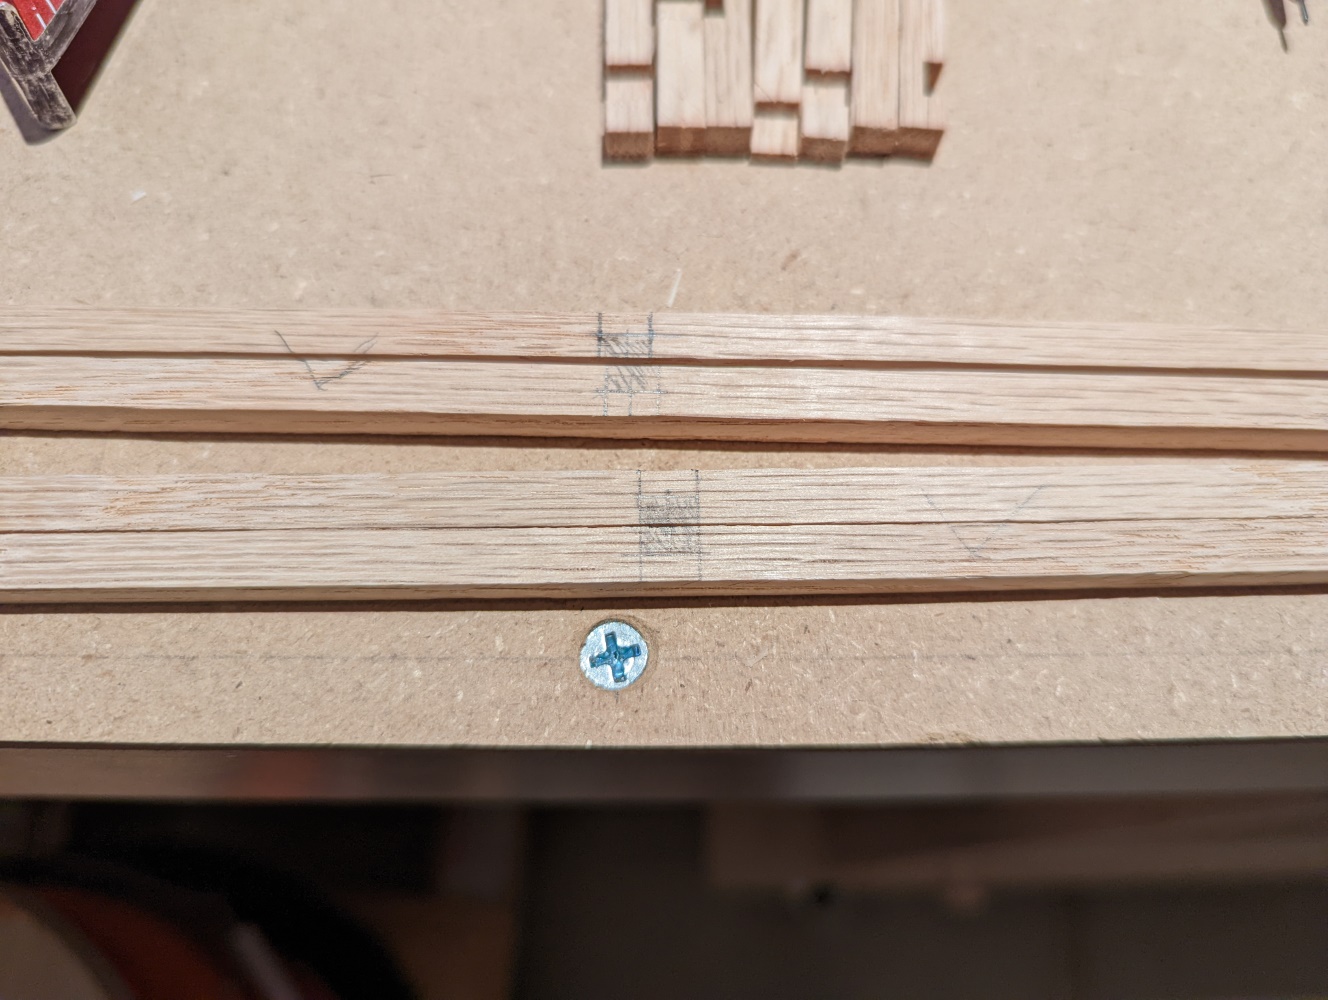
After switching to the box joint blades I’ve cut the rabbets and dados into these strips where they were going to be joined later with half laps.
I’ve also cut the plywood strip into 2 pieces of the same size to make up the mattress boards.
Fitting
Some of the rabbets and dados needed a bit of cleanup, so I took a chisel, a few thin pieces of wood, some sand paper and a file and made them work as good as I could. Some still look a bit sloppy, but for my first time doing that kind of detail work I think it is good enough.

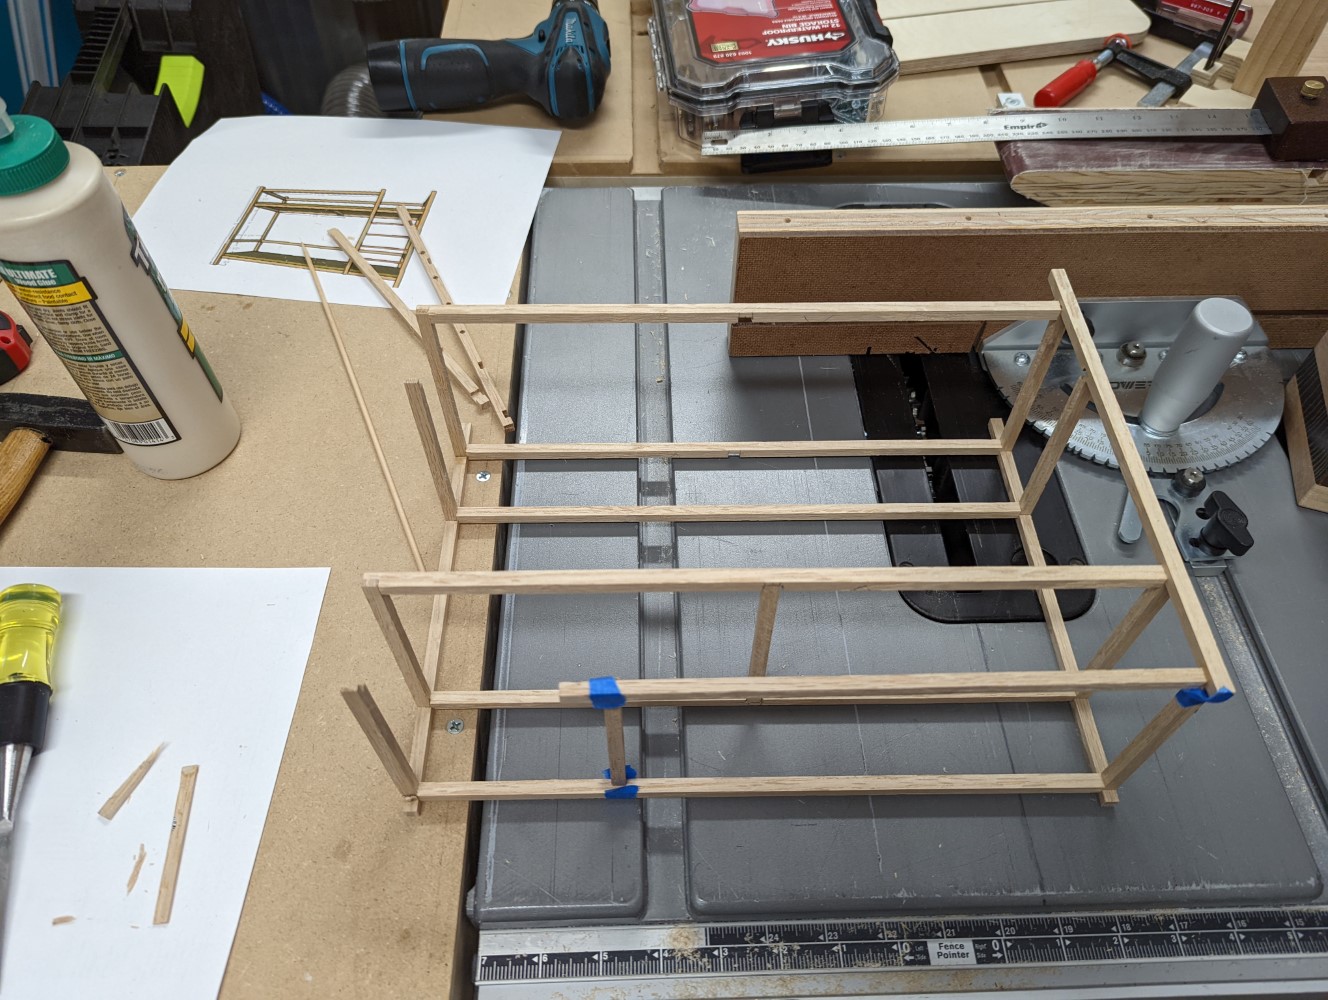
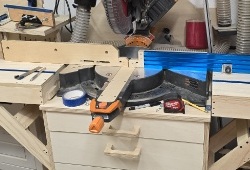
Glueing
When all parts seemed to fit together well enough I started glueing them together. I used very little clamping pressure, mostly with bandy clamps, just enough to ensure a proper hold at the joints. It went so well that I totally forgot to put the plywood pieces in place. When I noticed that it was already too late - they wouldn’t go in. At that moment I just left them out, postponing the search for an alternative way to make them work.
Tenoning
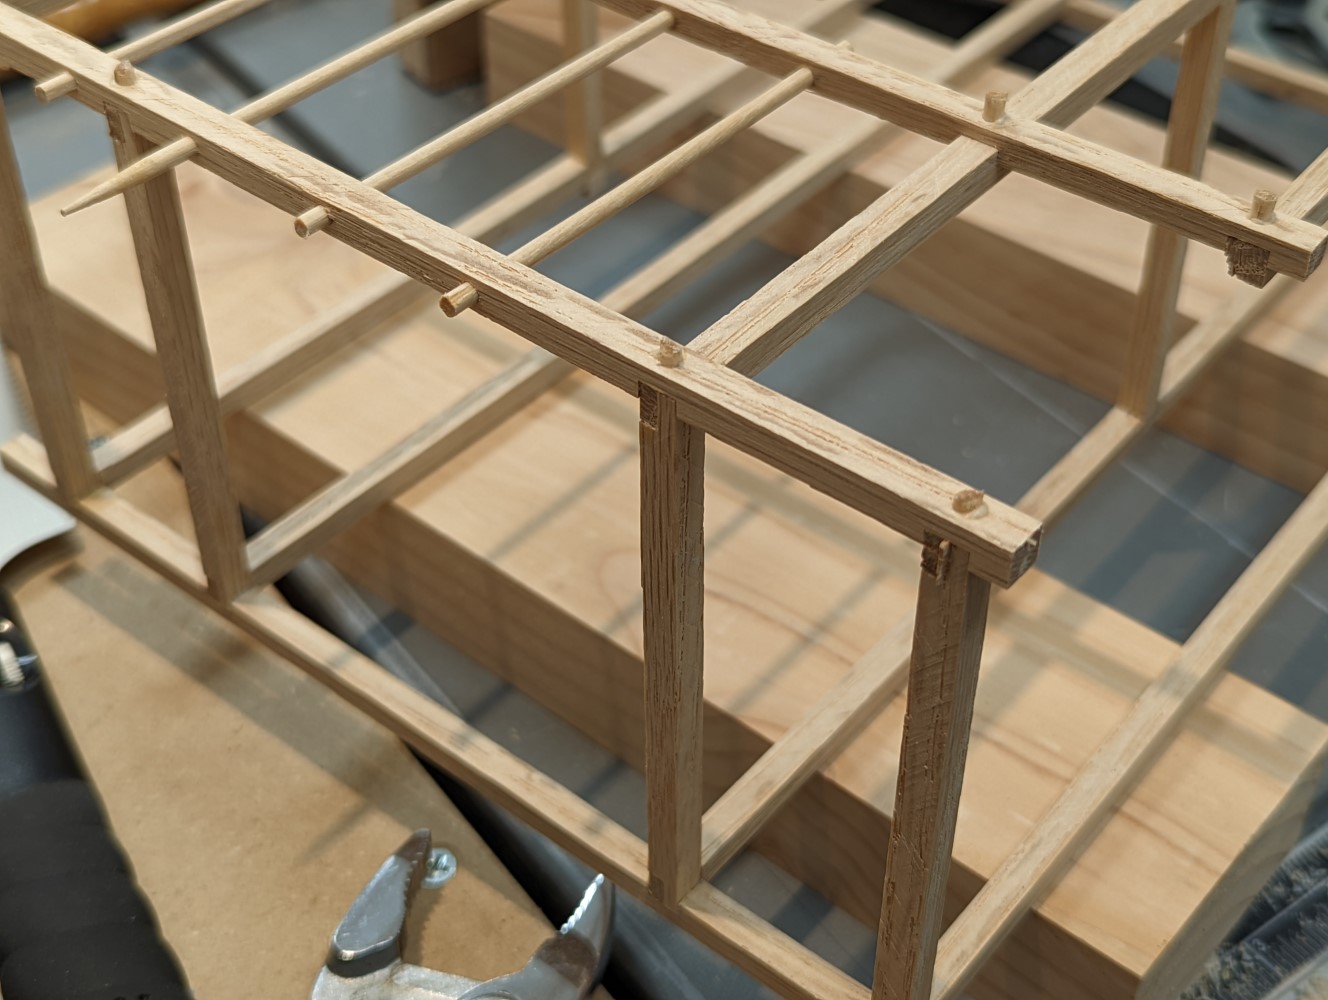
To strengthen the joints I had decided to use small dowels. Well, compared to the size of the oak strips they actually weren’t that small. They were going to be legit lose tenons, half the size of the joined pieces. So I drilled 1/8” holes into each joint, making sure the dowel would get proper contact with all mating pieces.
When all holes were drilled I cut the skewers into small sections of about 1/2” each. Then I glued them into the holes I had drilled. When the glue was almost dry I cut off the parts of the dowels that were sticking out, then cleaned them up with a chisel. In this process I’ve also removed the remaining glue squeeze-out.
Forcing the ply boards in
Well, before even seriously thinking about an alternative solution I just forced the boards in, going diagonally through the front, partially out the back, then back in, into the final position, pushing the frame as much as it needed to. I figured this would also make for a good test of stability - and it worked: the boards were in, and the whole construction has proven strong enough even for this kind of abuse.
A little bit of glue and the weight of some heavier wooden blocks were enough to secure the boards in place.

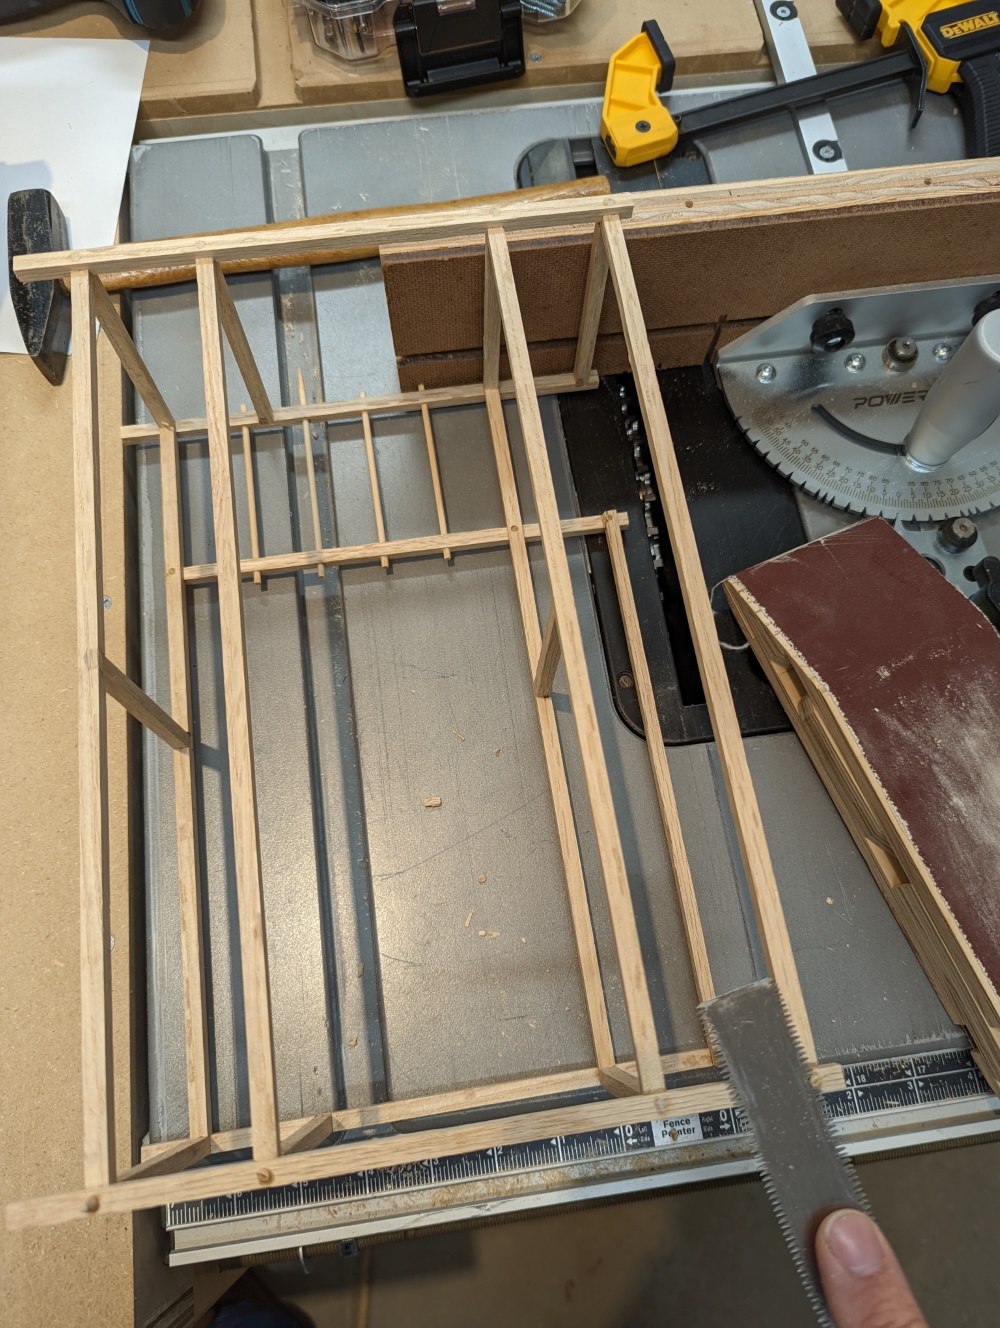
Cleanup
After the construction was done, I took some sand paper and cleaned up the surfaces. I didn’t go too crazy, just knocking off the saw marks and smoothing the edges, just so everything felt nice to the touch. I also had to sand down one of the foots of the bed a little bit because it was rocking.
Finish
To finish the doll bed I used a butcher block conditioner, based on mineral oil, beeswax, and carnauba wax. I rubbed in 2 coats, wiped off the excess and polished it a little. The important thing here was that the conditioner is safe for food contact, even exceeding the FDA regulations. So it would be safe for kids, too, even if they would decide to chew on the wood.
Bedding
The last task remaining was to make some bedding. My wife used her sewing skills to sew some foam packing material into the fabrics she’s chosen, creating mattresses, pillows and blankets for the dolls.
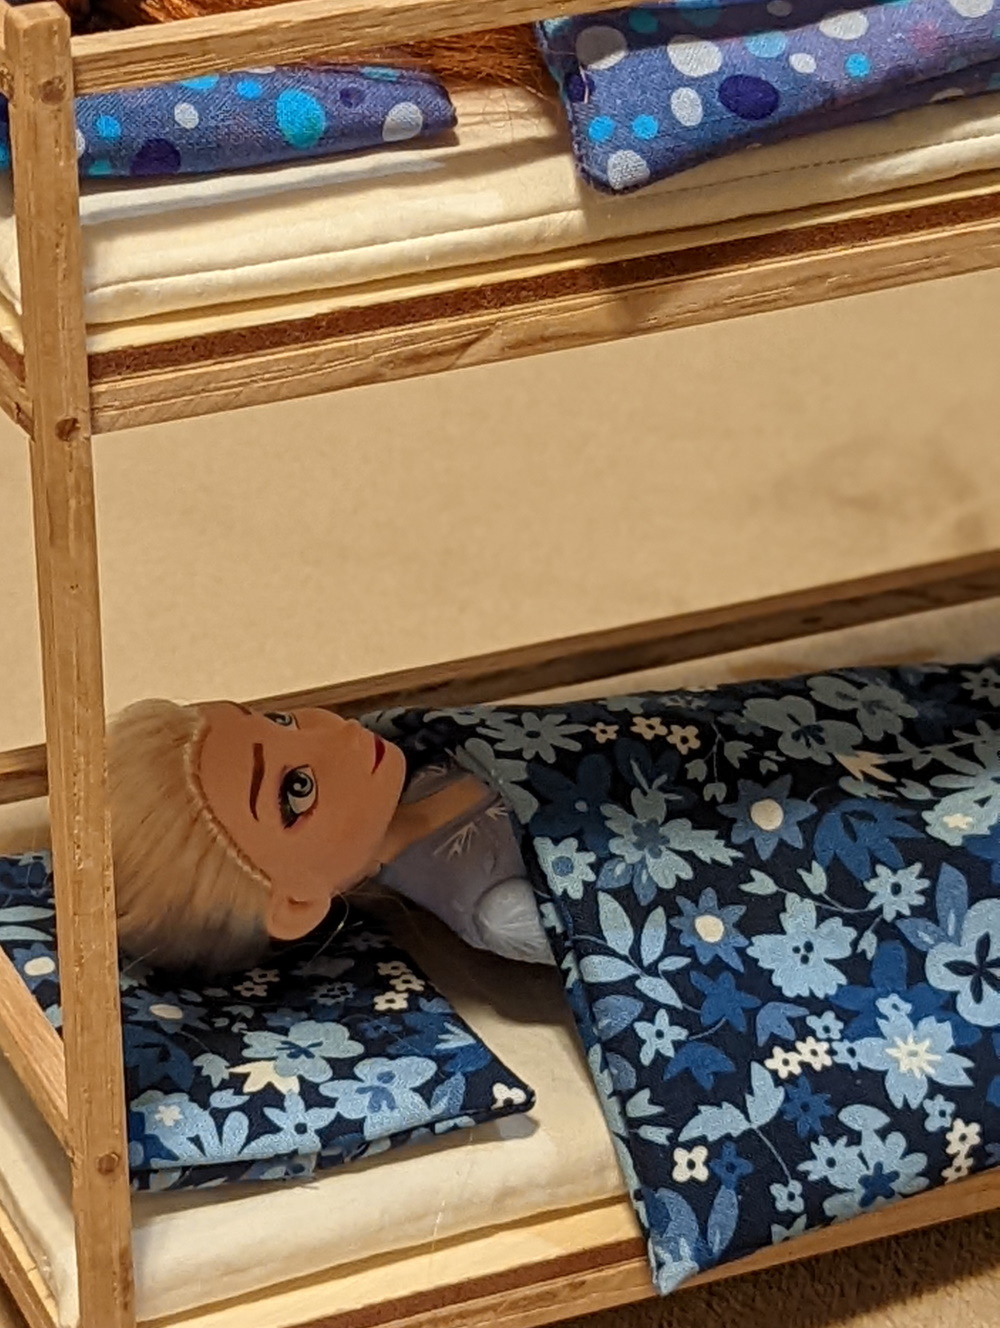
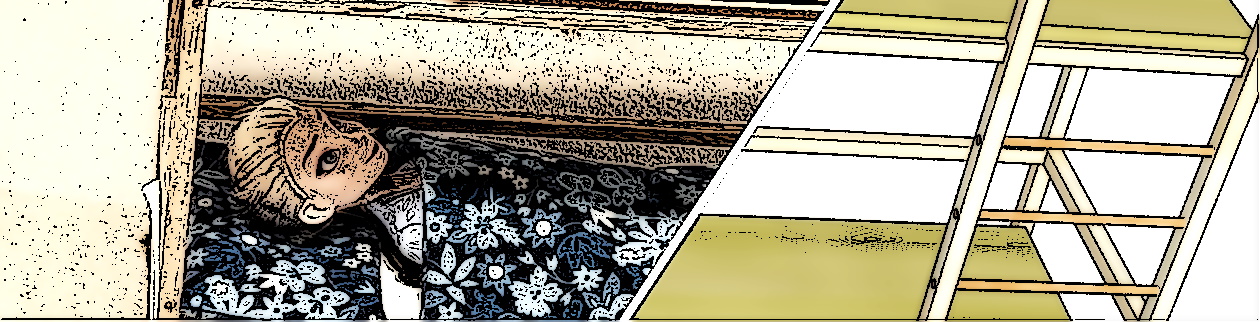
The final result
When we presented our daughter the now finished toy she really did love it. Seeing this kind of happiness in your child is one of the greatest things in live as a parent.

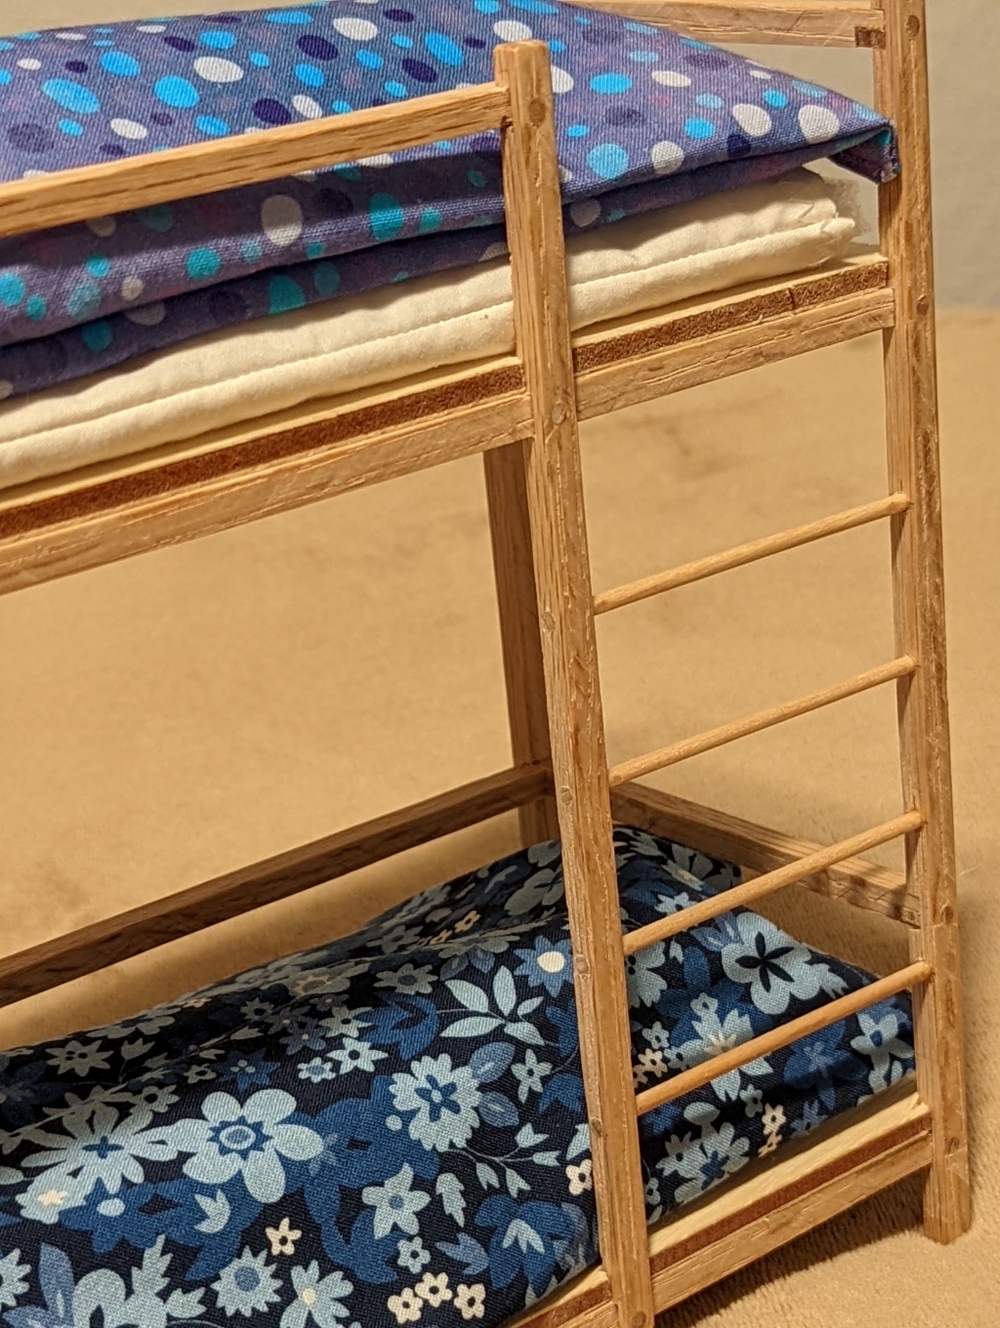

This was a really fun build, totally worth the effort and a great way to use up some scrap and household materials. I’m looking forward to building more furniture, next time in full size. I’ve already made some plans for the next projects, so stay tuned…
Comments