
Making a Dice Tray
Playing any kind of board or table top game with little kids leads to a lot of dice on the floor, or even broken if unlucky (we have some older dice that were made from glass). We needed something that we can use to roll our dice in to keep them where we need them, so I built a dice tray using mostly scraps, some screws and a bit of glue.
Modeling
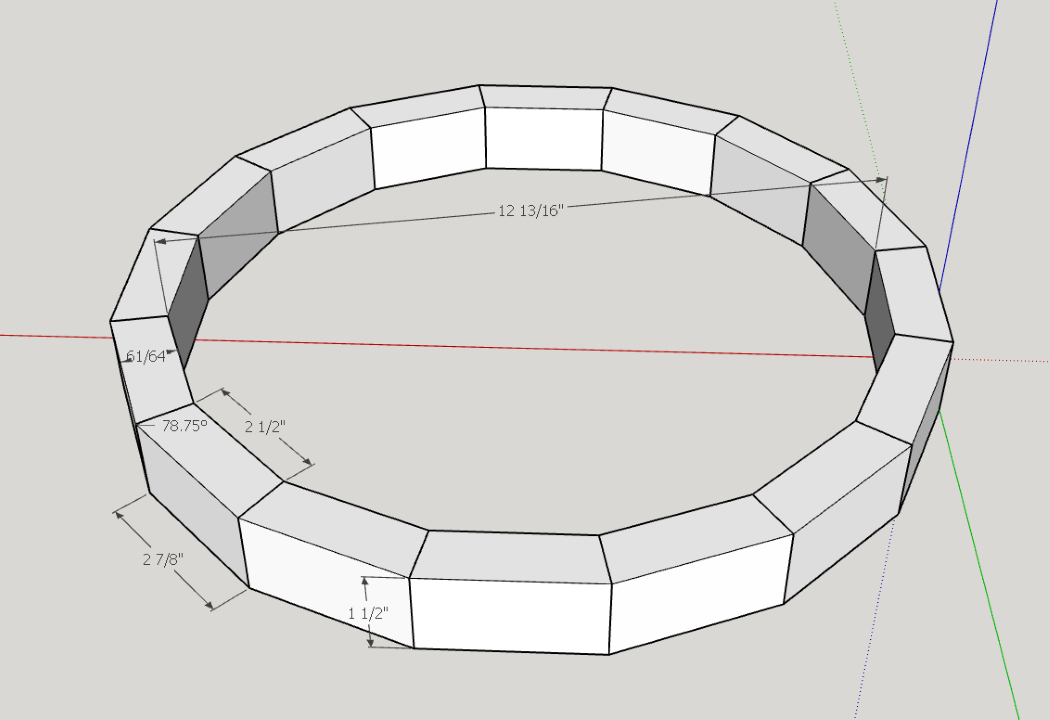
As often I started sketching out a basic model of what I thought it should look like. The main reason to not just start building and “designing” on the fly was because I had no clue what the angles needed to be.
So my idea was to use leftover strips of a 2x4 and cut them into 16 pieces with the same dimensions. Since the overall shape is supposed to resemble roughly a circle, I needed to cut the mating surfaces with an angle of 78.75°. The math to get there is:
360°/16=22.5°
Since these 22.5° are equally split to the two sides, each of these sides is going to be 11.25° away from square, or 78.75° from the outer edge.
Materials & Tools
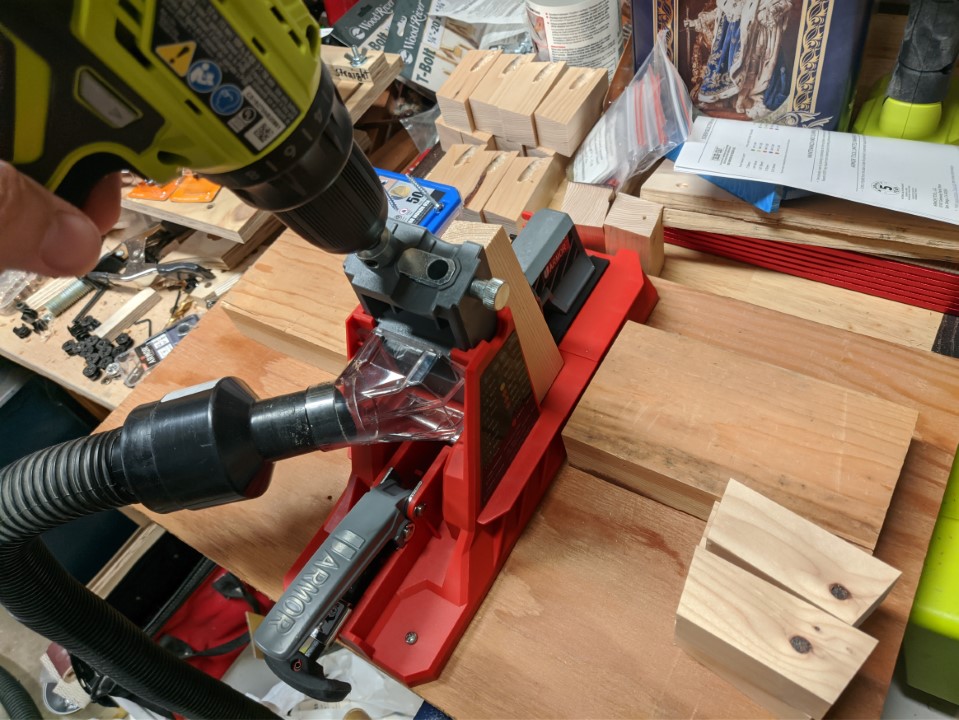
To build this tray I’ve used some offcuts from 2x4’s, a piece of 1/4” plywood, a pocket hole jig plus the respective screws, and glue. For the liner I cut up a red felt place mat.
BTW, today I know that gluing the wooden blocks together would have been enough since they are also glued to the plywood bottom. At the time (this build actually happened in May 2021) I was convinced the screws were necessary. Heck, I didn’t even have painters tape yet, so apparently I did use regular office adhesive tape. Well, we all have to start somewhere…
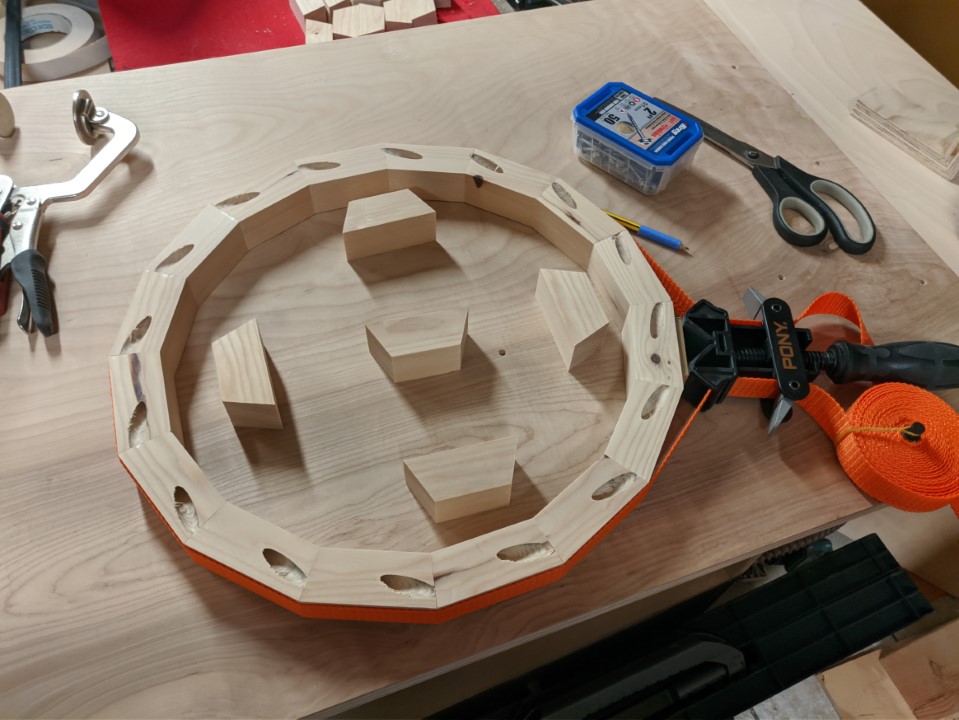
But I did have a corner band clamp, so I used that in the process, though this is particularly useful in cases where the angles are not cut accurately which leads to gaps - which this strap can help closing.
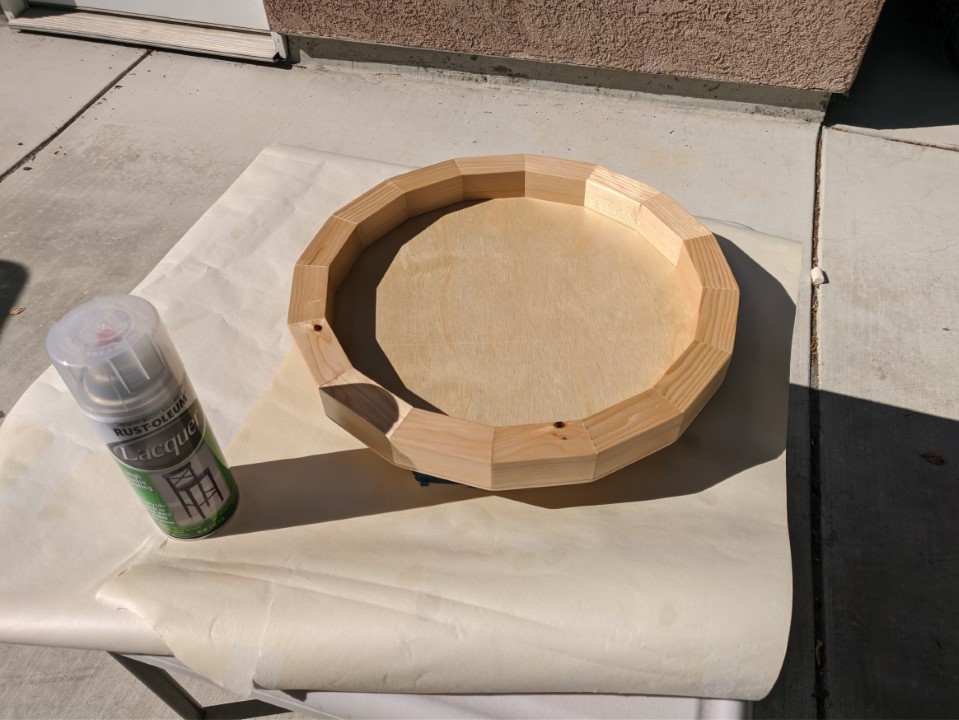
For the final finish I’ve used a spray can of lacquer as I was told this would give a nice and relatively durable finish that is easy to apply and doesn’t darken much over time.
Construction
The build itself was pretty straight forward. I cut the leftover strips of 2x4 into pieces of roughly 3” x 1.5” x 1”. After planing and sanding everything the final measurements were slightly below that, but didn’t matter too much anyway. I’ve just updated my 3D sketch to reflect the new measurements as well. in case I ever need to repair or remake it.
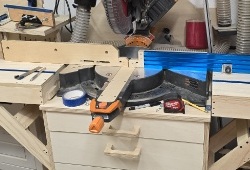
The angled ends of the blocks I’ve on the table saw using a miter gauge as that’s way safer than cutting such small parts with the miter saw. Unless one has a method of holding them in place properly without using their own fingers so close to the blade. Also, these small off-cuts like to turn into ninja-star-like projectiles on a miter saw…
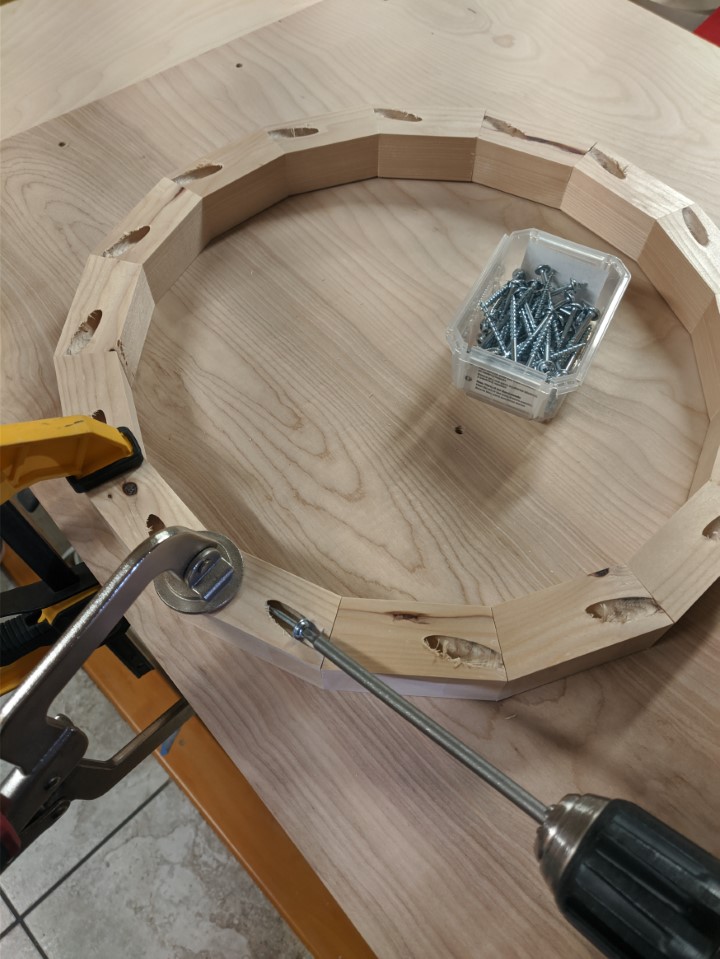
Then I’ve put the pocket holes in using my Armor Tools jig.
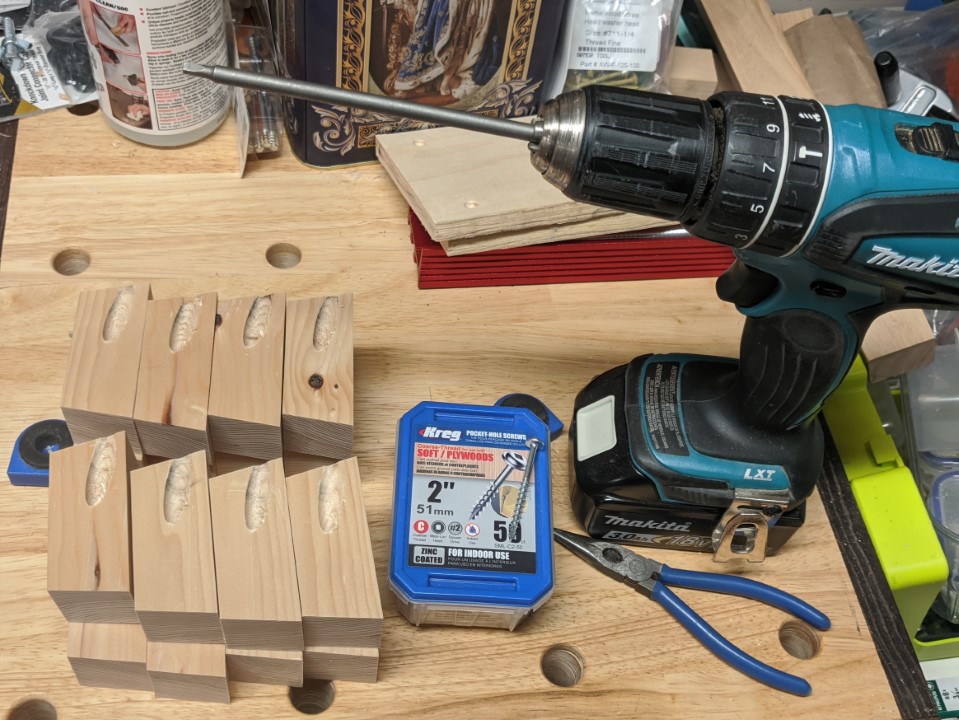
Once all 16 parts were done I’ve taped and glued them together and tightened with the band clamp. After that I screwed them together while holding them down tight with clamps so nothing could move other than the screws.
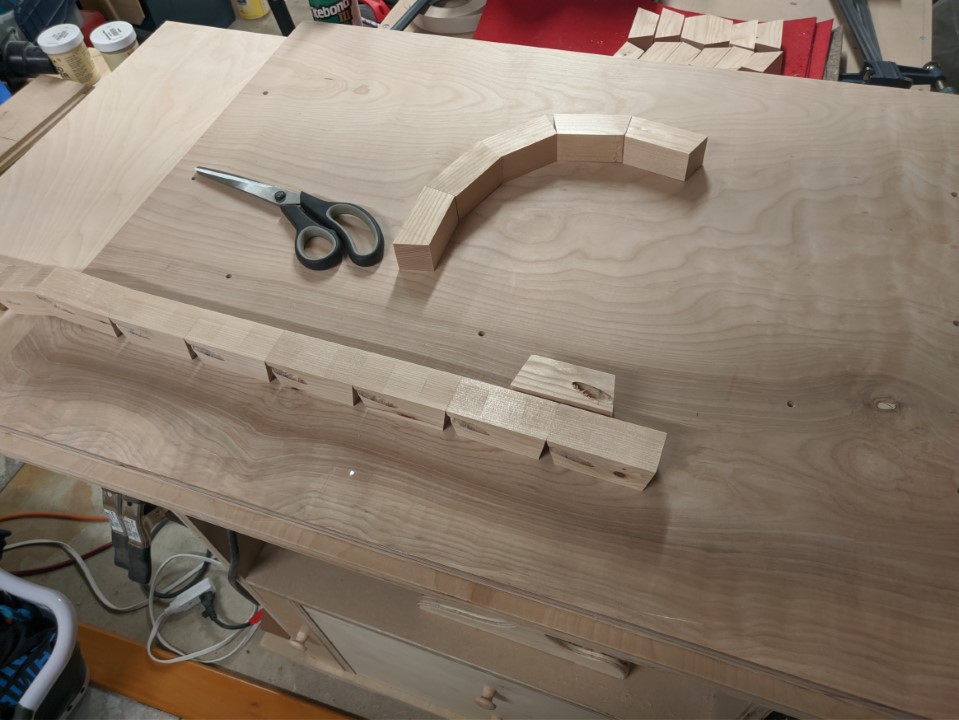
The next task was to put a thin plywood panel on as a bottom and trim its edges. For that I cut the shape with a jigsaw, leaving it protruding by an eighth of an inch, then used a router and a trim bit to cut it flush. I glued on the panel, and then used three screws to secure it even more (again, not really necessary as the glue is plenty strong).
Wood Finish
As mentioned earlier I went with lacquer in a spray can to give the wood a nice finish. The application was easy and quick, and it has held up really well over the past three years. While the lacquer’s appearance is like that of a water-based polyurethane, the application is so much easier. It quickly dries, and multiple layers are easy to put on as well. The only thing to keep in mind is to not over-spray it - leave spots that still seem dry for the next layer to cover.
Liner
Now only one piece was still missing: a liner. For that I used one of our old place mats that which were made from red felt. These I saved from the garbage bin earlier that year, intending to use them for something exactly like this. I cut one piece that perfectly fit the inner bottom of the tray, and then a long strip that fit all around the inner side wall. I glued them on with a spray adhesive.
The Finished Project
Once the math was figured out the real difficulty for me at the time was once more the lack of experience. I used a lot of screws that weren’t really necessary - and also increased the weight quite a bit. However, this tray is now so sturdy, that I can pick it up with whatever somebody left on it without having to fear it coming apart.
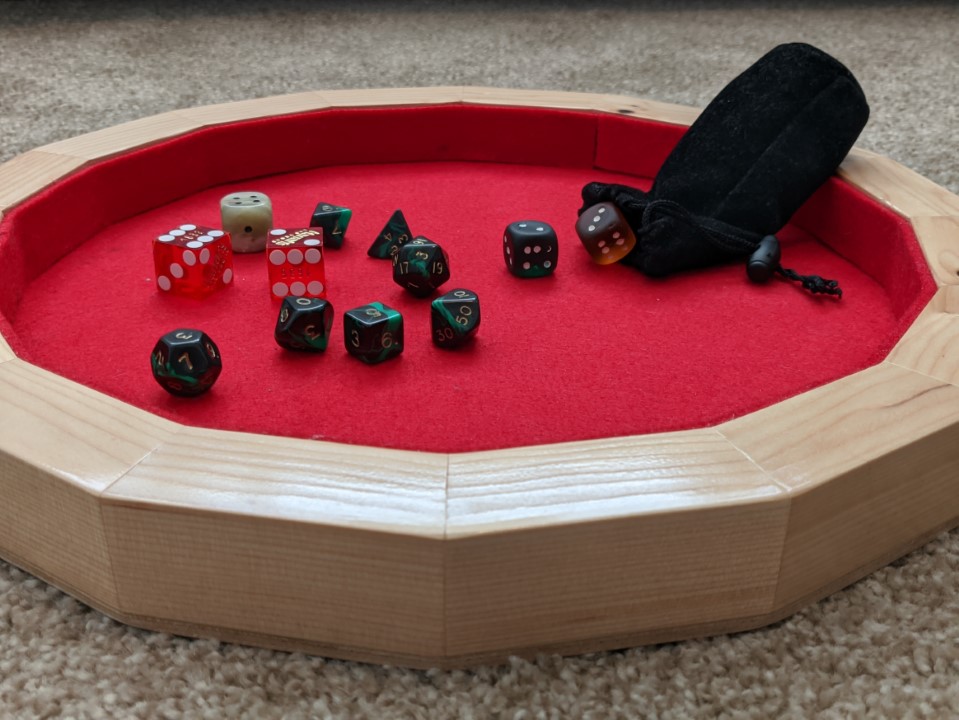
In the years since the tray has seen quite some rounds of Dungeons & Dragons, Sorry! and others. It holds up very well, and the only minor nuisance is its size: with about 13.5” it sometimes appears a little too big to use it on a crowded desk or table, i.e. in a Zoom-D&D session. But on the other hand it is perfect for when we sit with the kids at the dining or coffee table and everybody can easily reach and use it.
I think I’ll make some more of these, maybe for next holiday season? But a little bit smaller and with different shapes, maybe…

Comments