Building a Loft Bed for my Kid
When one of my children wanted to have a loft bed after moving into their own room I had no objection. We used to have a shared bunk bed for the kids, which they used for a couple years and also switched out who sleeps where occasionally, so both are used to sleeping up high.
However, when checking online for loft beds to buy we noticed that those actually available and of seemingly good quality are pretty expensive, and those which weren’t didn’t look like I would trust them with my kid’s life every night for years.
So I decided to build one myself, and there are plenty resources available online for inspiration.
Modeling
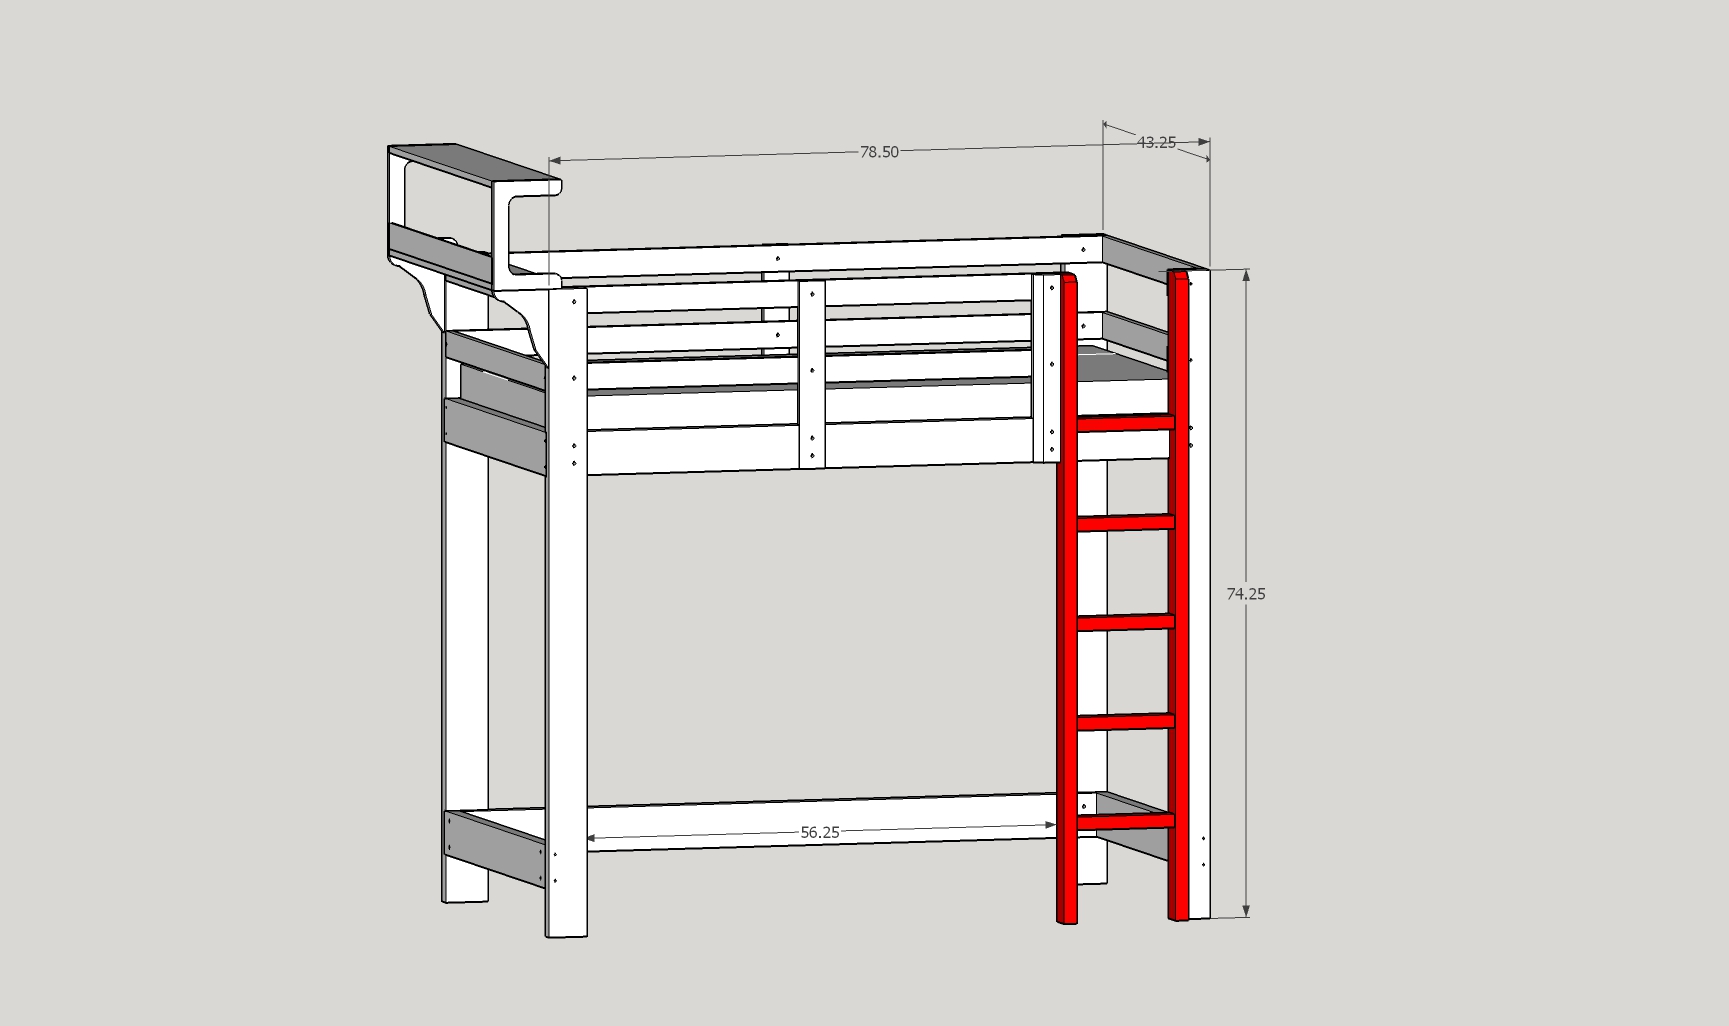
As so often in the past I started sketching out a basic model of what I considered a nice looking but also stable build on paper. Then my kid got some say in the final shape as well, and once we were on the same page I’ve built a respective model in SketchUp 2017.
Materials
The materials used in this project were basically construction lumber and hardware:
- 4 14’ long 2x12 pine boards
- 2 6’ long 1x1 strips of poplar
- a box of 2.5” long 3/8”-16 carriage bolts plus washers and locking nuts
- a couple dozen deck screws in lengths 3”, 2” and 1-1/4”
- a good dozen of 4” and 2=1/4” cabinet bolts each, plus the respective amount of barrel nuts
The slatted mattress base we’ve actually bought from a furniture store.
Preparation
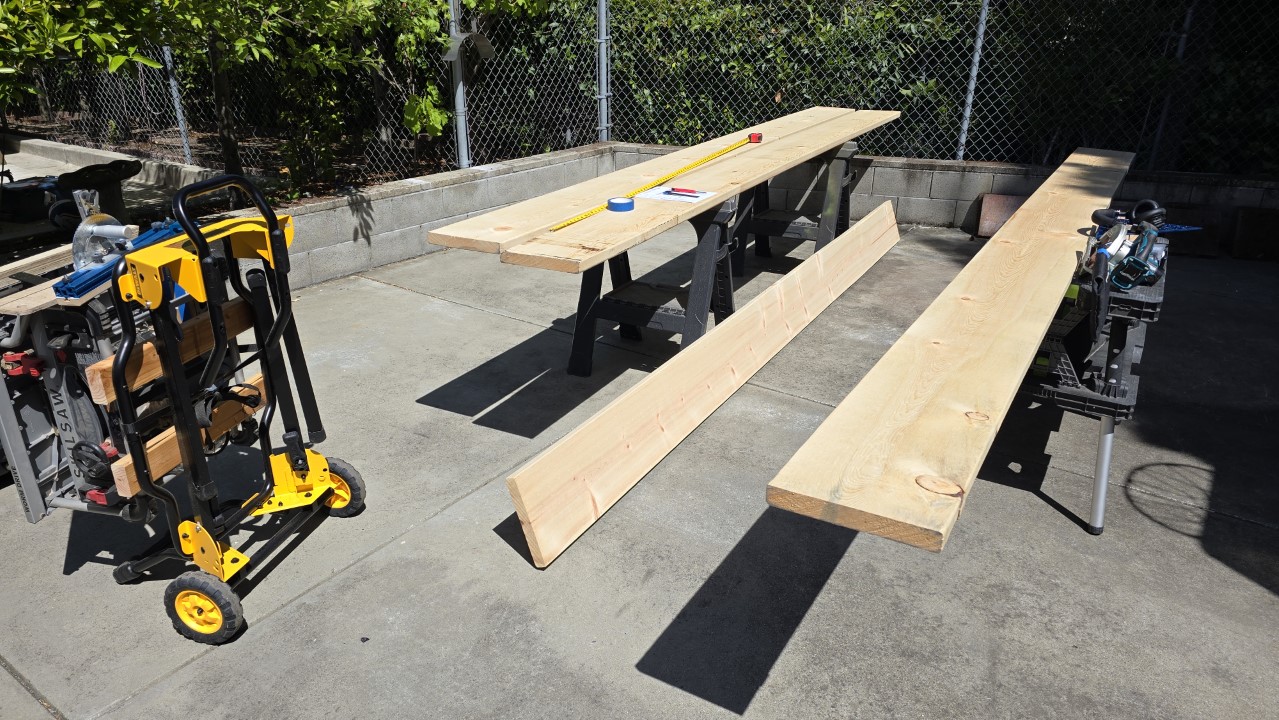
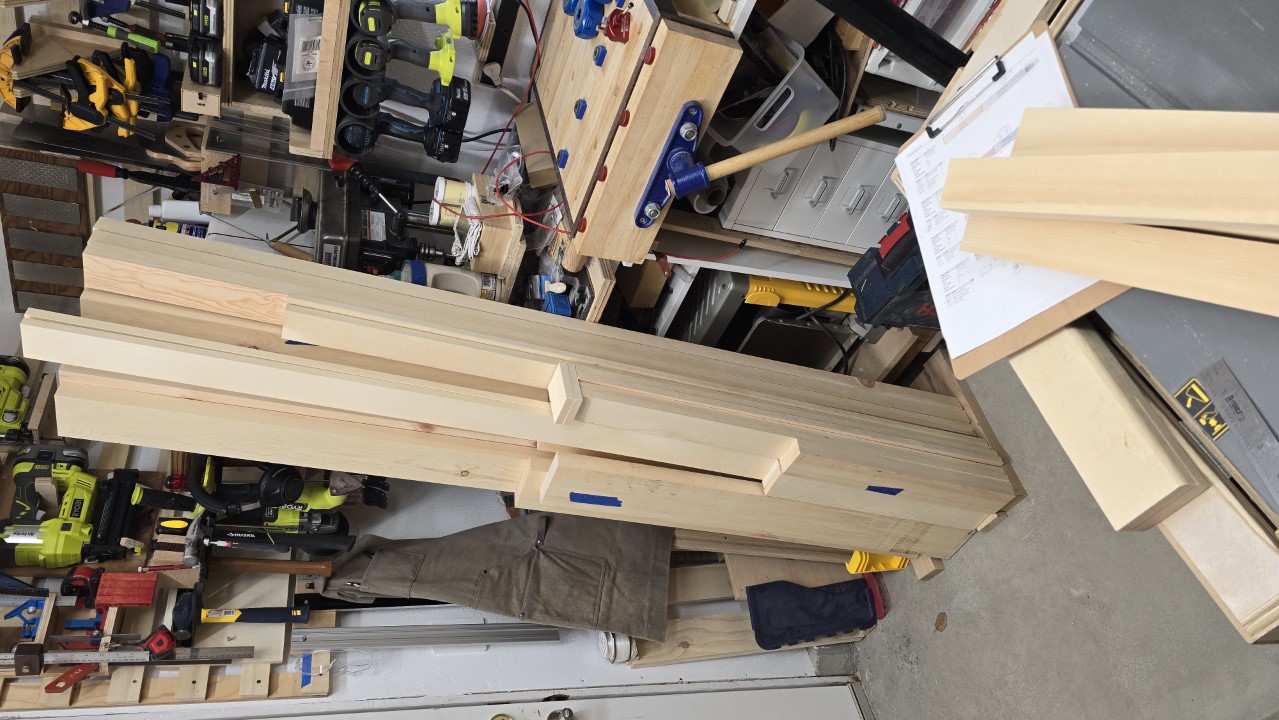
Before I bought the boards, I’ve calculated the exact amount of wood I needed, then gathered information about what is available to me close by, that is of a decent quality and size. A local lumber yard had the perfectly sized pine boards available, and that to a reasonable price. So I put on the trailer and got these 4 boards, picking them from the lot by determining how I could make the most out of the material. I had to already figure how I would cut them so I could avoid knots that were too large to have them in the build in places where the structural integrity would suffer.
I was also planning on some pieces that I could rip in half to get double the amount of boards for the guard rails, as well as creating waste pieces which I then could cut other smaller pieces from. The “OpenCutList” plugin for SketchUp as well as the Cut List Optimizer were helping a lot with that. I only had to minimally alter the suggestions to account for knots and holes in the boards before making final cutting decisions.
Once I’ve known how to cut up each board I’ve marked all future parts clearly with respective marks on painters tape and noted the same marks down in the cutting plan.
Tools
For the most part the tools used for this build were quite basic for a more serious hobby-woodworker, I think: a table saw to cut up the boards, a planer to get nice surfaces (I used both, an benchtop planer as well as a hand plane), several power drills and impact drivers plus the respective drill, drive and forstner bits.
I did pre-drill and countersink the deck screws even though they are supposed to self-drill and -sink as I wanted to reduce the stress on these relatively delicate pieces. An electric brad nailer helped keeping the guard rails in place after aligning them with the legs, which made it so much easier to screw them on.
I did plane some parts with a hand plane as they were too short for the benchtop planer or had angled surfaces.
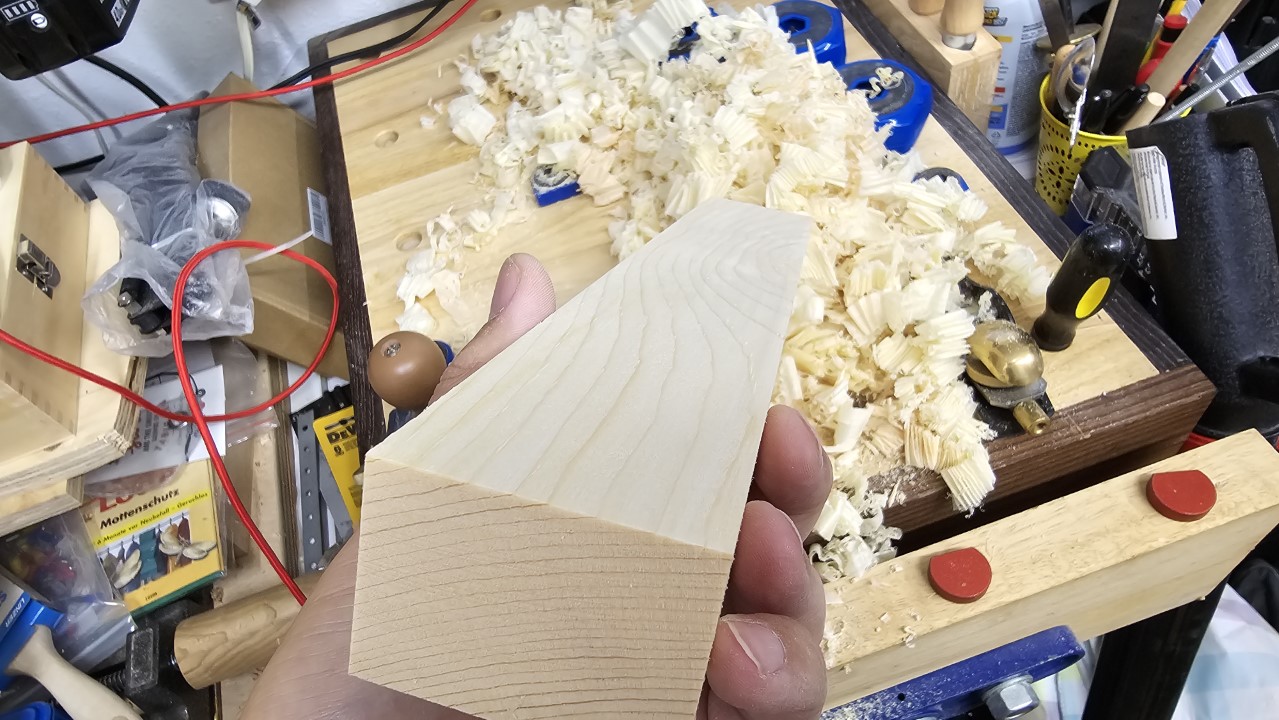
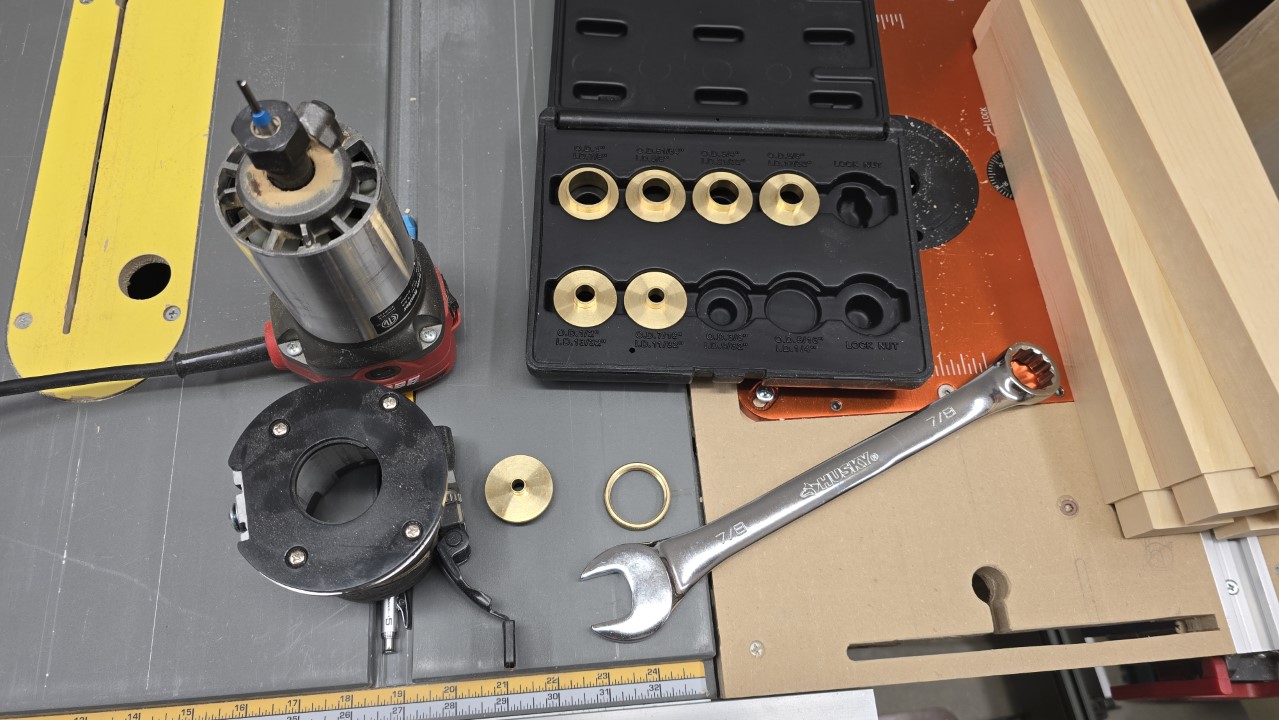
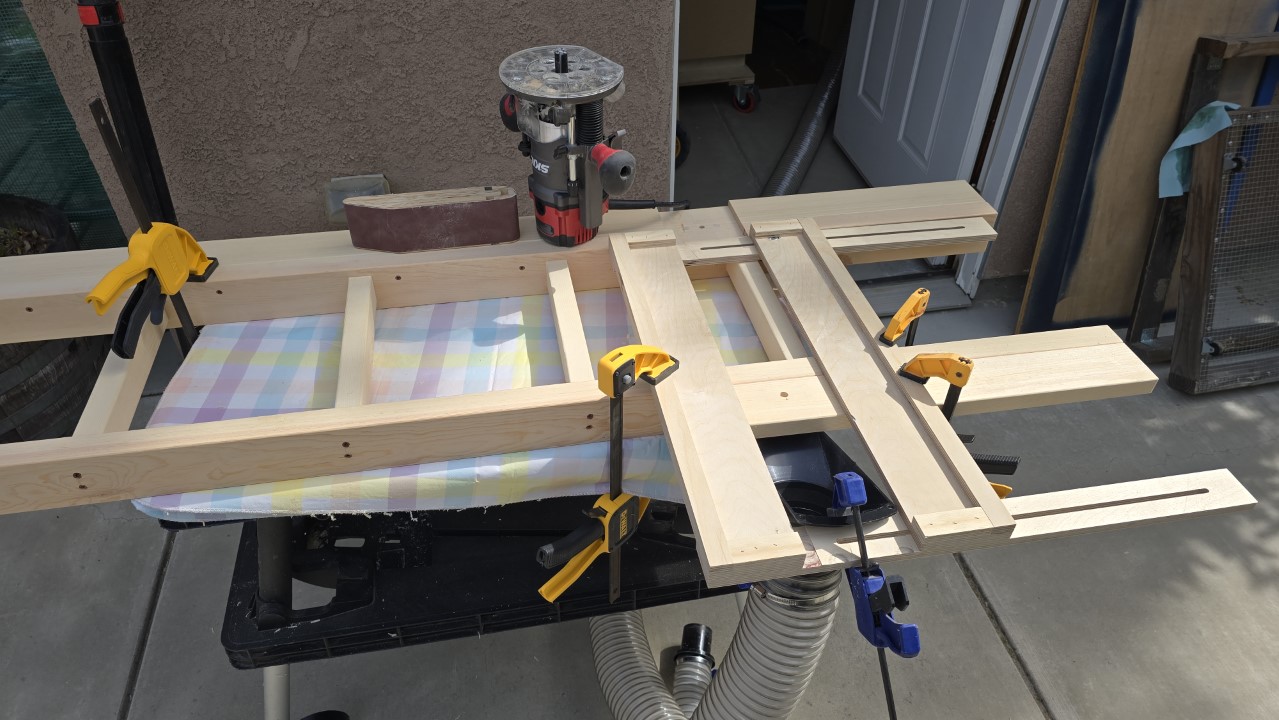
I’ve also used the router table to joint some parts, as well as a handheld router to route out the mortises where the ladder steps were set in. To create the necessary template first I’ve used a 1/4” spiral bit in combination with a pattern ring and a variable template. Once I got the template for the mortises right I used a 1/2” mortising bit with it on the ladder parts.
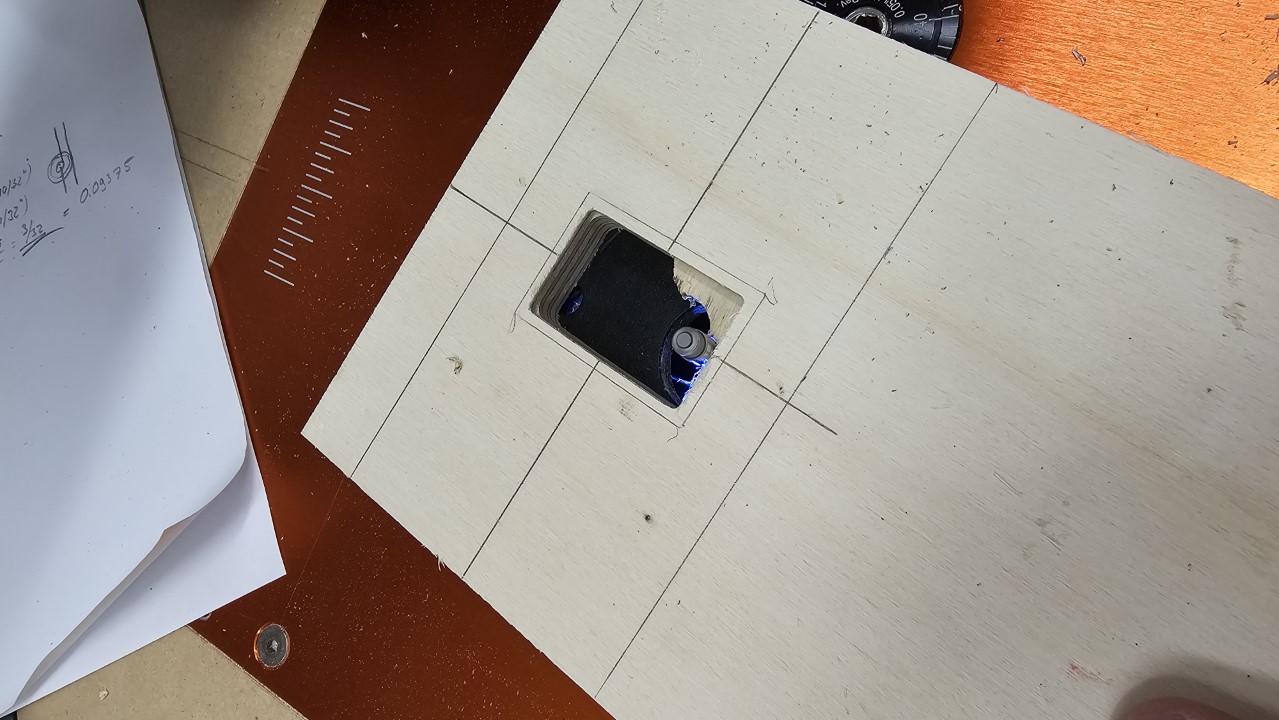
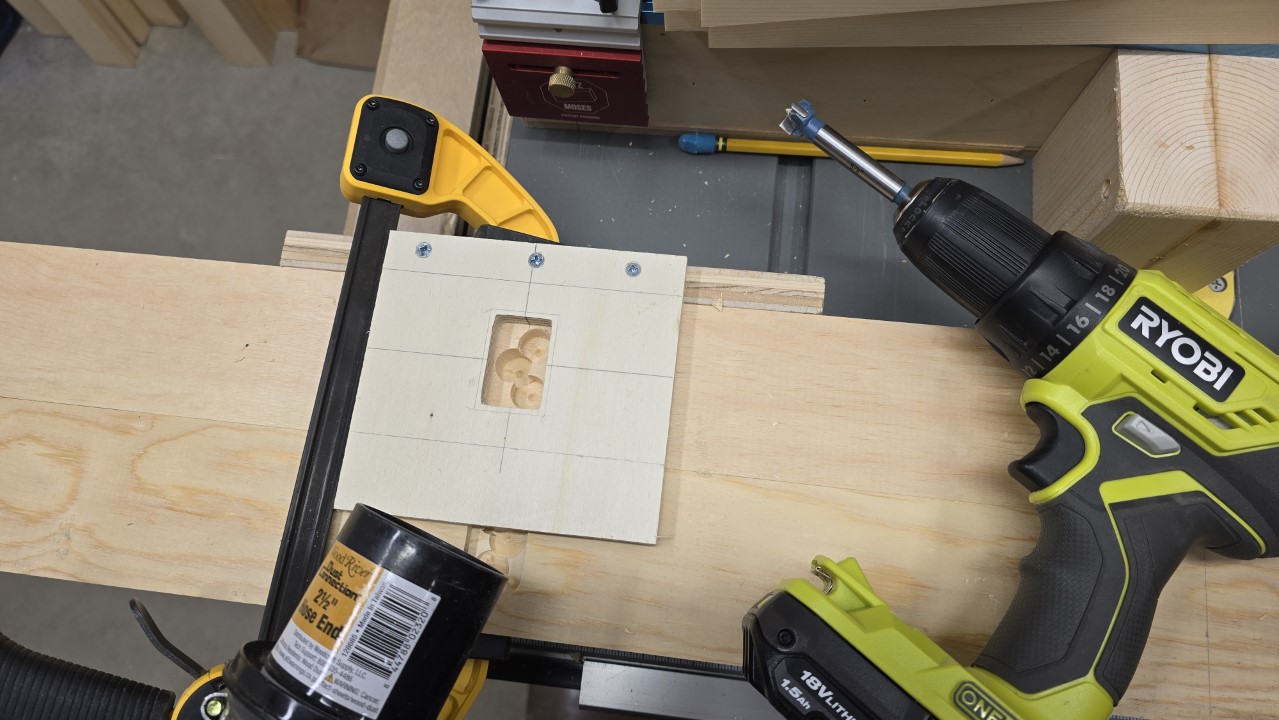
The forstner bit removed a part of the waste and created room for the router bit to get an easier start.
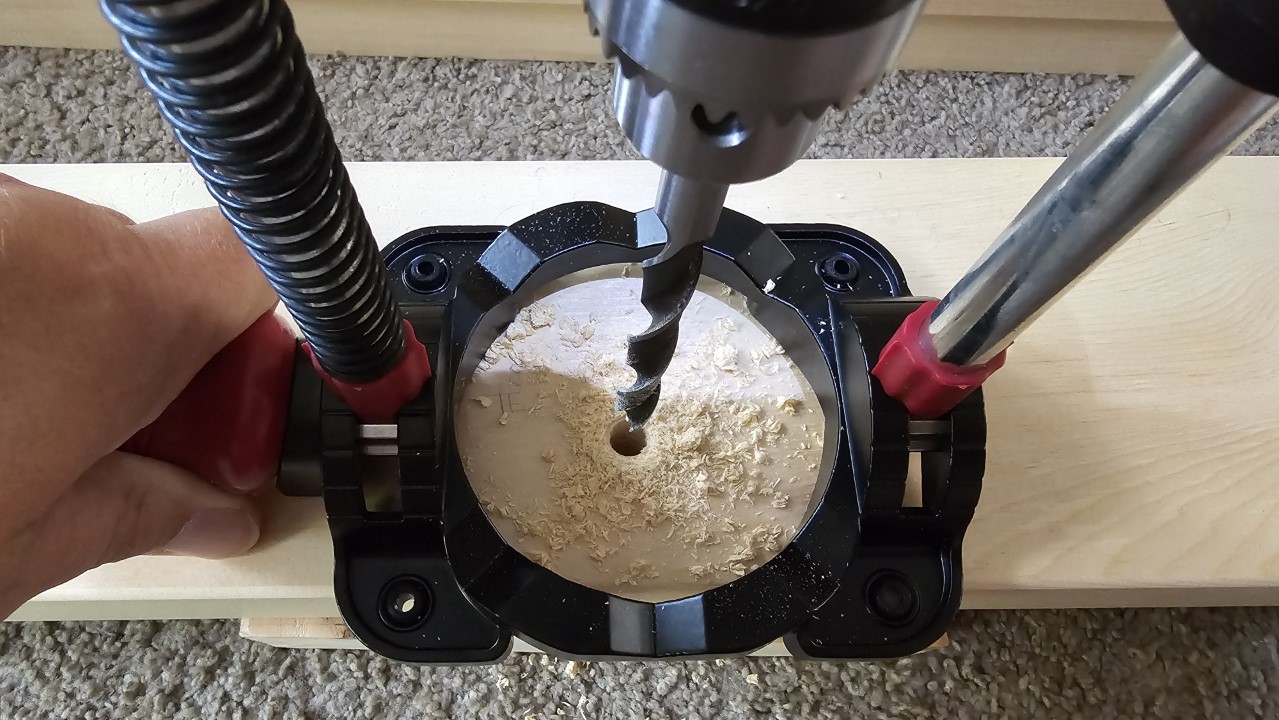
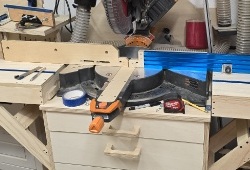
One tool I actually bought for this build is a drill guide that helped to repeatedly drill straight holes in a 90 degree angle as I needed to make sure they meet when putting two 1 to 1.5” thick boards together. As the boards were way to long to handle them inside my workshop on my small drill press the Milescraft drill aid I got for this proved to be extremely helpful.
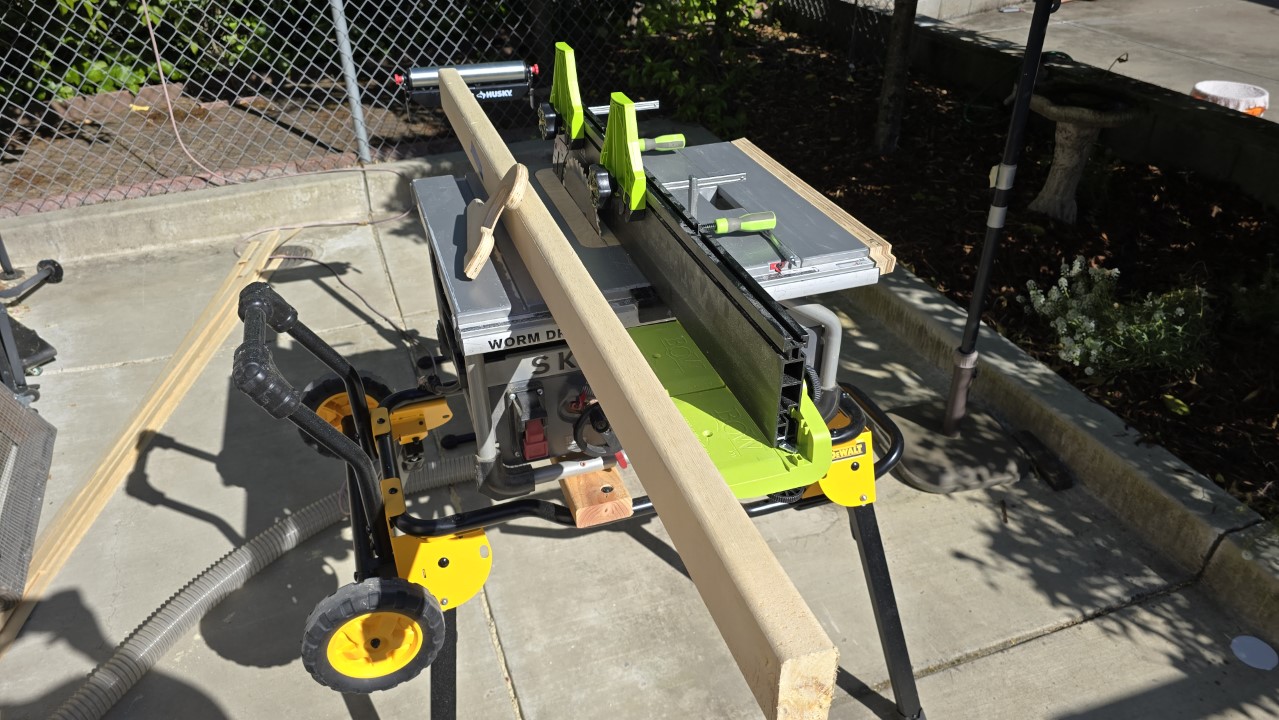
Since I have the luxury of having a second table saw I can cut larger boards and sheets outside my shop, before taking the smaller parts inside. That saw is my previous table saw and is now mounted onto the unused rolling/folding stand of my current saw. This makes it easy to wheel around, so I put it up wherever I need it. For ripping long boards I temporarily attach my add-on fence from the other saw as it gives almost double the surface for the board to ride against. Otherwise I’d have to wheel out my table saw cabinet every time, and that would not be as much fun (though it would be possible).
Parts
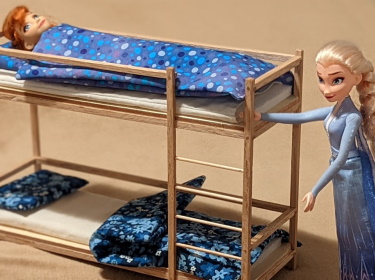
The bed’s construction consists of three main parts: frame, legs, and guard rails. All of these parts were cut from the 4 boards I started with. The only “external” addition to that was a pair of 1x1 poplar runners that I screwed to the frame so the slatted mattress base can rest on them.
The frame
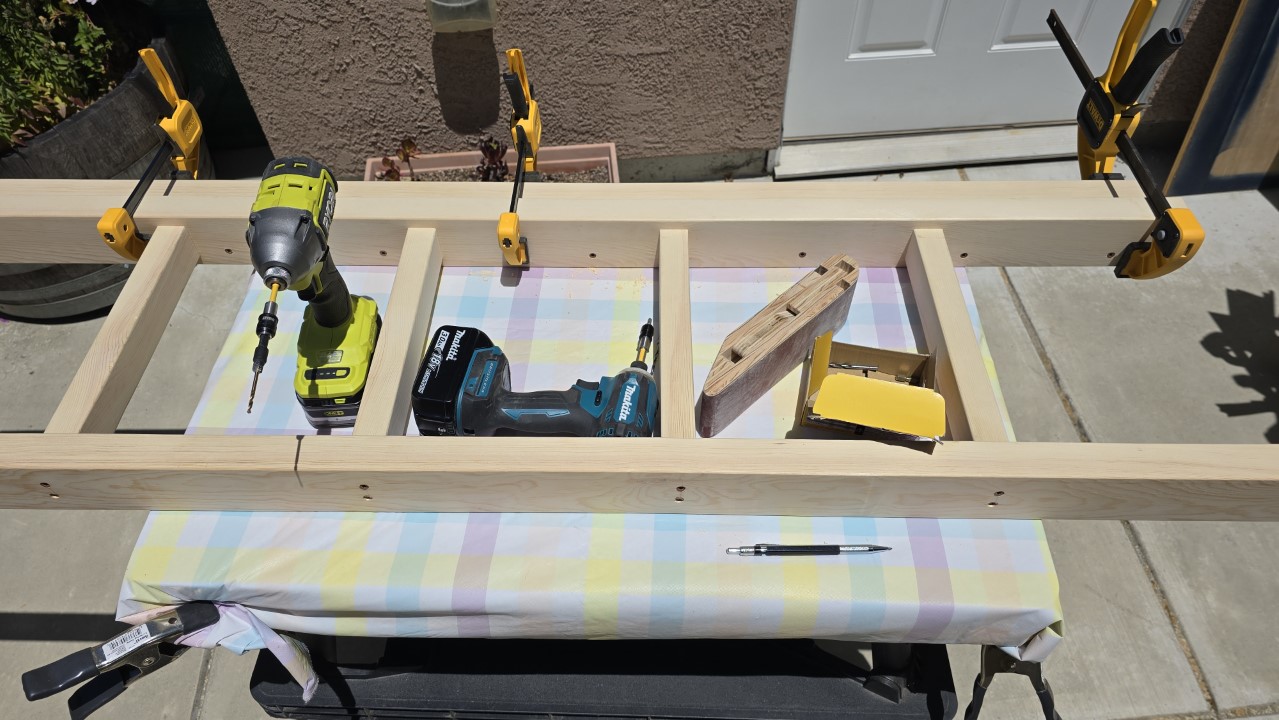
The main structural component of the bed is its horizontal frame. It is comprised of a set of 2x6 that are butt-joined with cabinet bolts and barrel nuts. Inside the frame are the poplar strips mounted to the long sides so the mattress base has something to sit on. The frame then also got a couple 3/8” through-holes where it then is mounted to the legs. These holes are bored out on the inside with a forstner bit so the hex nuts clear the mattress base.
The legs
In the back the bed stands on legs that are also cut as 2x6, while the front leg on one side is only 4.5”, so it appears a little less bulky. The other front leg actually is the ladder that allows the kid to climb up, plus another 2x4 to allow for easier mounting to the frame.
All legs incl. the ladder have a 1/2” recess cut into them all at the same height, so the frame sits inside of a half lap. This increases general stability and helps spreading the rocking and shearing forces away from the 2 carriage bolts each leg is mounted with. About 5” from the floor another frame stabilizes the construction at the bottom on three sides to further reduce possible movements.
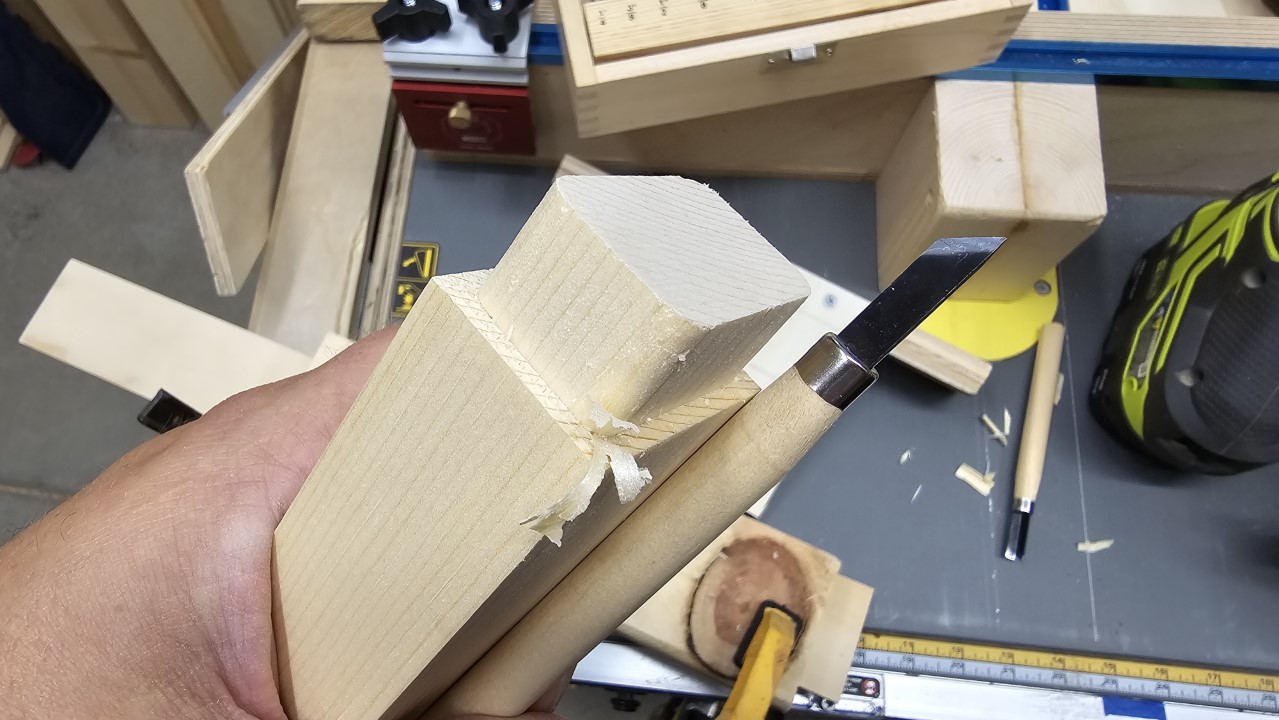
The ladder
The ladder is an integral part of the bed’s structure as it replaces the fourth leg. The steps are set in 1” deep mortises, and fixed with deck screws from the outside. These screws are set in two different angles on each side to make the construction more durable.

The guard rails
This is the “fence” at the top of the bed that protects the occupant from falling off. It is made of 5/8 thick and 2x3 wide boards that are mounted to the frame with some 1.5” pieces of 2x3 and to the legs directly. They are also connected to each other via cabinet bolts and barrel nuts. The connection with the legs was originally intended to be done with short cabinet bolts and fitting nuts, but I forgot to account for the loss of thickness of the boards due to planing them. Since they were made by ripping 1.5” thick boards into supposedly 3/4” thick pieces, their thickness was already going to be at least half a saw blade kerf (which in this case would be 3/64” each) less than 3/4”, but then I had to plane them quite a bit as the cutting quality wasn’t optimal, and neither were the outer surfaces.
So I had to improvise and decided to go with deck screws instead. This has the benefit that the connection is sturdier by using three screws per joint instead of one bolt. On the other side the looks aren’t as good - on the inside one can see the screw heads, and on the outside the recurring element of the nice-looking flat cabinet bolt heads is missing. But I had to finish the bed so I didn’t have time to remake the respective parts from additional material, and my kid likely will never care about a certain type of fastener anyway.
Difficulties
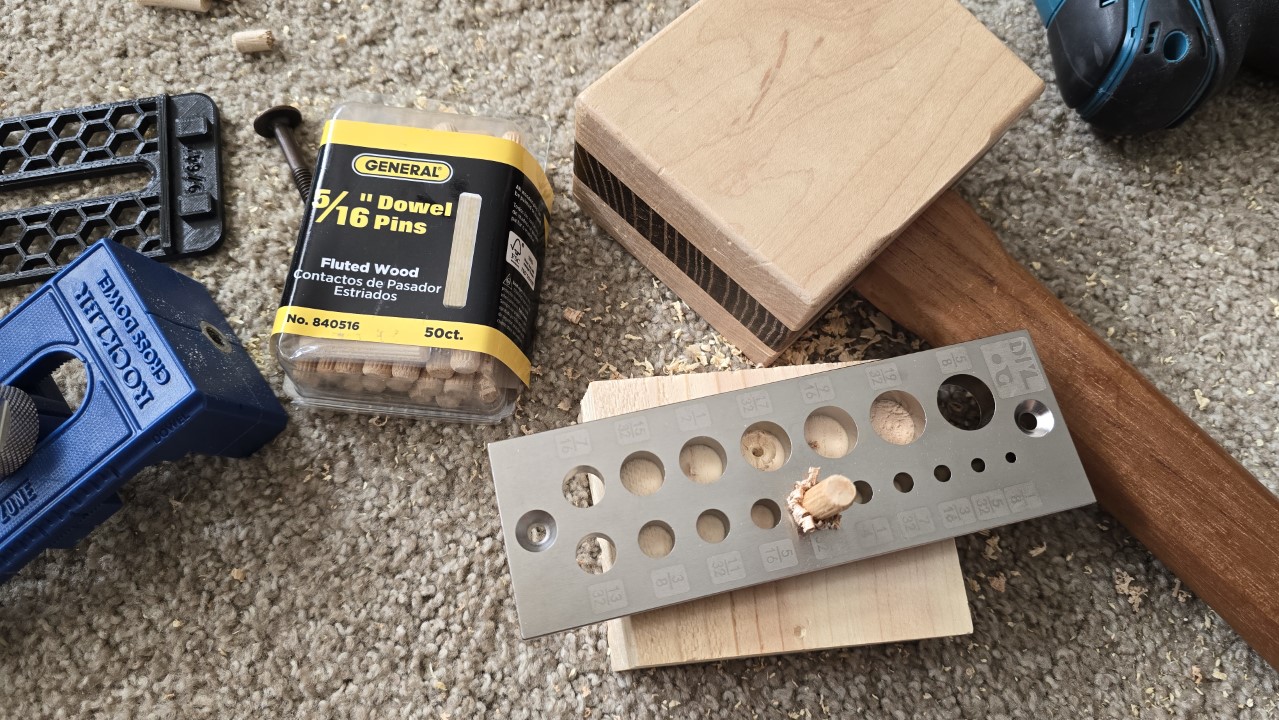
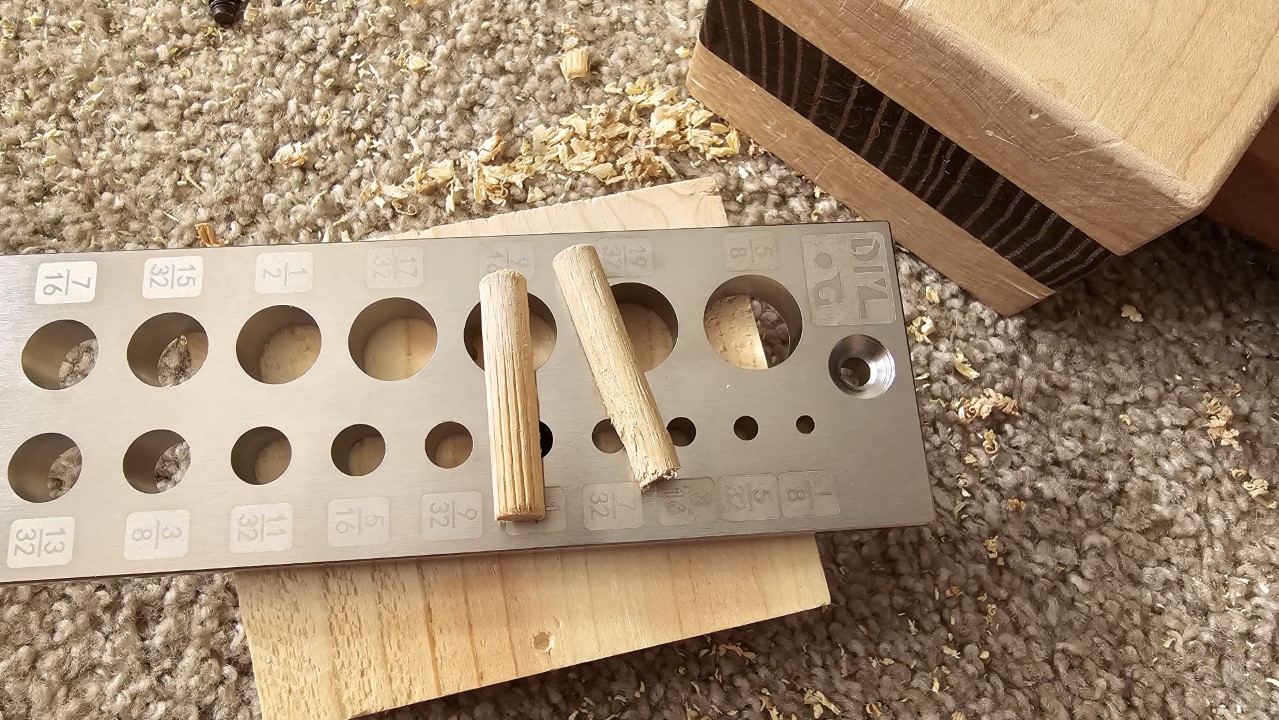
I already mentioned the boards that were a tad too thin. Besides that there were other things that didn’t quite work out as expected. For instance I kept messing up where to drill the holes for the cabinet bolts, so I ended up filling holes by glueing in wooden dowels - which I also had to make first.
When trying to connect the stretchers at the bottom with the legs I had so many problems to get everything lined up and seated neatly I ran out of patience and ended up using 5” deck screws which I salvaged from an old workbench I’ve demolished recently. I screwed them in diagonally so they crossed each other, similar to how it’s done with beams in framing.
Then I forgot that I’ve used screws to put together the ladder, and promptly destroyed a brand new router bit when routing out the dados for the frame as - of course - I hit a screw. For a moment I was wondering why there were sparks everywhere before it dawned on me… However, the bit still finished its job relatively well, but required a little bit of cleanup afterwards as the corners of the carbide blades of the bit broke off. So I guess I won’t use that bit any longer.
ToDo
Paint
My kid has chosen a set of three colors of which I already bought a couple small cans, and which I will put on once we are sure there are no more changes required. Then I’ll put on these three paints plus a clear coat on top to make them more durable.
Subsequent changes
One change my kid has asked me to do after I’ve finished the actual build: widen the “entrance” at the top of the ladder a bit as it turned out to be too narrow. The gab between the ladder’s stiles is 12 inches, which is the maximum I could provide as there is a sleeper sofa that needs to fit between the ladder and the other leg when pulled out. For now the idea is to cut off a couple of inches at the upper ends of the ladder itself, and then smooth out the remaining surfaces and edges so it feels extra nice to the touch.
Additions planned
An addition that is already in my plan but hasn’t been done yet is a set of shelves the kid asked to build as well. They are going to be mounted to the head end of the bed, that not only provides space for a night light, a glass of water, a book, etc., but also allows for blocking out the sun when needed. We haven’t finalized the design just yet, so this may also take quite some more time to get done.
I’ll update this post once I’ve finished these tasks as well.
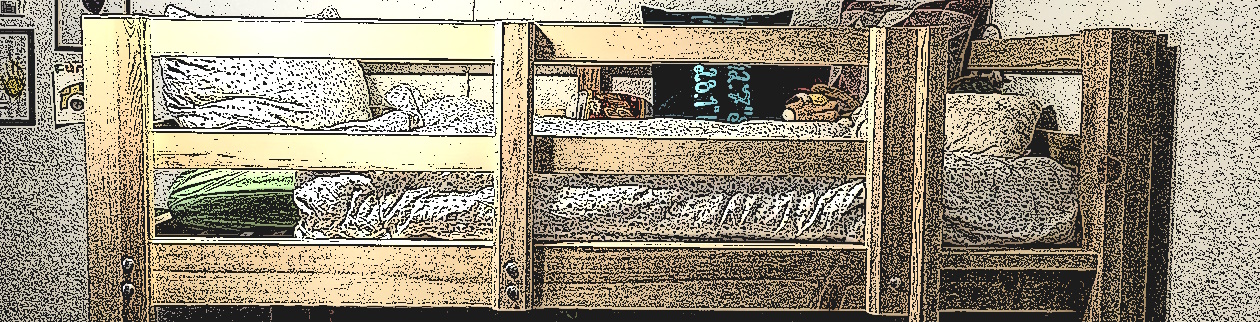
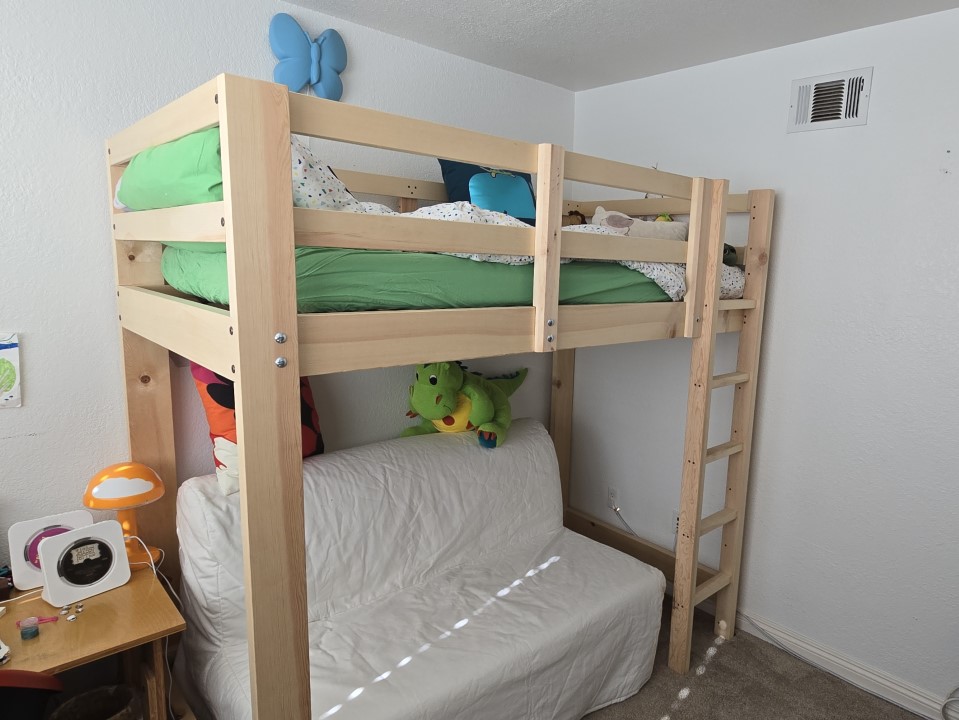
The (kind of) finished project
For a couple of weeks this bed is now already in use as we needed the sleeper sofa otherwise, and the kid loves it so far. It turned out quite nice, even without any paint on. The entire build took me about three weeks of work including the modeling and material purchasing runs.
Did it, in hindsight, make sense to build it myself? Absolutely, the passion and enthusiasm for a project like this is exactly what brought me into woodworking in the first place. Was it cheaper than buying a bed in a store? Not necessarily, as for the roughly $250 for the material we could have bought one that would at least get the job done. For something as nice and sturdy as I’ve built it the costs would have been at least twice as much, though there seems to be no upper limit.
As I have more time at my hands at the moment and want to build up more skills anyway I happily invested the time needed to plan and build this bed.
Some of that time I did kind of waste by working around the lack of certain tools (or knowledge). For instance a small pattern routing bit would have made routing out the mortises for the ladder steps so much easier. Another time I just made life harder on myself and had to remake the steps entirely because I removed too much material when cutting the tenons the first time, making them too weak for my liking. Or when I messed up the holes for the cabinet bolts…
And of course I got sidetracked multiple times, i.e. to build a miter saw station, or to make a new table saw sled, or to build a dado template.
However, the best of all in this is that my kid got to have a say in how it had to be designed and even was able to help with the assembly of some parts - and this is invaluable.

Comments