Building a Raised Vegetable Garden
During last winter my wife decided to try some vegetable gardening the coming spring. Not just to grow some healthy food herself, but to have something to collaborate on with our little ones, too.
So she asked if I could build a plant bed to get this project started.
“Of course!” I said. ![]()
Planning
First we needed to find a space to put the plant bed. We found it along the rear wall of the house we live in. There was a mostly unused flower bed that needed some care anyway, and that was perfect for this project. About 16’ by 2,75’ it had enough space, was in a good place to benefit from weather and sun, and due to its almost rectangular shape it shouldn’t be too hard to build a well fitting plant bed.
Making a SketchUp model
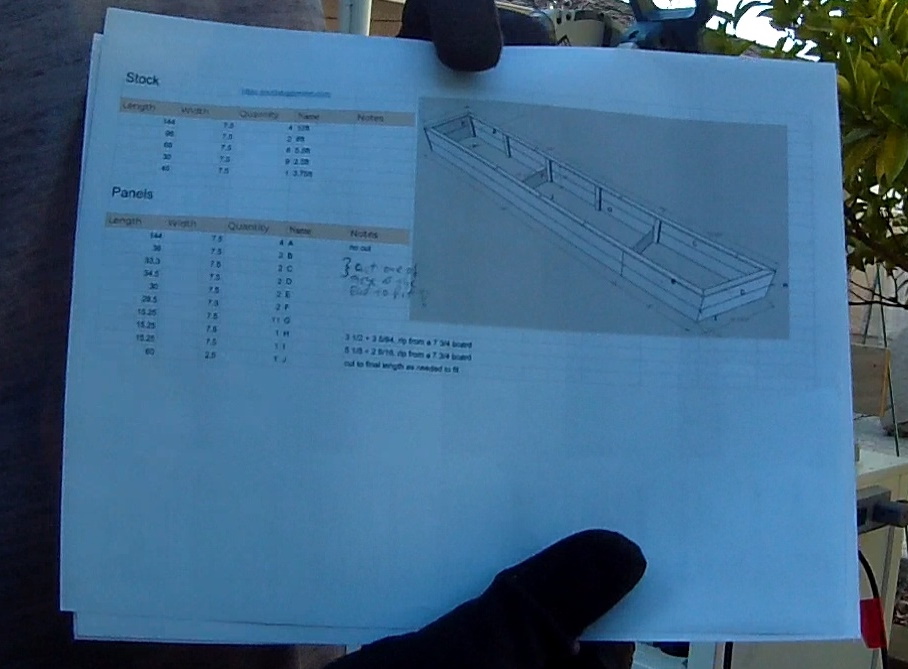
So once I had the measurements I created a model in SketchUp to get the exact dimensions of the material I would need. Constructing it perfectly to the size of the flowerbed allowed me to calculate exactly the sizes of the parts - well, I did subtract some inches to allow for tolerances, and I didn’t want the wood stick to the wall of the house either so they wouldn’t become a moisture trap.
The first iteration of the model was only to be able to calculate for the sizes of the boards I would need, so it was more of a rough draft. But once I knew exactly what material I was getting I finished the design.

Gathering the material
I was lucky to get some redwood scraps from a construction site that were about to be disposed and would provide enough material for the project. It were a couple 1x8 inch redwood boards in multiple length: some at around 12 feet (which came in handy to make the long sides very stable and easy to set), some at 8 feet, and some shorter ones between 3 and 5 feet.
Redwood has a natural resistance to decay and bug infestation, so it is perfect for outside use. One of the key requirements my wife gave me was the absolute avoidance of any hazardous materials - like wood finishes that could be poisonous when seeping into the ground, contaminating the plants. We were aware that it might mean to redo the whole thing in a couple of years, and we are fine with it. By then we’ll know if this is exactly what’s needed, or if and where we would need to make changes then.
“Measure twice, cut once”
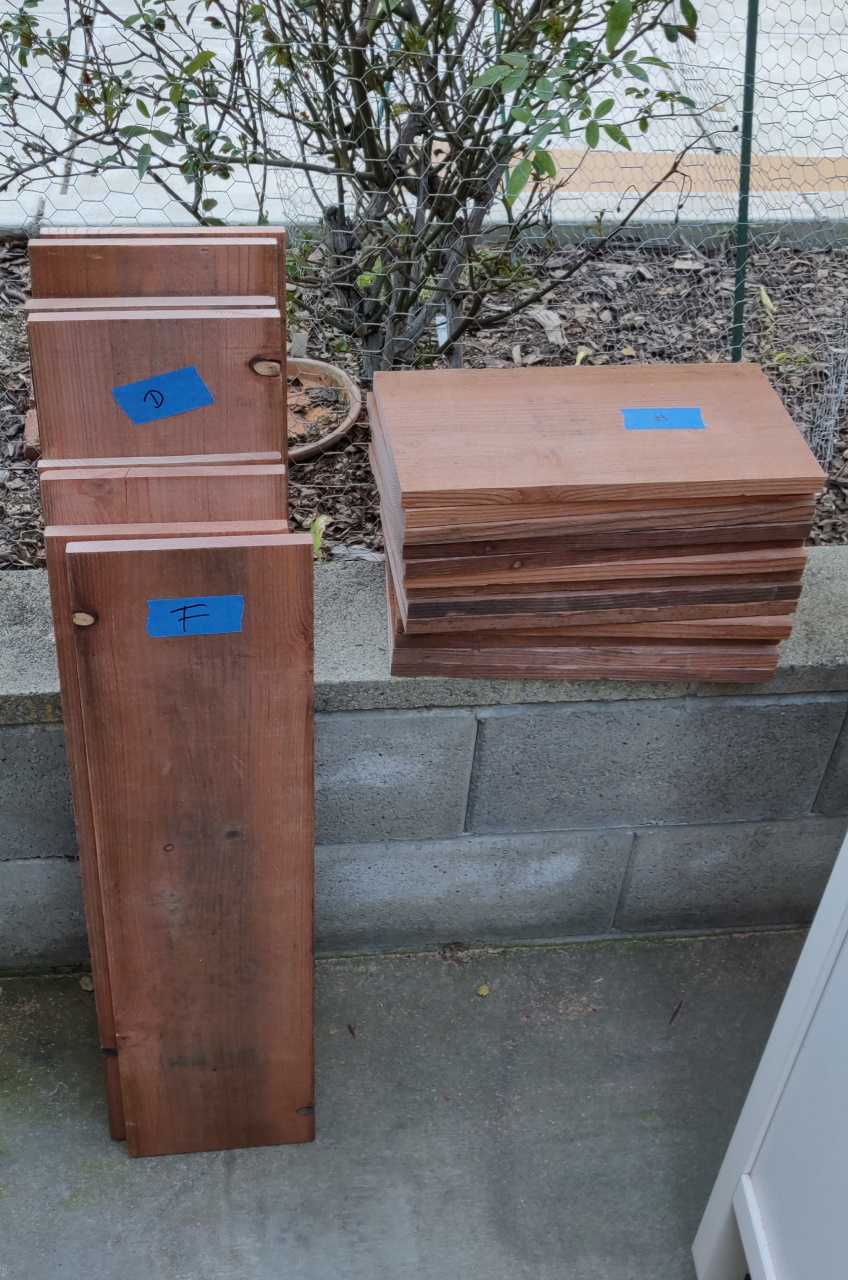
When I had the material at home I measured exactly to make sure I only calculate with what I have, and to know what else to buy if needed. It also helped in using the boards in the most efficient way by sorting out holes from knots, cracks and other imperfections. Remember, these came from a construction site, so they weren’t exactly furniture quality.
But they were more than good enough for a plant bed, so I adjusted the SketchUp model to accommodate for the newly gathered information.
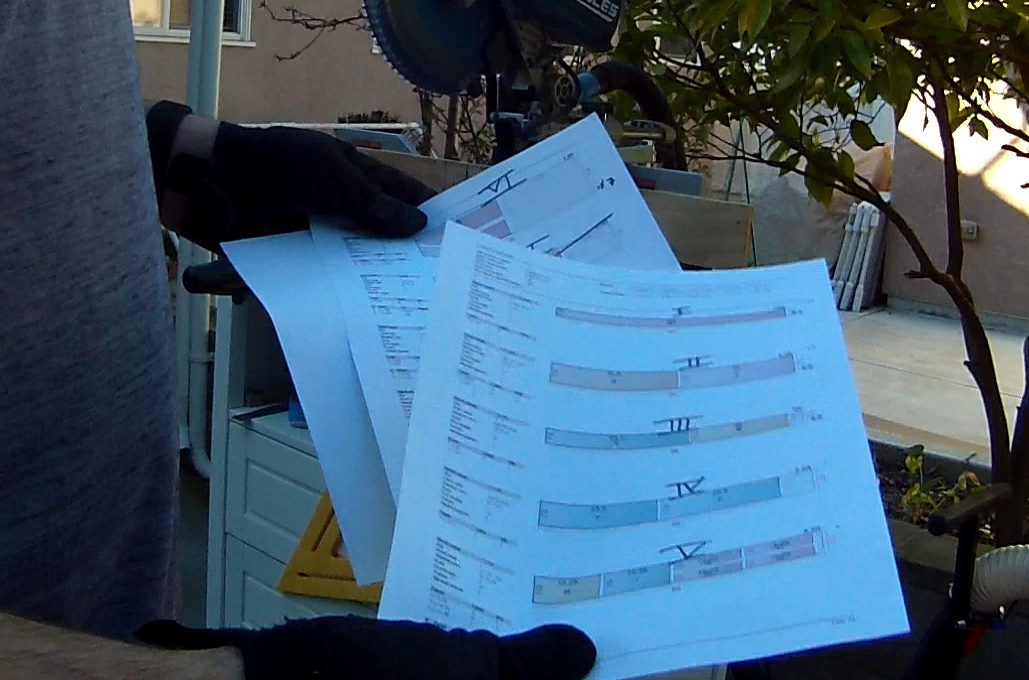
Then I took to a cut planning tool: www.cutlistoptimizer.com. Its free version has enough functionality to allow for exact cut list creation and to optimize the the cut list, so I get the most out of the material I had. When I entered all information - measures from the SketchUp model as well as the dimensions of the available boards - and worked out a cut list that I exported as PDF.
Marking the boards
To make sure I can easily tell the boards apart and which part of the cut list applied to them I labeled them all with blue painters tape and a sharpie. These labels were put so that when cutting the boards to size each part would still be labeled with the letter the respective part of the cut list as well as the SketchUp model had. This made the cutting and the assembly really easy.
Construction
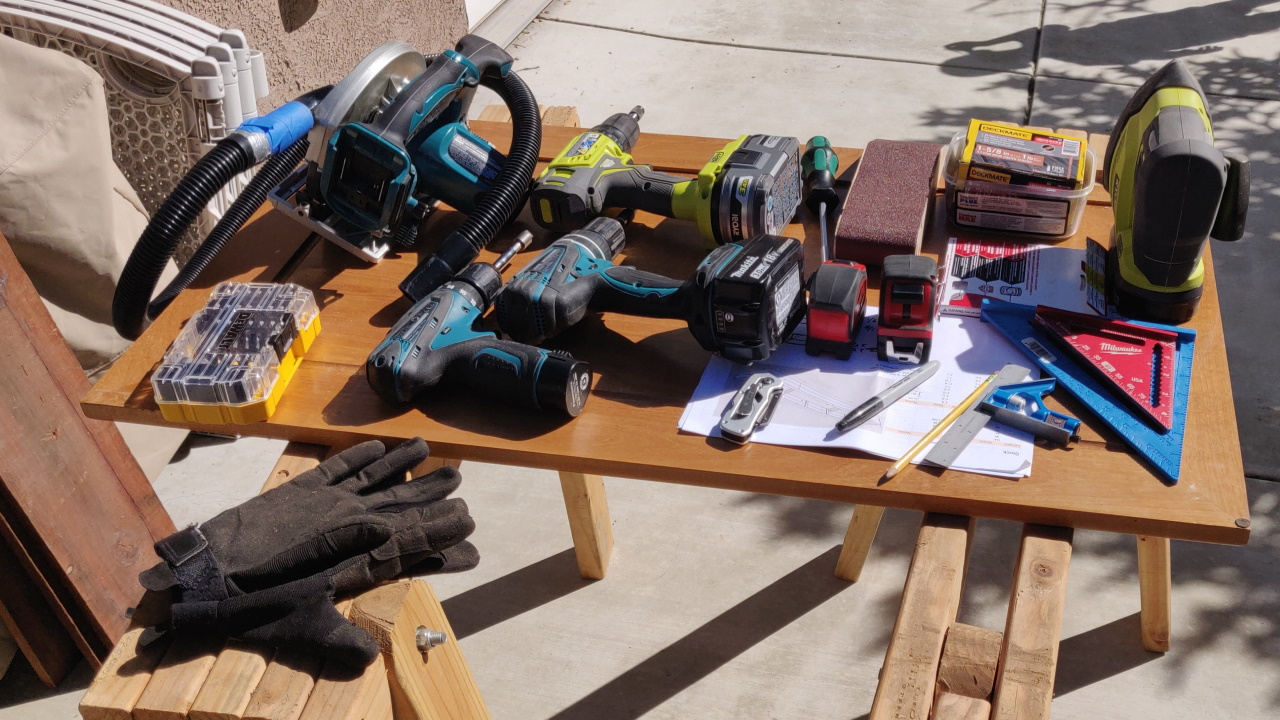
Cutting the boards
Nothing special here: cutting the boards to length on the miter saw that I rolled into the back yard as it had more space than the shop (which is a garage), and then ripping these boards where needed to their final width.
Glue and screws
To connect the boards I relinquished the finer methods of joinery in woodworking. Instead I made short vertical posts by glueing the faces of two boards together with a waterproof wood glue, so they basically got the circumference of a 2x4.
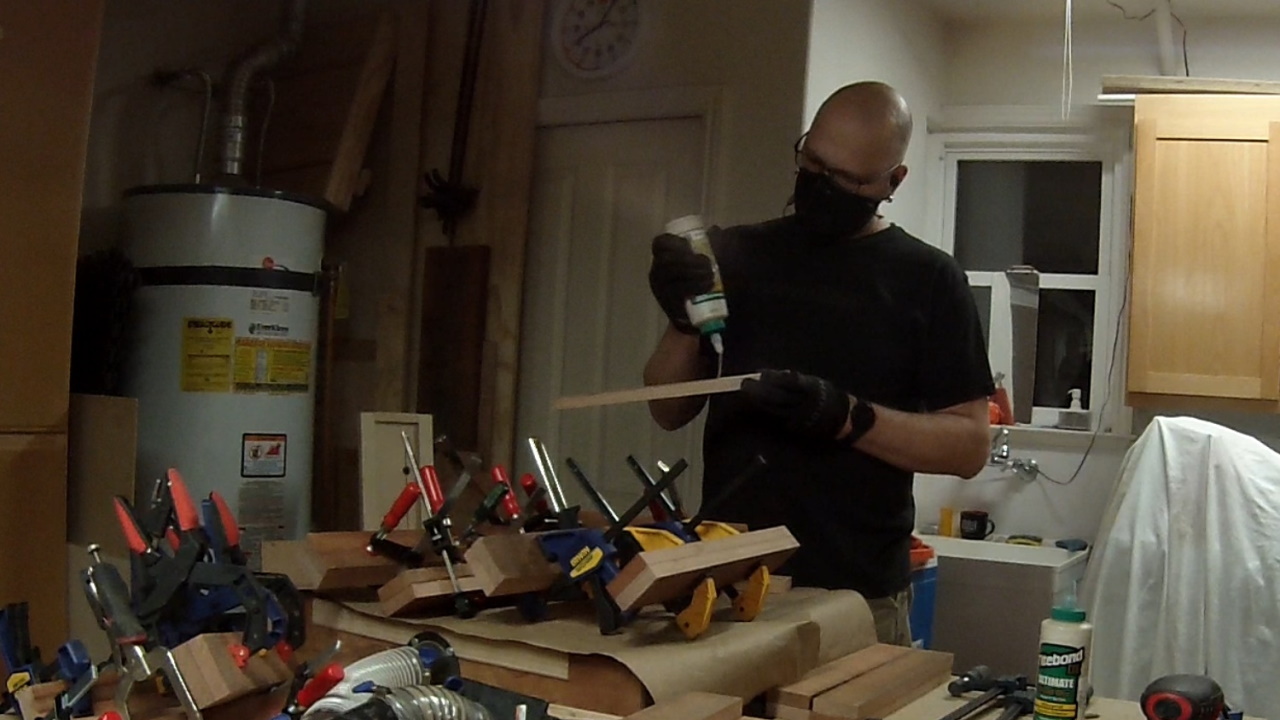
These were screwed onto the back of the longer boards with coated deck screws, right at the seams where the ends of the boards meet. The longer boards also got some extra posts screwed on to stabilize them. Some more posts connected the boards at the corners, where the angles on one side required some beveled cuts.
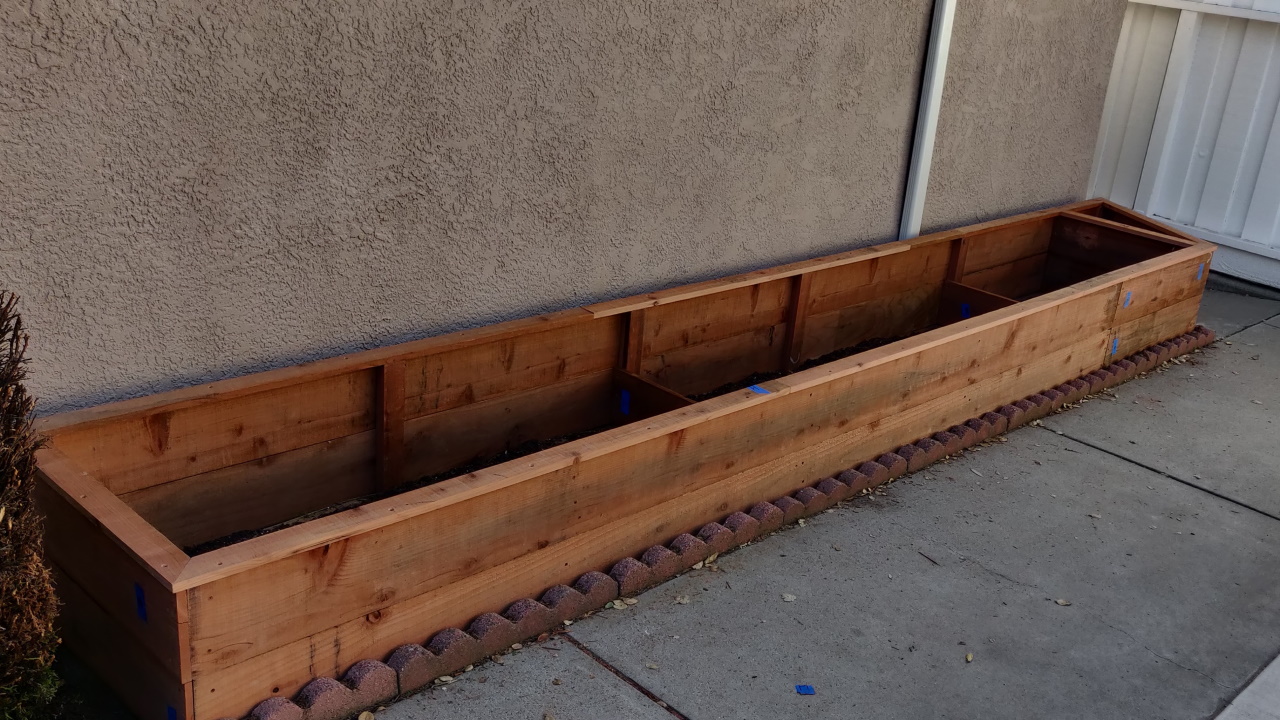
At roughly a third of the length from each end I’ve put a board across the plant bed and screwed it also to a post on both sides. This gives the whole structure more stability and would keep the soil from pushing the long sides apart over time.
At one of the short sides I let the plant bed end in a triangular shape to follow the lines of the flower bed. This also became kind of a design element that my wife specifically asked for.
To give the build a nicer touch I’ve set kind of a crown on top, using some narrower strips that were screwed into the edges of the top row of boards. Since I’ve layed them out specifically to overlap with the seems of the boards below they too make for an even stronger structural stability of the final build.
Smoothing out the surfaces
To reduce splintering and ensuring a nice feel to the touch I’ve sanded the top and front. I’ve also rounded the edges and corners to reduce the danger of anyone getting hurt. After all the kids were supposed to join the gardening at some point, so everything has to be as smooth as possible. On the other side it is still an outdoor object, so I didn’t have to get too crazy about it.
Finalizing
Soil
When the actual build was done we’ve put a double layer of plain cardboard at the bottom to act as a fertilizer when it would start rotting later (a tip that my wife has gotten in a gardening group). Then we’ve filled the plant bed up with soil.
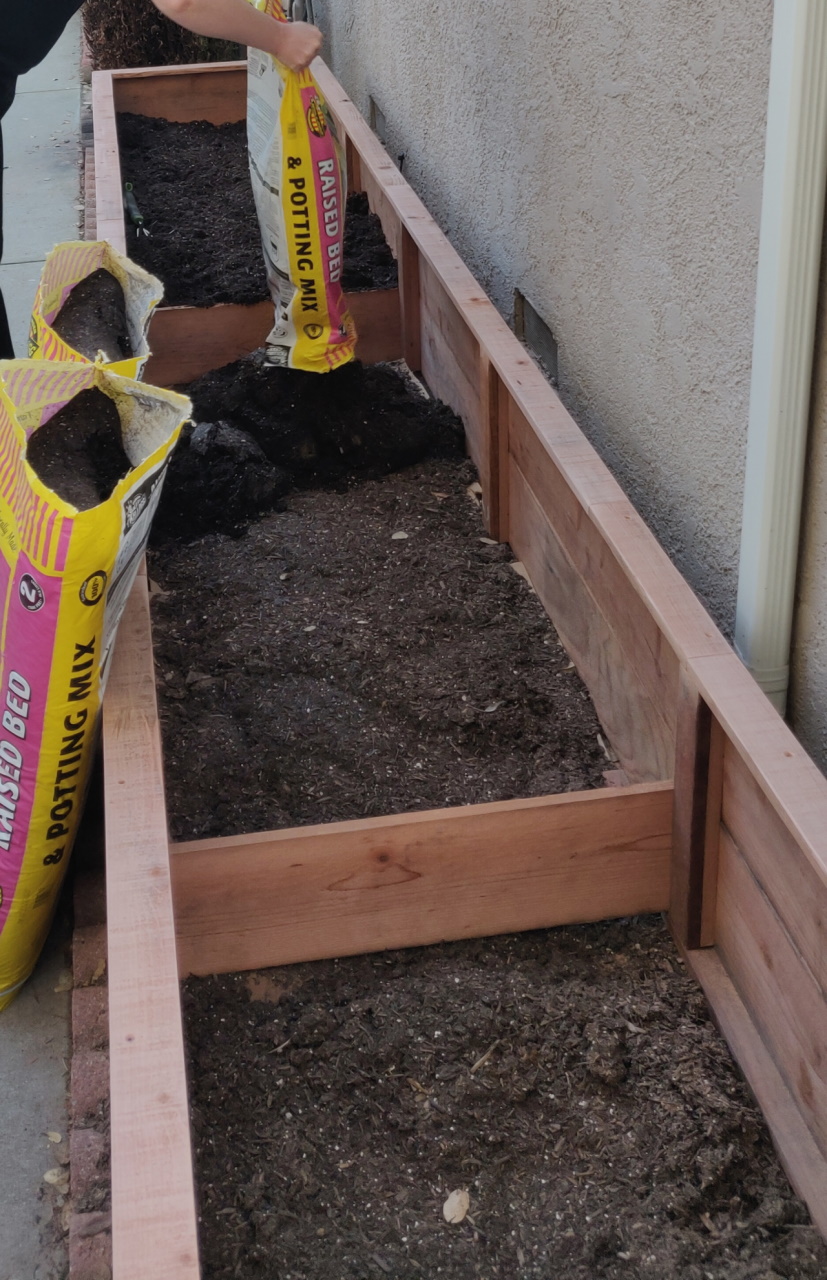
The my wife started dividing the space into small parcels that were planned for the different plants, marking them with some gardening stuff she had (that’s her domain, not mine).
Irrigation
I came back into the game when she knew where to put the irrigation system. I drilled some holes into the sides underneath the crown, so I could fit a hose in. A couple drippers and sprayers as desired, and we now have a pretty well functioning vegetable garden.
Produce and flowers
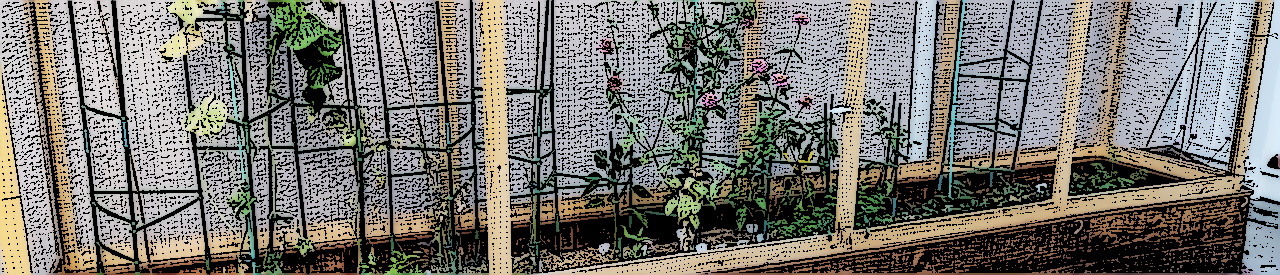
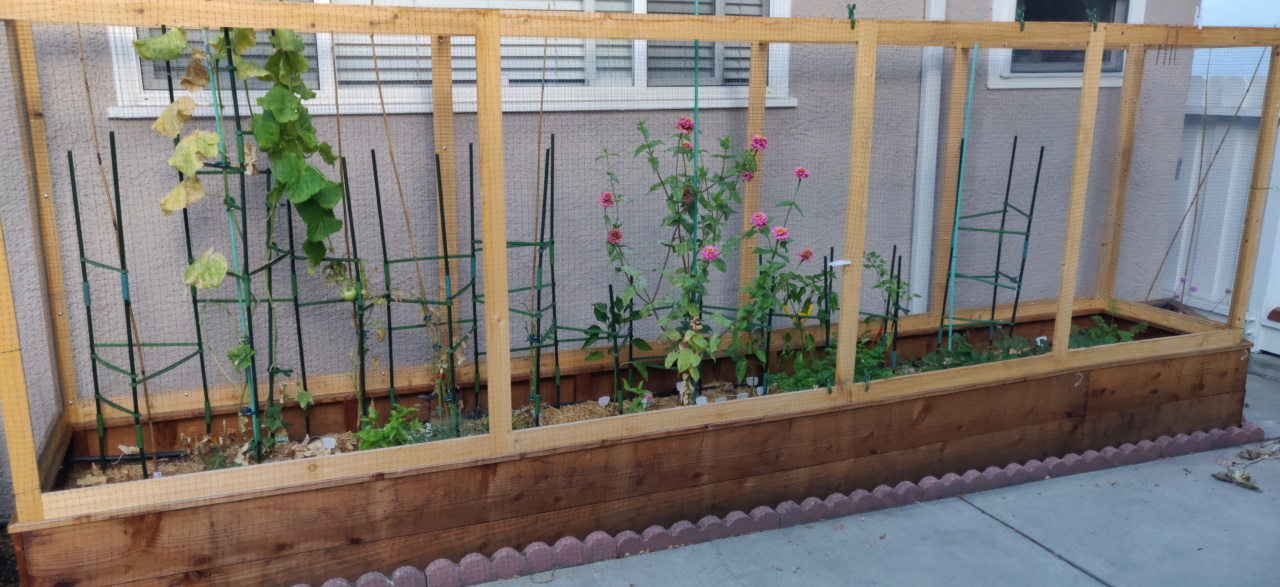
This summer it already provided us with quite some nice fruits and vegetables: strawberries, tomatoes, cucumbers, bell peppers, beans and a whole bunch of herbs. Next year it also should have corn and small pumpkins.
For the kids there were also a few different flowers in between the veggies, but the most appreciated by the kids were the sun flowers they planted in that decorative corner at the end of the plant bed.
Spontaneous upgrade
A couple weeks after planting the first plants my wife asked for a top to the plant bed. Since this was after lumber prices started to skyrocket I had to improvise a little: I added a top structure to the existing model in SketchUp and started building this from fence pickets which I cut into strips and screwed together with pocket hole screws.
The base of that was done and put on, but then I got sick and couldn’t work on that for a while, so it currently is stuck at this stage. The sides and back are secured with hardware cloth that we got from a friend some time ago, and the front for now is just covered with a nylon net. that’s ok for now, but over this fall I need to make some doors and put them on…
Conclusion
There we have it: a nice little vegetable garden that keeps some of us busy for quite some time. I’m sure we’ll have more fun and joy with it next year, when soil and plants as well as gardening skill have settled a bit.
My only concern is that the wood may not hold up as well as we’ve hoped, but we are taking that risk anyway. So far it does holt up pretty well, though. Fingers crossed it stays that way. And if not then we already have some more ideas what to improve next time…

Comments