Building a Miter Saw Station for the Shop
There is never enough space in the shop, and the miter saw needs a place to stay as well - so why not building a miter saw station with storage for other things?
To be clear: this is not meant to be the “ultimate miter saw station” as many woodworking content creators seem to claim for their own builds and adaptations, but rather my own attempt to use the available space in my small shop as efficiently as possible.
Modeling
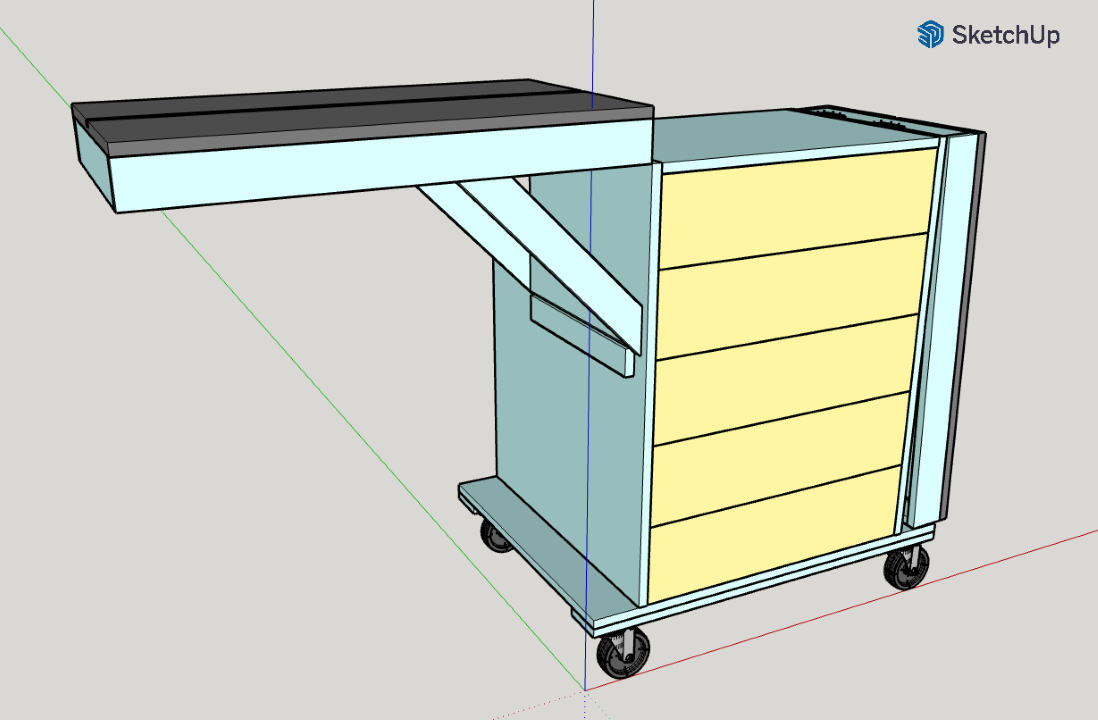
As so often I used the free SketchUp 2017 to create a model that was initially inspired by some tutorials I have seen in woodworking magazines. That means it has a similar bottom as my table saw stand, which consists of reinforced 3/4” plywood and sits on four 3” swivel casters.
Dust collection
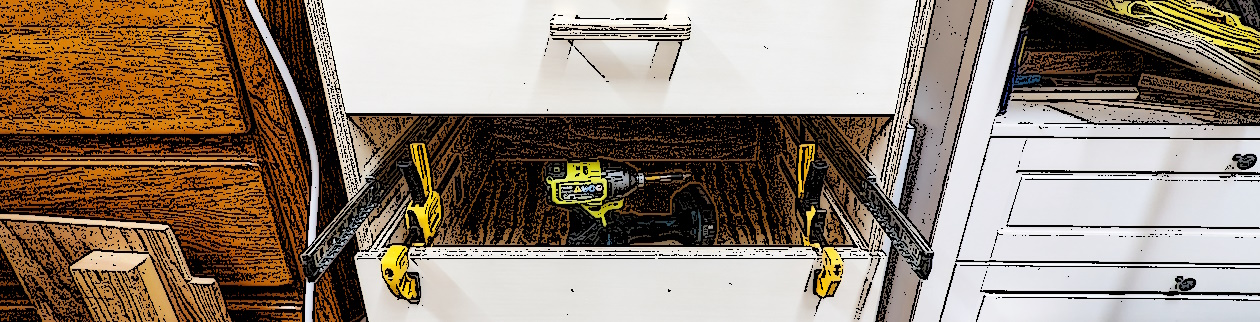
Initially I was also planning to install a dust hood I have found in SketchUp’s 3D-model warehouse, which I intended to build from 1/4” plywood. But when I was finally ready to start with that part another interesting way became available: the YouTube content creator Shop Nation had developed a nice dust chute replacement for the miter saw model I have (Ridgid 4251 a.k.a. Delta Cruzer 12”) and added it to his online shop. As I also own a 3D printer I’ve bought the respective 3D print files from Shop Nation, then just printed that port and installed it - and I’m very pleased with how well it works. I might build the hood at a later point if it turns out I use the saw more often and the current solution couldn’t keep up well enough.
Materials
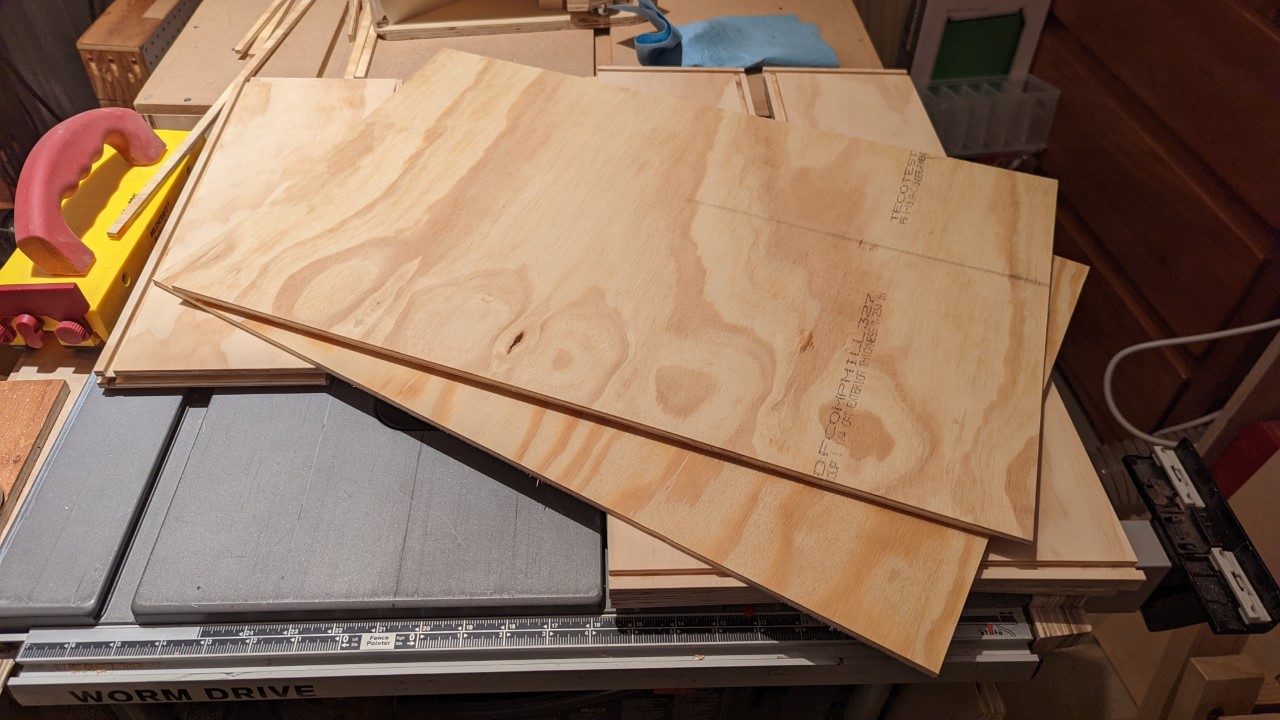
The building material in this project is mainly ACX plywood in the nominal thicknesses of 1/4”, 1/2” and 3/4”. Have I used mainly scraps for my shop projects in the past, this time around I’ve shelled out some money to buy good quality plywood from a local hardwood store, which all the structural parts and the drawers are made from. Just the drawer fronts are from some scraps of poplar plywood, which is a lot more lightweight than ACX, but looks a lot better, too.
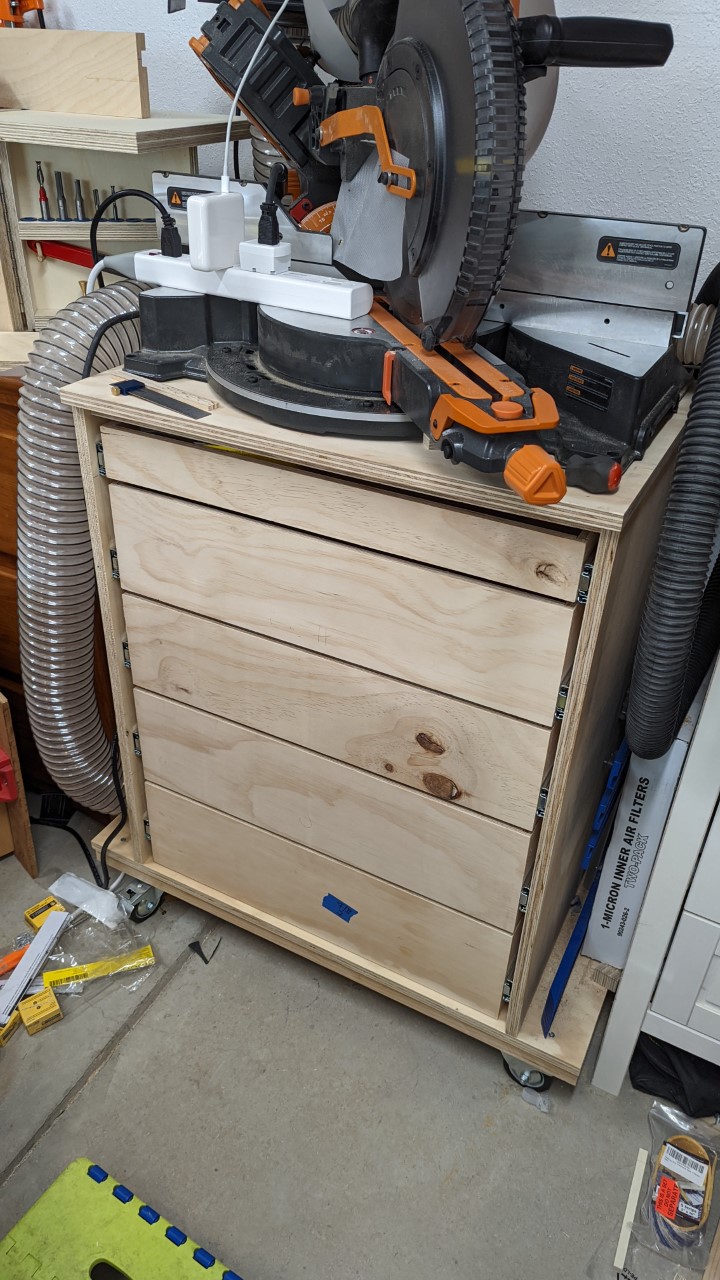
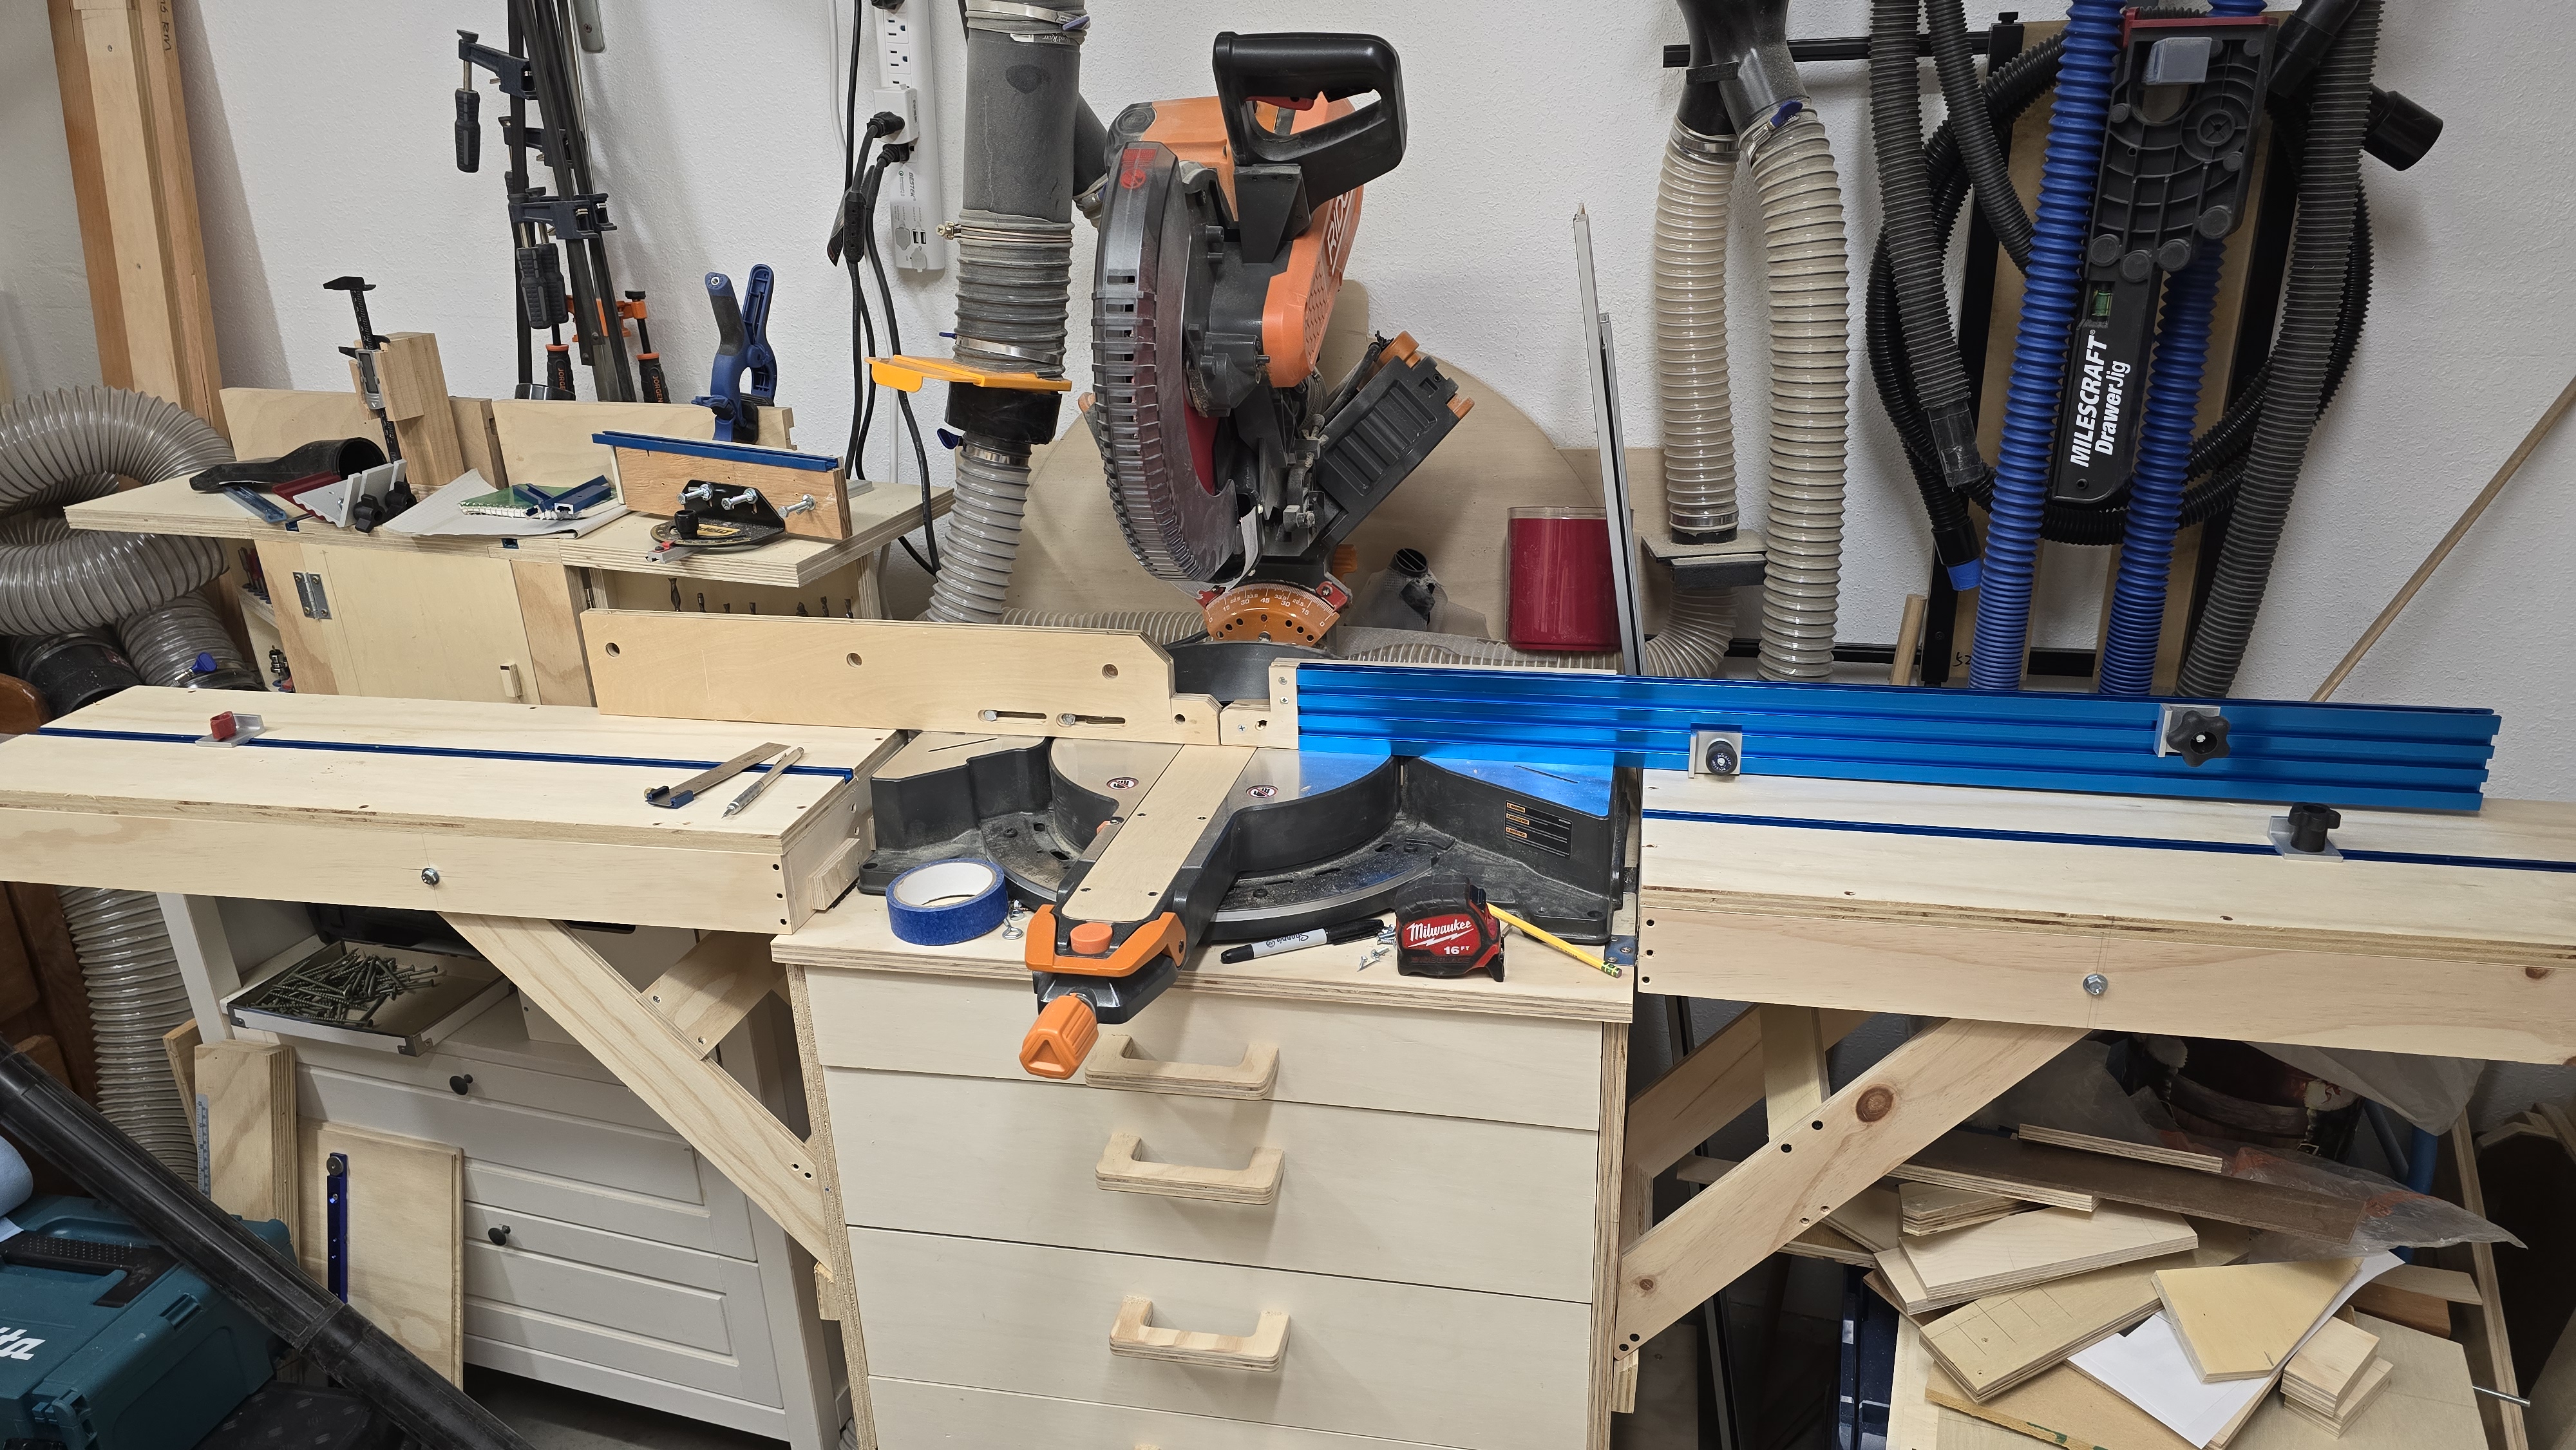
Base cabinet
The cabinet consists of two sides, a wider bottom panel to increase stability, and two strips across the top, so basically just like a regular kitchen cabinet (except for the bottom). A 1/2” thick back panel gives the cabinet its rigidity.
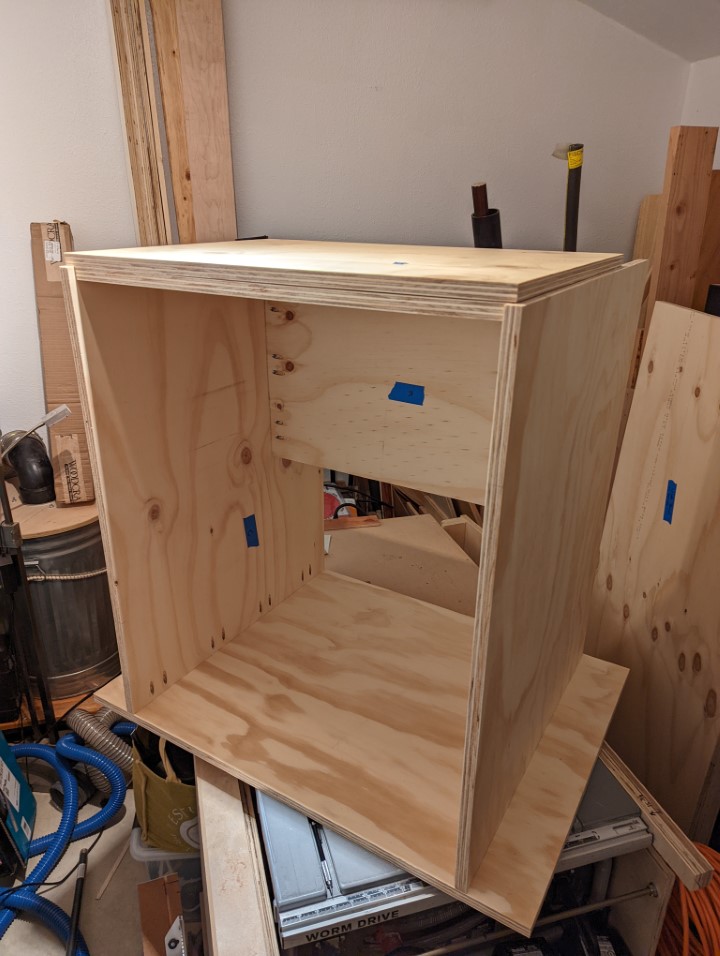
Since the original plan included a dust hood, which was supposed to drop the dust and chips to the bottom of the cabinet’s rear, there is a gap between the upper three drawers and the rear end of the cabinet. This gap is closed off from the drawers by an additional panel, acting as a sort of dust/chips chute and has a hole on one side, where the hose of the dust collector was supposed to go. This has currently no function, but it still causes the upper three drawers to be a couple inches shorter. It isn’t a problem for me, so it likely will stay like that forever. Since this extra panel is also 3/4” thick it further increases the cabinet’s stability, which will be important when I have to wheel it in and out of the shop later.
To reinforce the bottom I’ve glued and screwed a piece of a 2x4 along each of the front and back edges underneath the bottom. This is enough to carry the weight of the cabinet, the drawer’s contents, the saw itself, and any workpieces on top of it.
All panels were joined with pocket hole screws.
Top
In addition there is another 3/4” panel screwed to the top stretchers to give the saw a flat surface to sit on. This panel covers the entire cabinet’s top and spreads the weight of the saw and everything else on top equally over both sides.
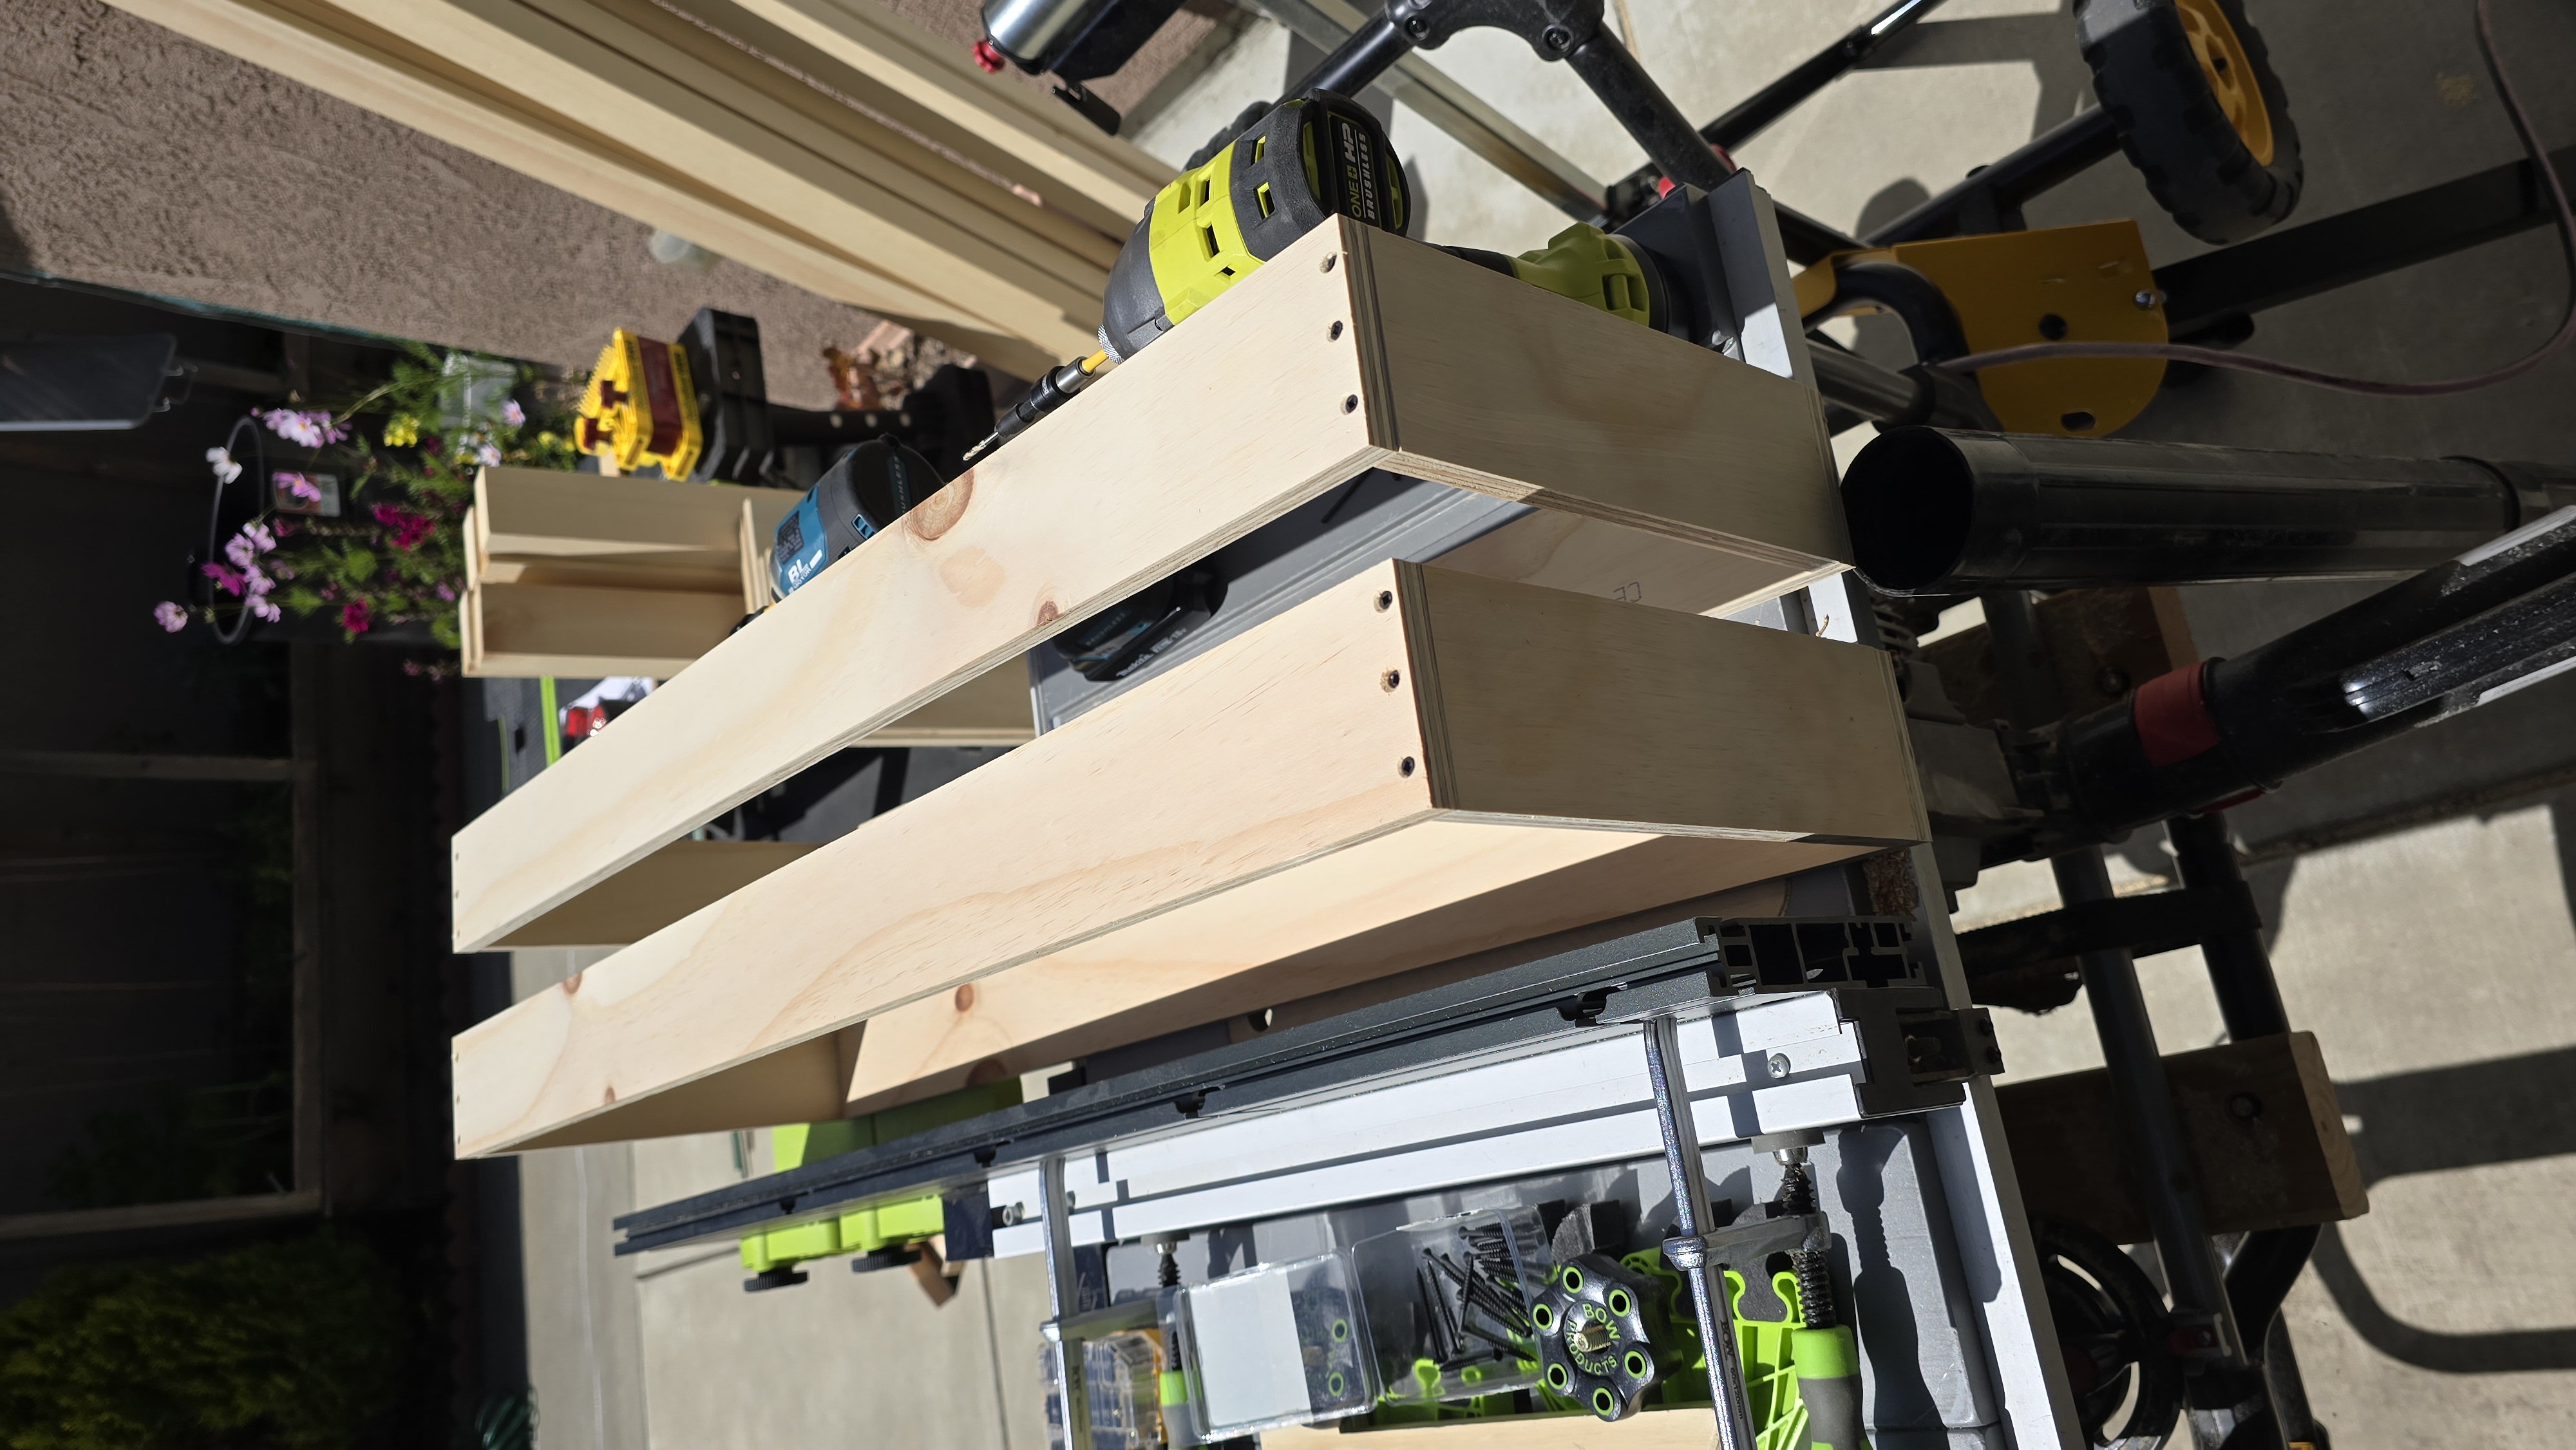
Drawers
The miter saw station has 5 drawers total, with 3 different heights. The two bottom drawers are the largest, with about 7.5” each. The next two drawers are only 6,5” high, and the top drawer is a little lower at almost 4”. This is different than what the SketchUp model shows, with the reason being my better understanding of my shop storage needs later into the build.
This setup allows me to store larger tools like routers and their bases in the bottom drawers, and smaller stuff incl. screws and other hardware to go into the upper ones.
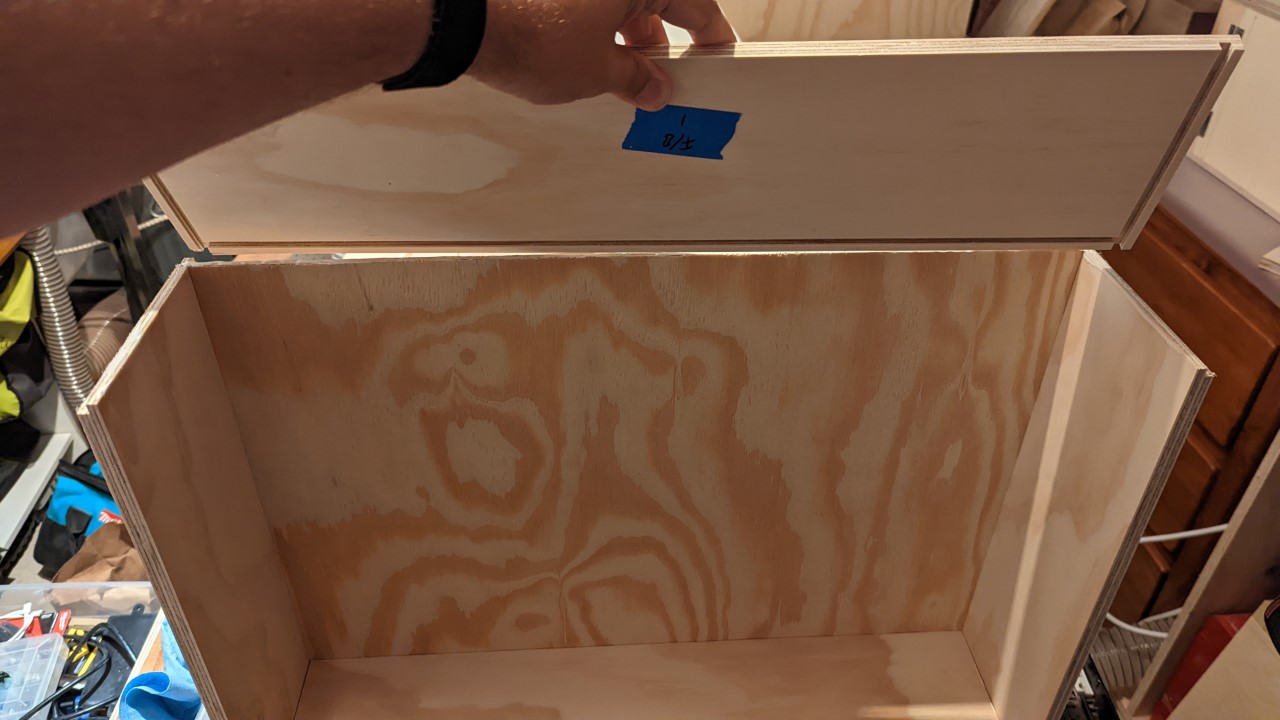
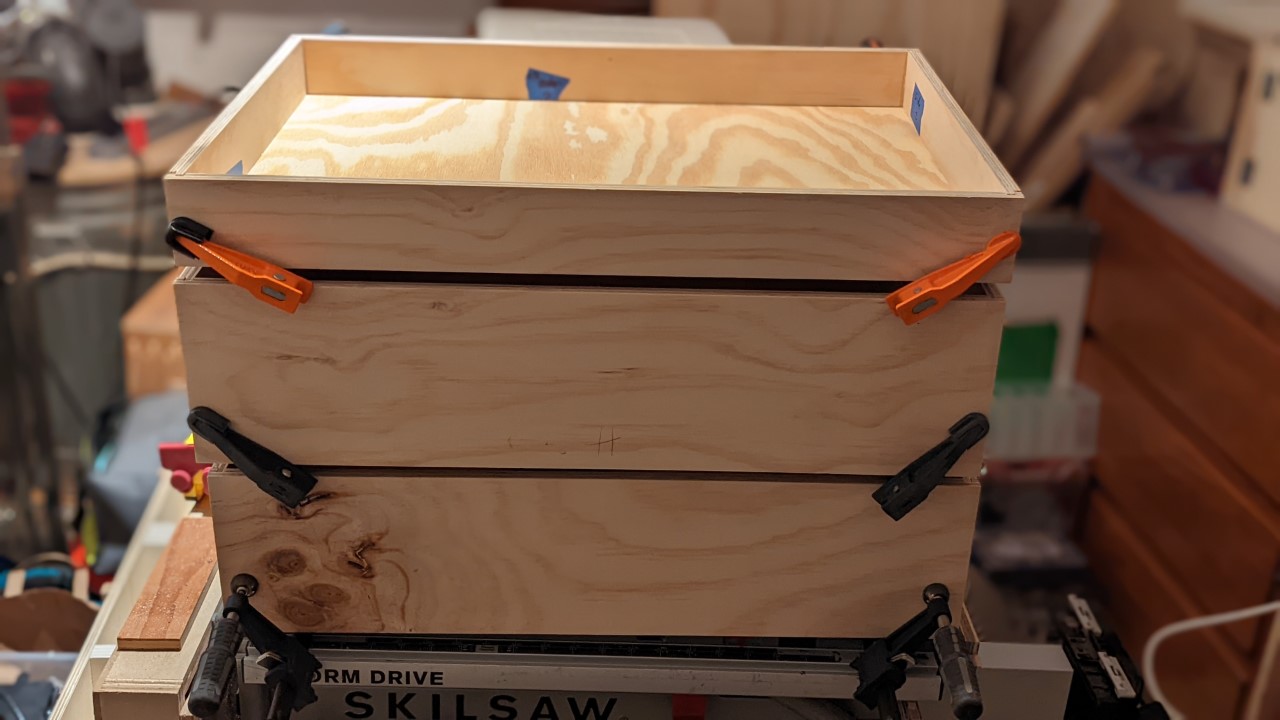

The drawer parts were all joined with the 1/4-1/4-1/4 method: The sides get either a groove or a rabbet on both ends as well as a groove at the bottom, all being 1/4” wide. Once the router or the table saw are set up properly this allows for a continuous workflow, where everything is cut with just this one setting, and the orientation of the board dictates the actual cut being made. Then all pieces can be glued together - square, strong, and without any hardware.
Slides
For the slides I chose to go with some good quality soft-closing slides. Slides without this feature would cause a lot of stress on the cabinet structure when not handled carefully, and the last thing I want is for the station to become unstable. Shop furniture doesn’t need to be pretty, but it has to be sturdy at least.
It doesn’t have to be ugly either, so I’ve opted for some nice looking fronts, which also keep most of the dust out of the drawers.
Handles
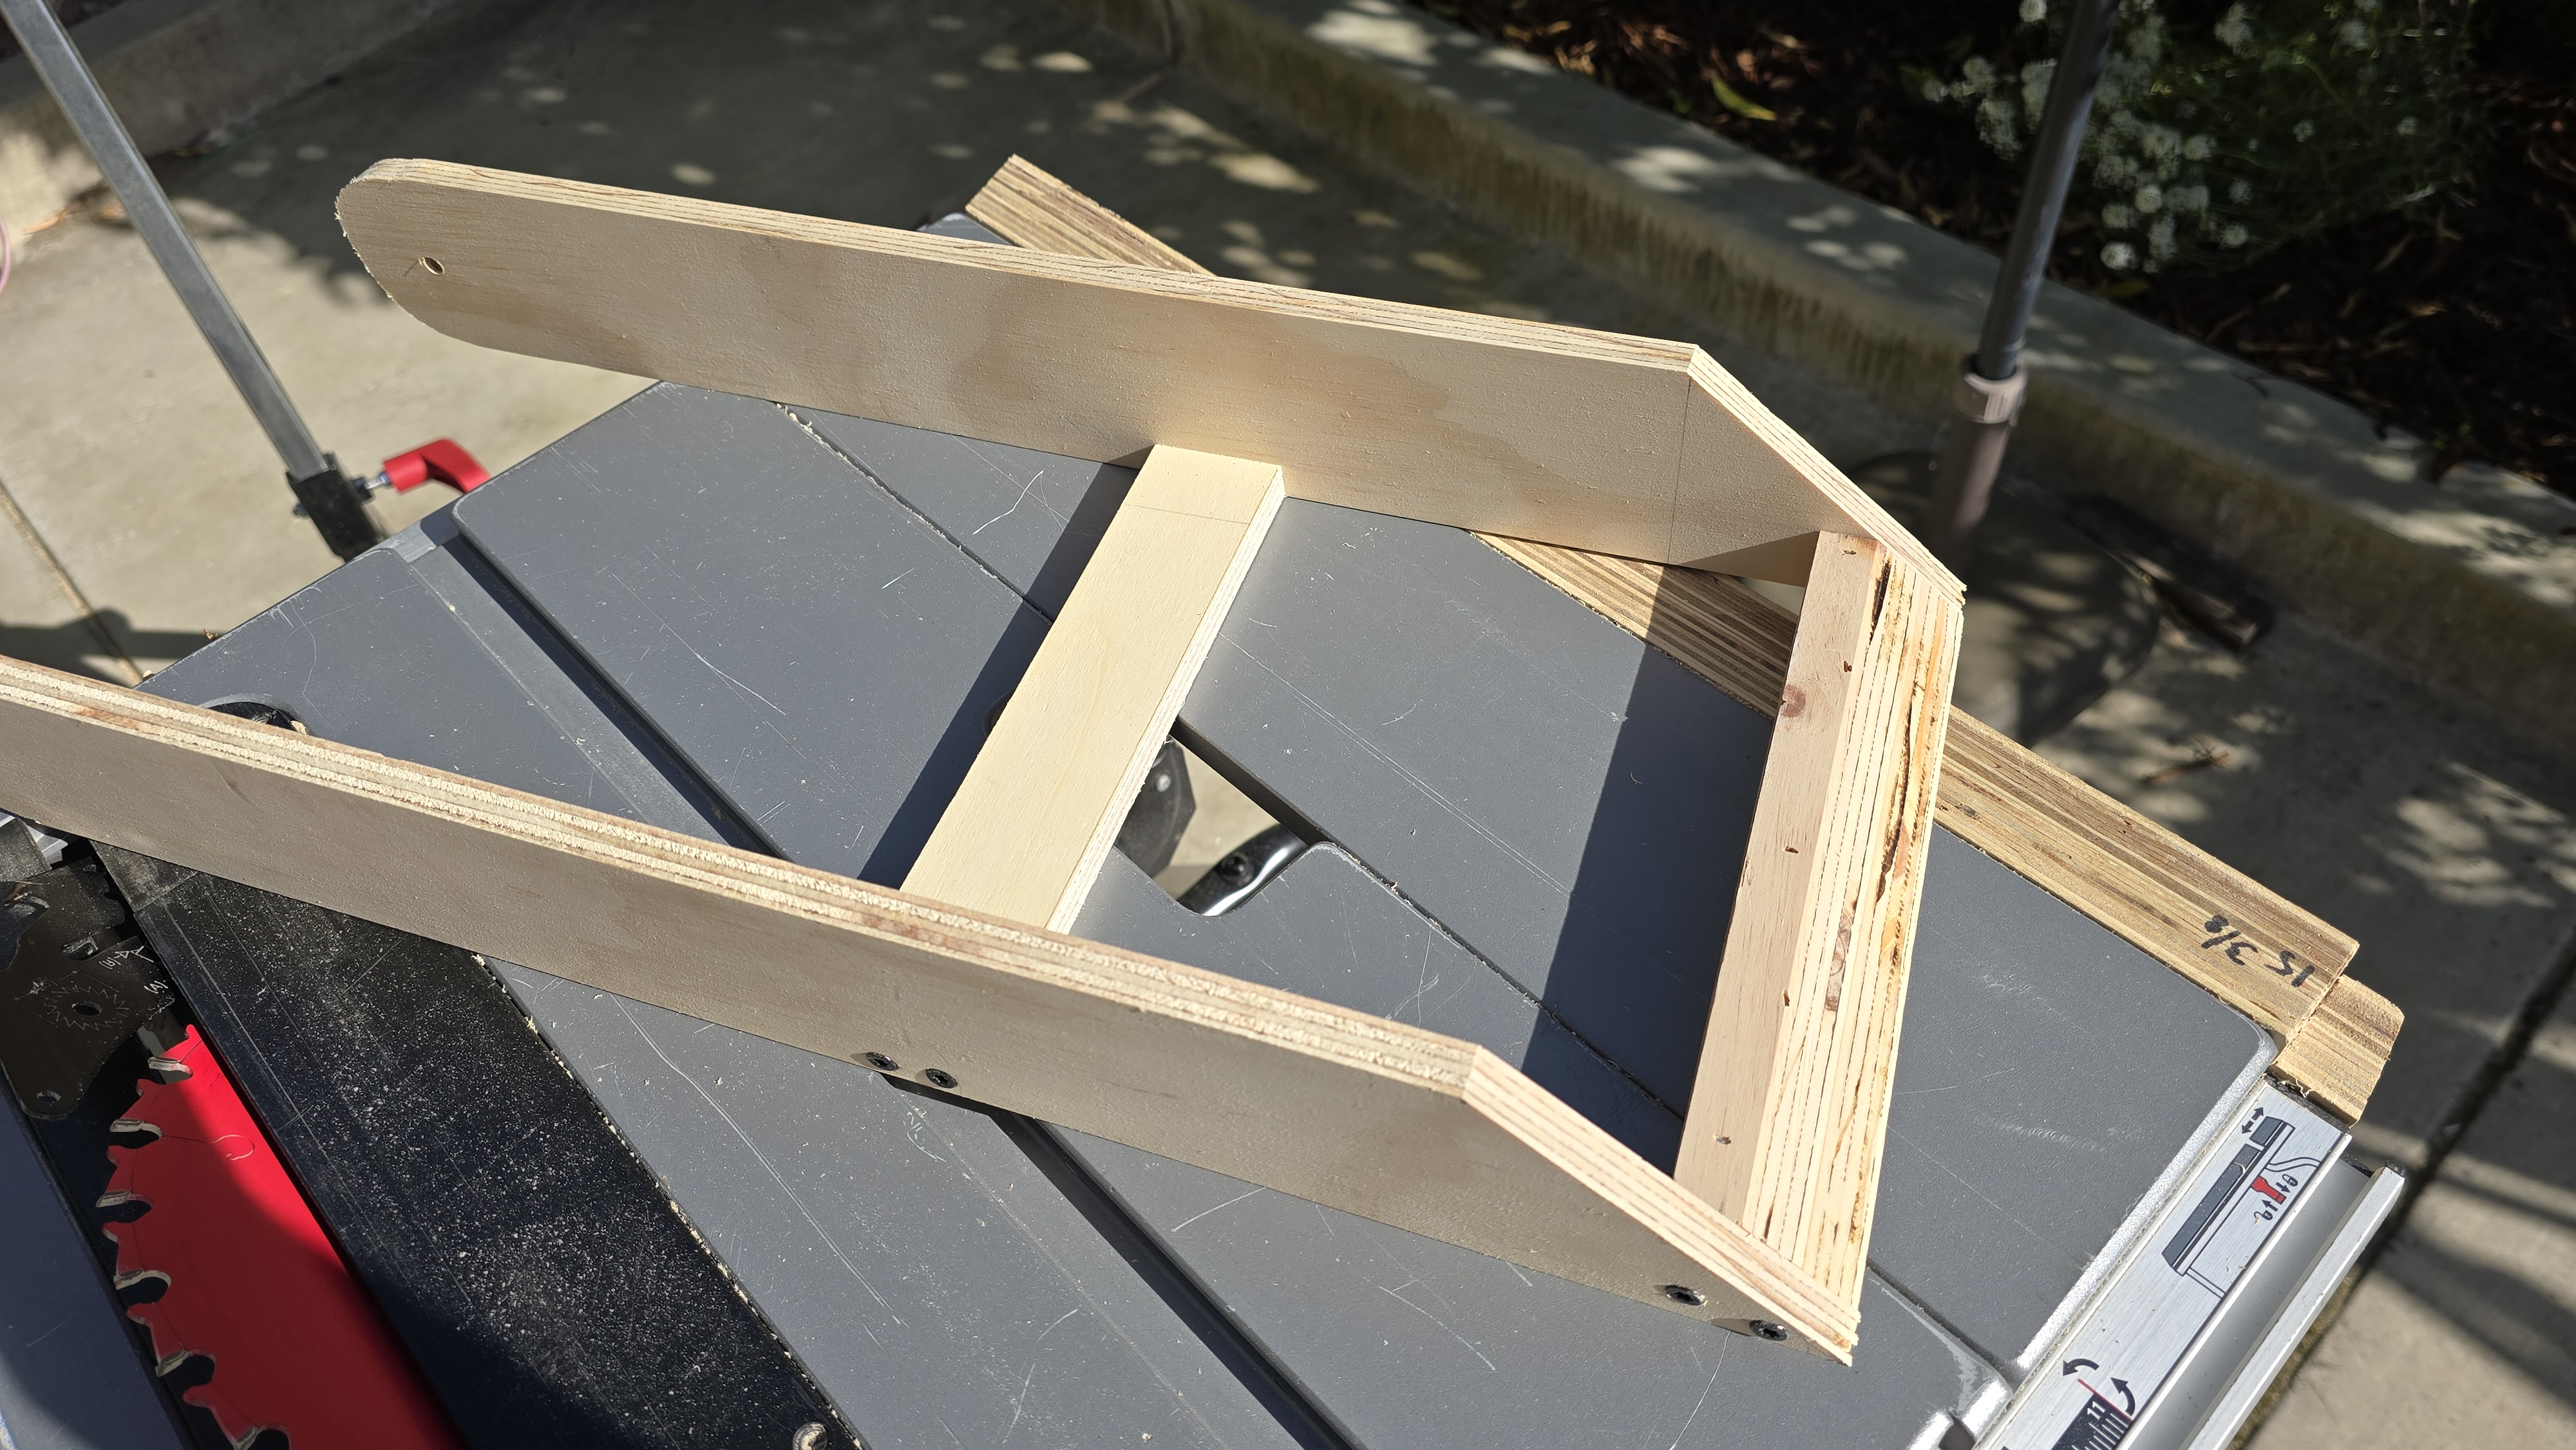
The handles are also cut from ACX as I wasn’t willing to buy any from a hardware store and wanted to try making my own ones anyway. Their design is very basic, though I’ve tried to shape them so that I would have it as easy as possible when I try to open them while having my hands full. I also wonted them to have a shape that won’t cause my cargo pants to get hung up on their ends all the time when walking past them closely. Then they should also be sturdy enough to last a long time.

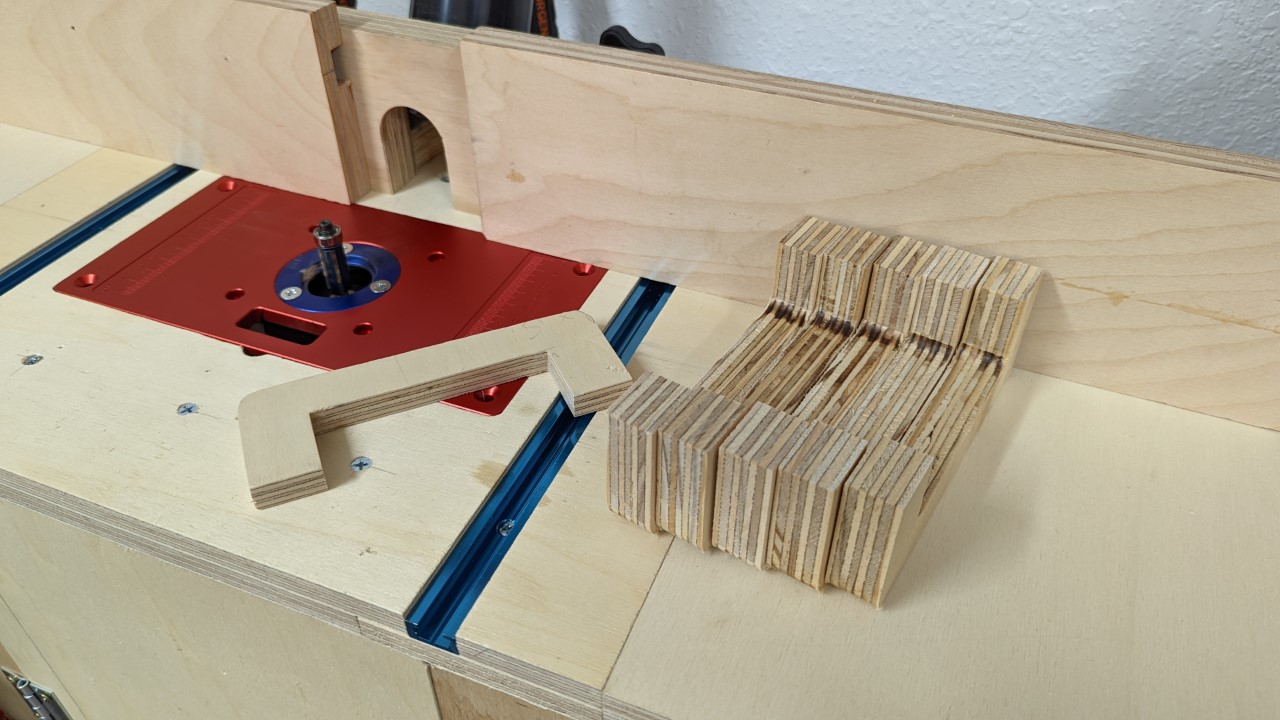
To ensure they are consistent I’ve first cut a template, and then used this to route the handles themselves on the router table with a trim bit after cutting off most of the waste with the band saw. A small round-over bit in the router table then cleaned up the edges, so everything is nice and smooth.
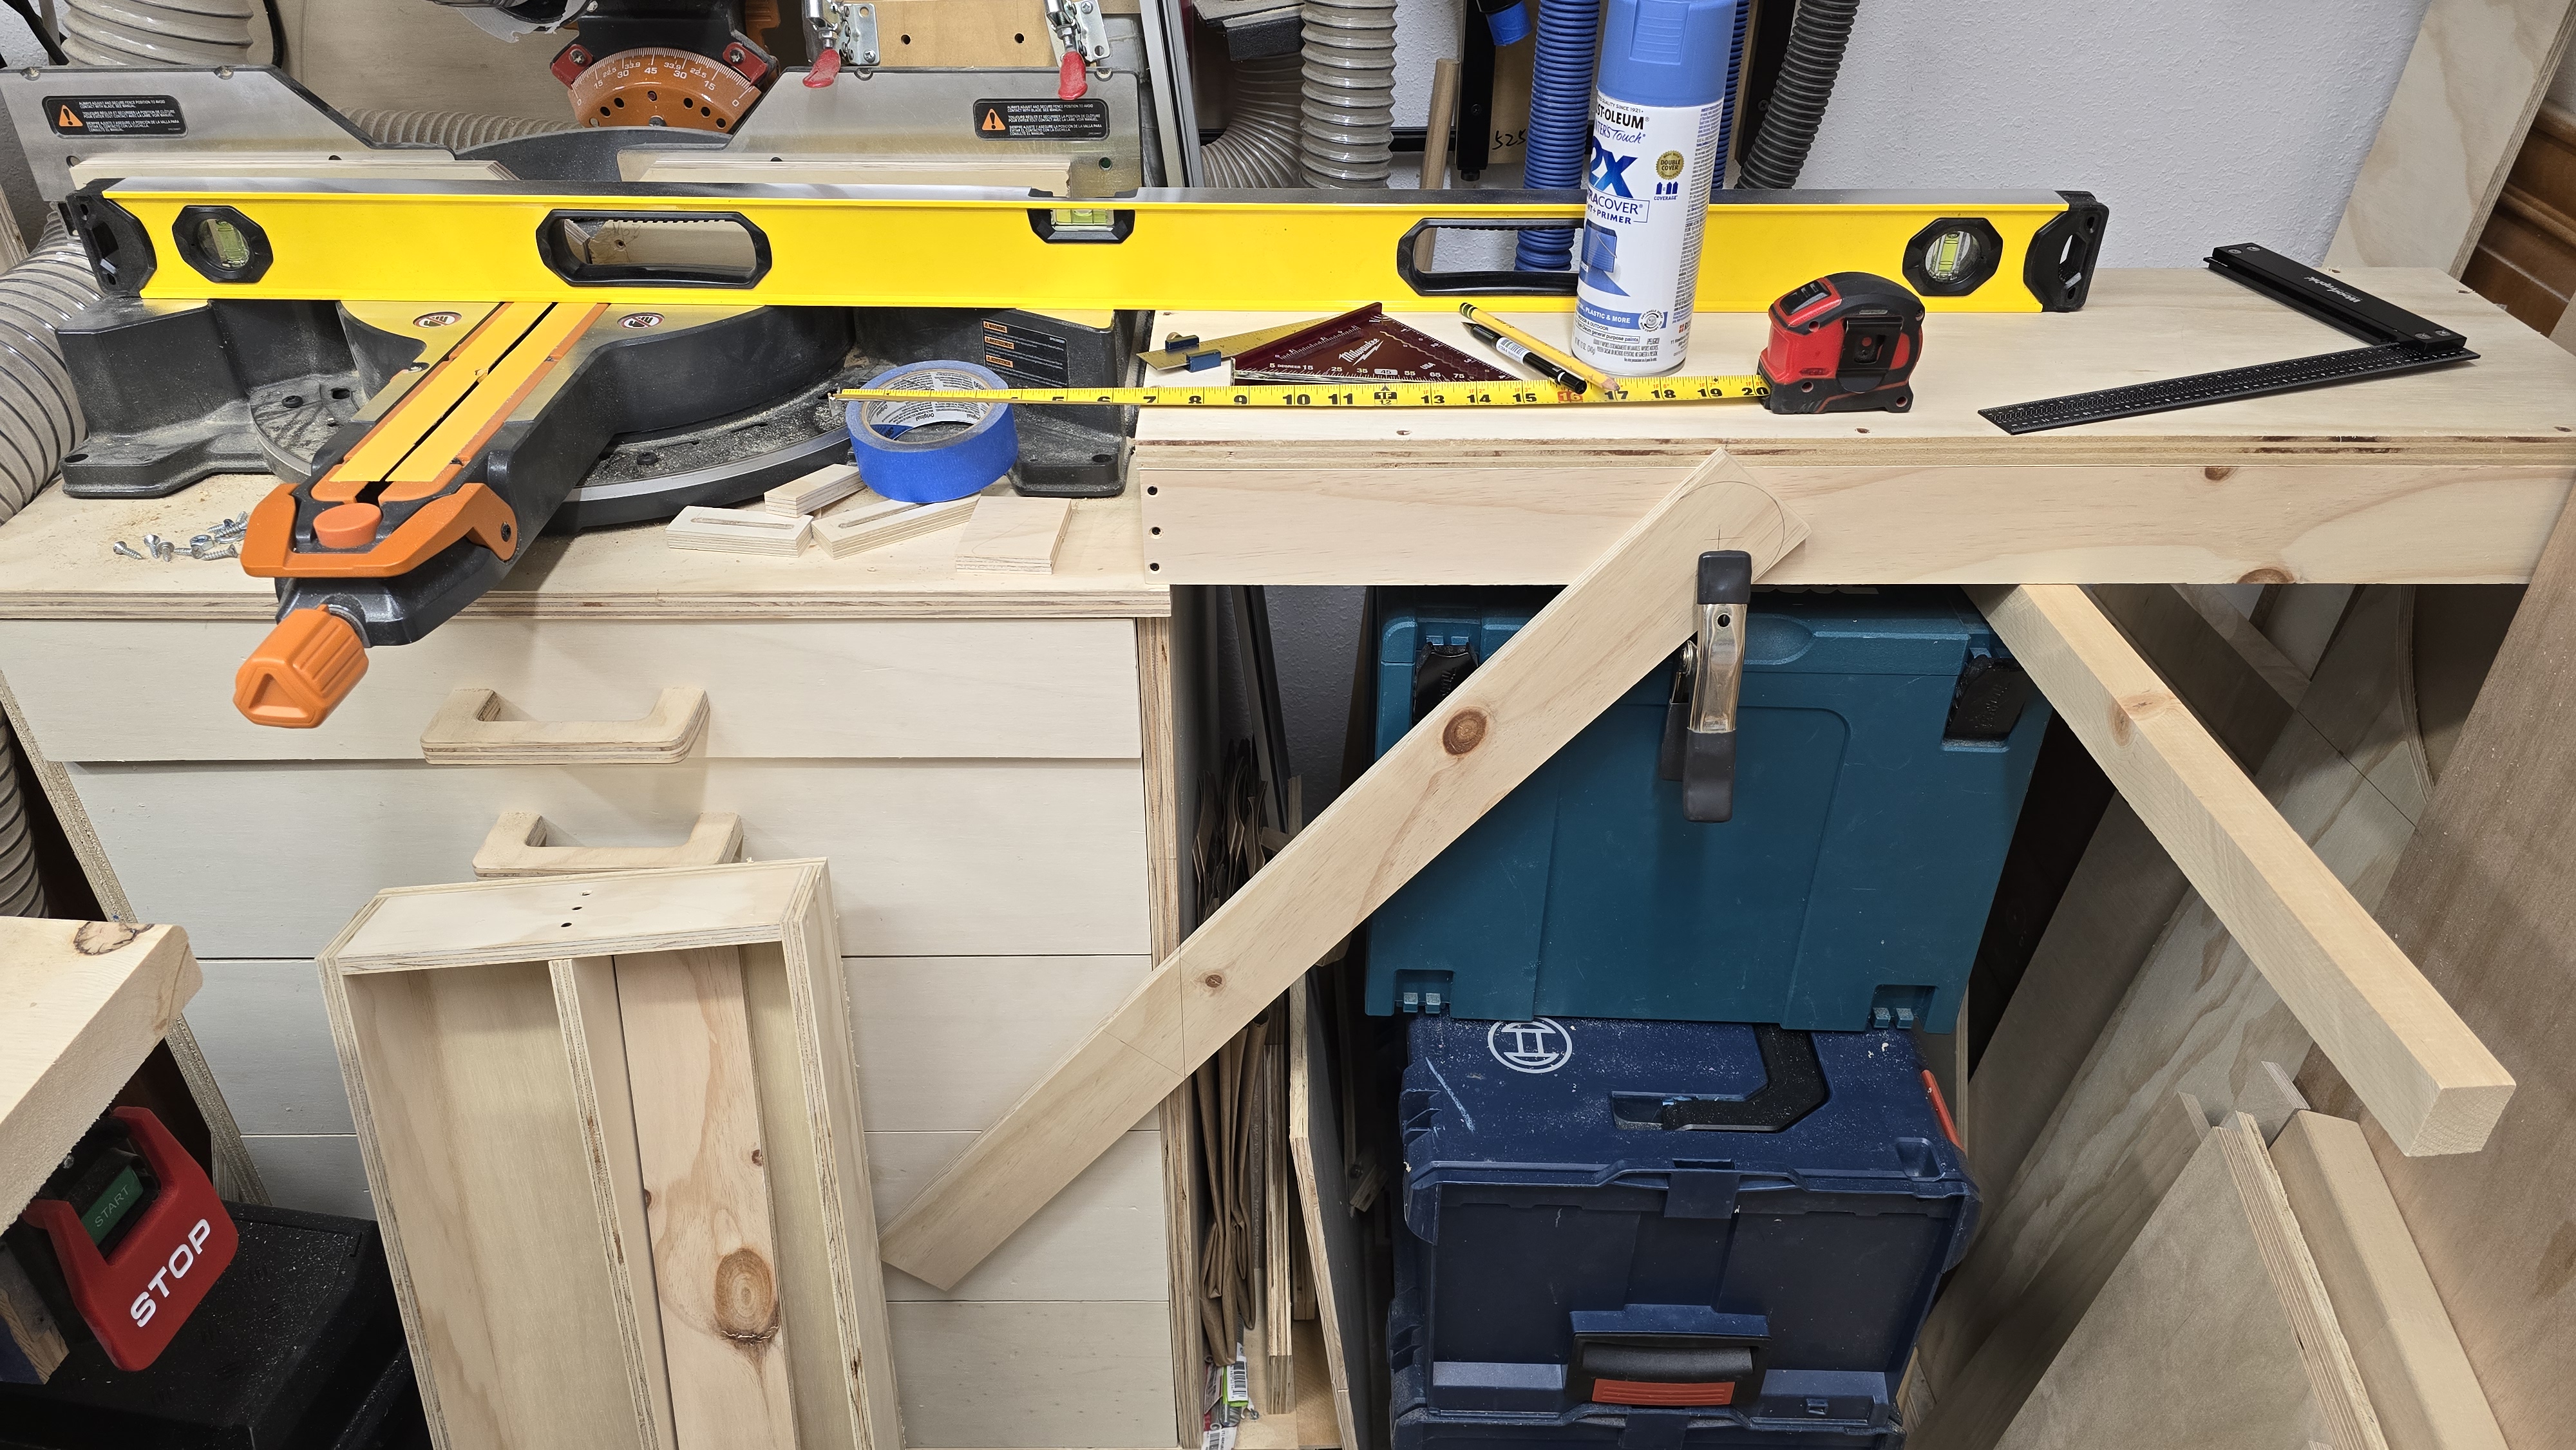
Side panels (“wings”)
On both sides of the cabinet is another panel installed, that can be folded up to provide extra support for longer work pieces, and down, so it gets out of the way when not needed - just like a wing.
Each wing has a frame that consists of a set of 2-5/8” wide strips of plywood that are butt-joined with trim screws. On top of that sits a 3/4” plywood panel that has a T-track inserted lengthwise to allow for movable stops to be used for repeated cuts on pieces that extend beyond the saw’s fences. The supports that hold each wing in the horizontal position rest on a french cleat at each side of the cabinet.
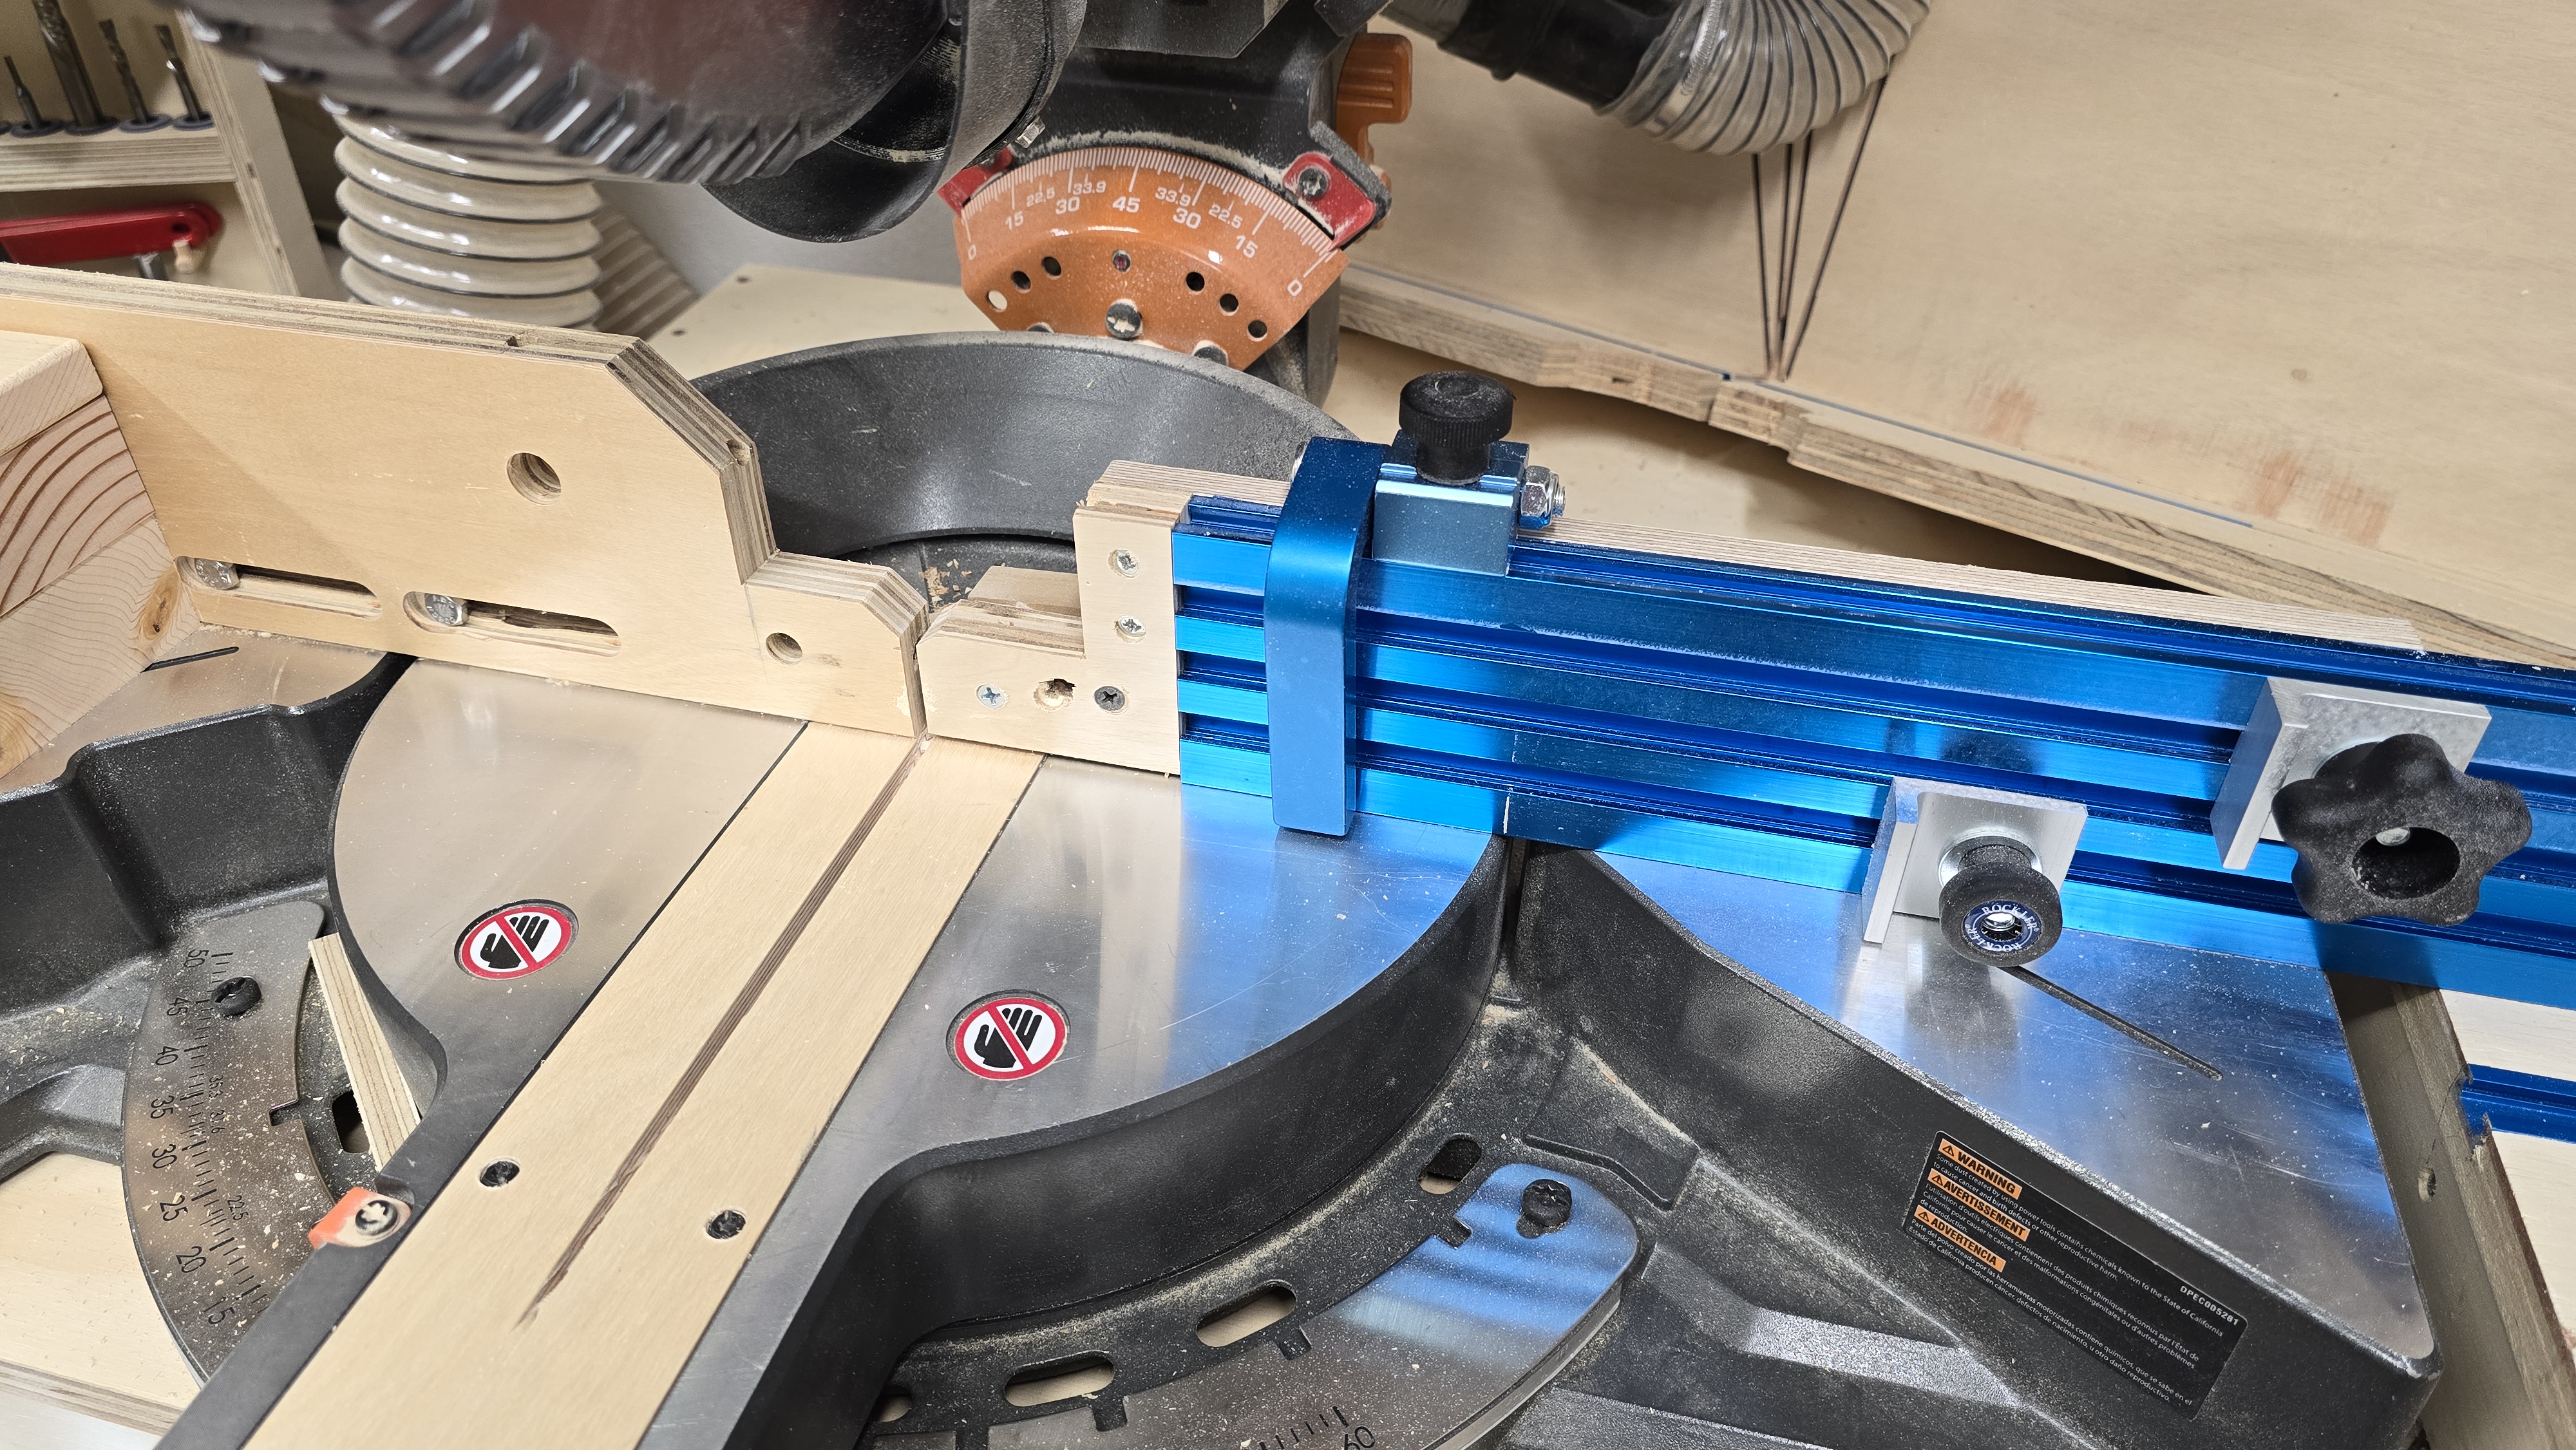
Fences
I’ve replaced the movable upper metal fence parts that were originally installed, with full-size Fences that sit in front of the original fences, and are held in place with T-bolts and can slide in and out as needed. The left fence now is just a piece of 3/4” plywood, while the right fence is a piece of 36” triple T-track that I bought some time ago with the idea to make it a fence of some sort, but then never did. Now it finally is used as originally intended and allows to operate a set of movable stops, even when the wings aren’t folded up.
The stops consist of an unused flip stop from an old table saw sled, as well as some other smaller stops that are meant to sit flat on a T-track.
The finished project
So, despite this being a relatively easy build it was the first time I had attempted to make an actual cabinet with more than one or two drawers. As expected I ran into some difficulties, mainly rooted in a lack of experience. So, for instance, I struggled with mounting the drawers and their respective slides in a consistent way. While likely nobody ever will notice any of the flaws I still want to improve the standards I hold myself to, so I’ll keep practicing.
Another difficulty was the mounting of the wings, which needed to be attached in a way that allows them to fold up far enough to allow the support cleat to be positioned as needed, as well as carrying the weight well enough to not just break off when placing a 4x6 on it, for instance. Then I also messed up the length of the wings by a 1/4 inch, which caused them to not fold down all the way as they were hitting the bottom. Instead of just cutting of the upper ends and make 2 new short strips to put in I’ve opted for two different ways to move the hinges so it created more clearance. I’ve also had to set the hinges into the top panel a bit to make them flush with the top so they won’t get in the way of the saw’s feet - yes, I made the cabinet about 1/2” too narrow.
The saw is usually bolted down with some 1/4” bolts with knobs and threaded inserts, but can easily be removed if needed.
Overall I am pretty satisfied with how everything turned out. The drawers are already well used, and the height is perfect for me whenever I need to use the miter saw. The additional space provided by the wings already came in handy when working with 6’ to 8’ long workpieces - or just to set the coffee mug on.
I’ve also used the chance and made a zero-clearance insert for the saw as the original insert has a really wide gab to account for beveled cuts and the additional space the saw blade then needs. Since I usually don’t do these cuts on the miter saw anyway, I don’t need to account for that. If I ever need to make one I’ll just put a sacrificial piece underneath the workpiece to protect the insert.
Comments