
My first Woodworking Project - an Outdoor Coffee Table
Before this I did make some smaller things from wood, usually from small sheets of birch plywood or OSB. One example being a step stool, that was initially thought as a tunnel for my son’s toy cars, but then proved strong enough to also hold a sitting or standing person.
My first ‘real’ project
But this project here was the first, where I knew upfront what I wanted it to look like, what materials I would need, and where it will go once it is finished. So it was an actual project, planned and executed in February 2020.
Idea
The tutorial I did find by accident when my wife and I were looking into some coffee tables that were available to buy online. None of the stuff we could buy was a good match to what we wanted - until I stumbled upon Ana White’s 2x4 DIY Outdoor Coffee Table Tutorial.
My wife and I both immediately liked this particular build, it would fit with our existing lounge furniture, and it seemed simple enough to recreate.
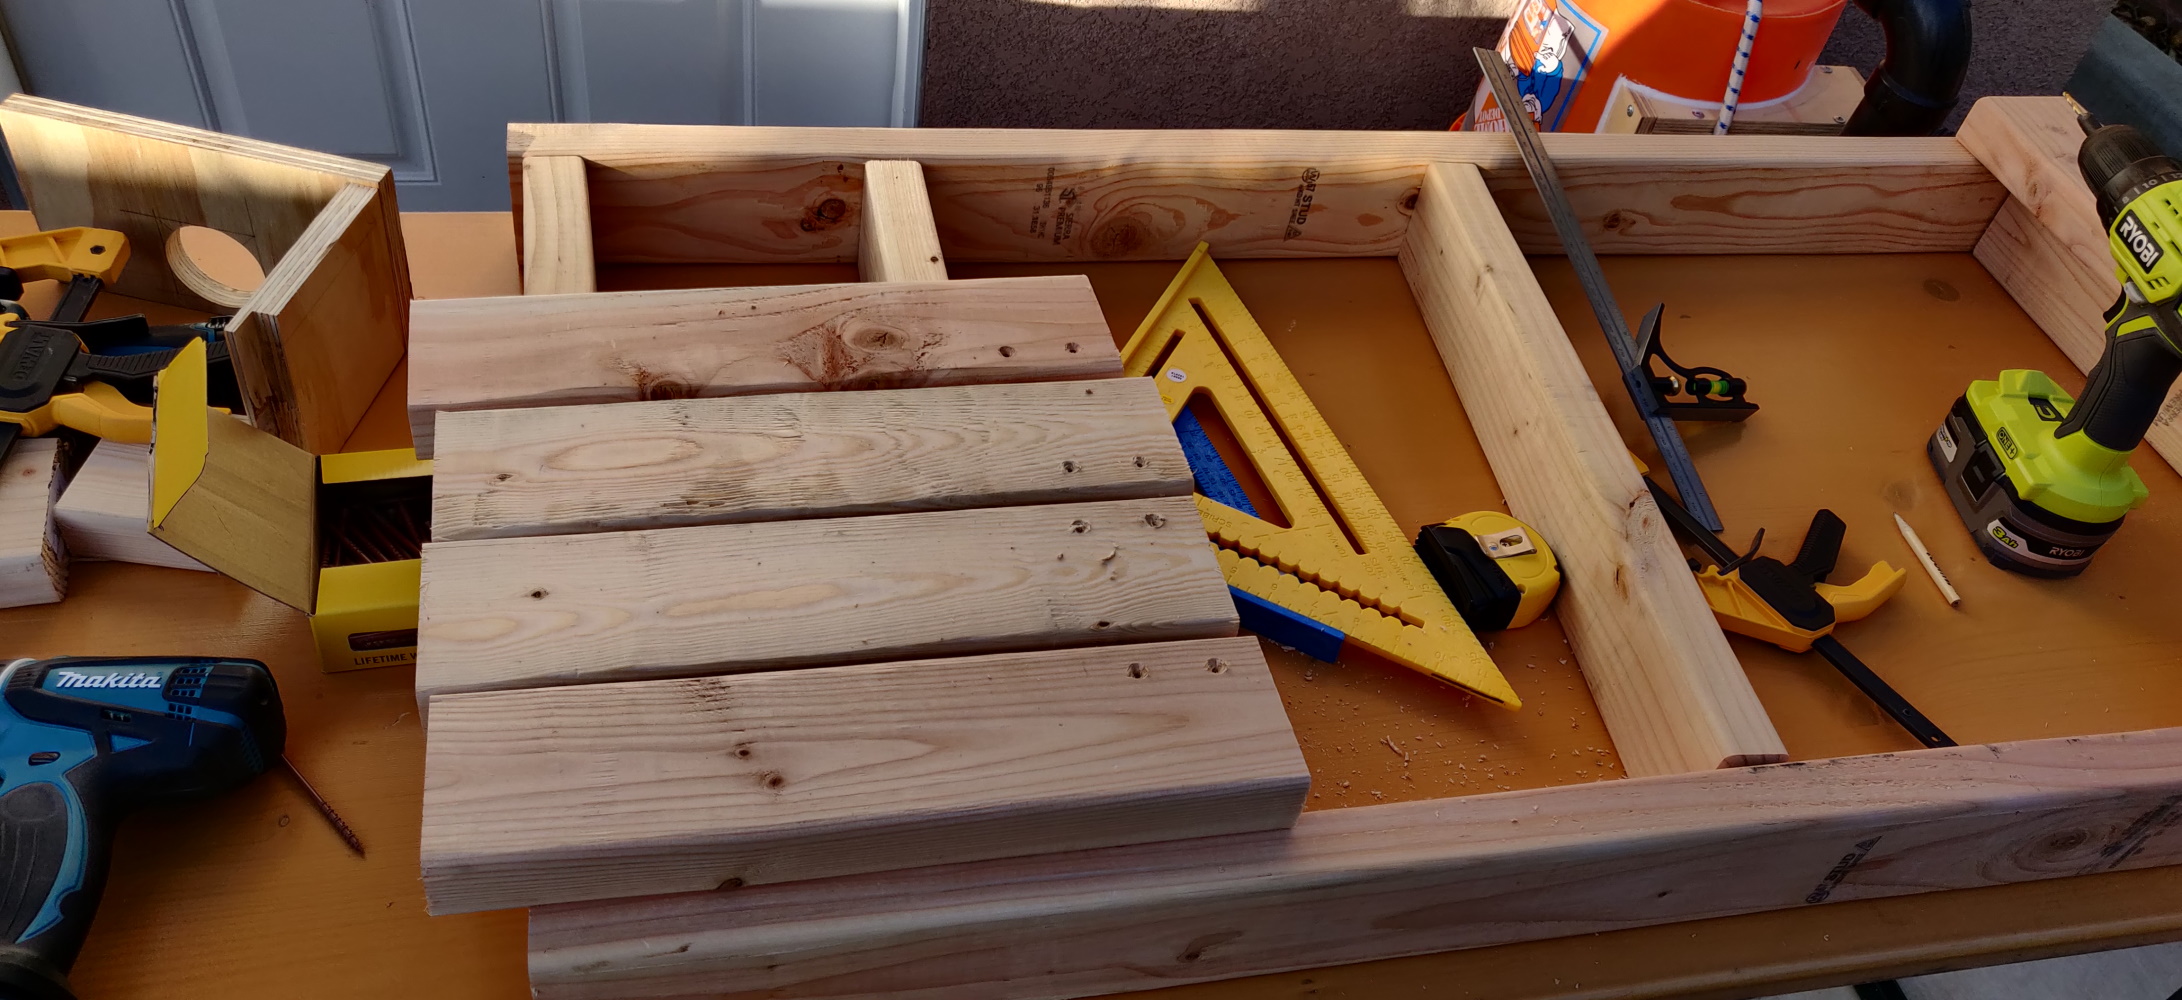
Materials
So I went to the big box store, picked some white pine 2x4’s, got 2 boxes of brown coated, outdoor suited deck screws, and had some cans of deck stain mixed (my wife had two different colors in mind and couldn’t decide, so I got them both both).
Tools
The instructions were easy to understand and repeat, a circular or miter saw, a powerdrill, some clamps, a tape measure and a pencil were basically the only tools I needed to cut the pieces and put the table together. I already had all these, so I got started right away.
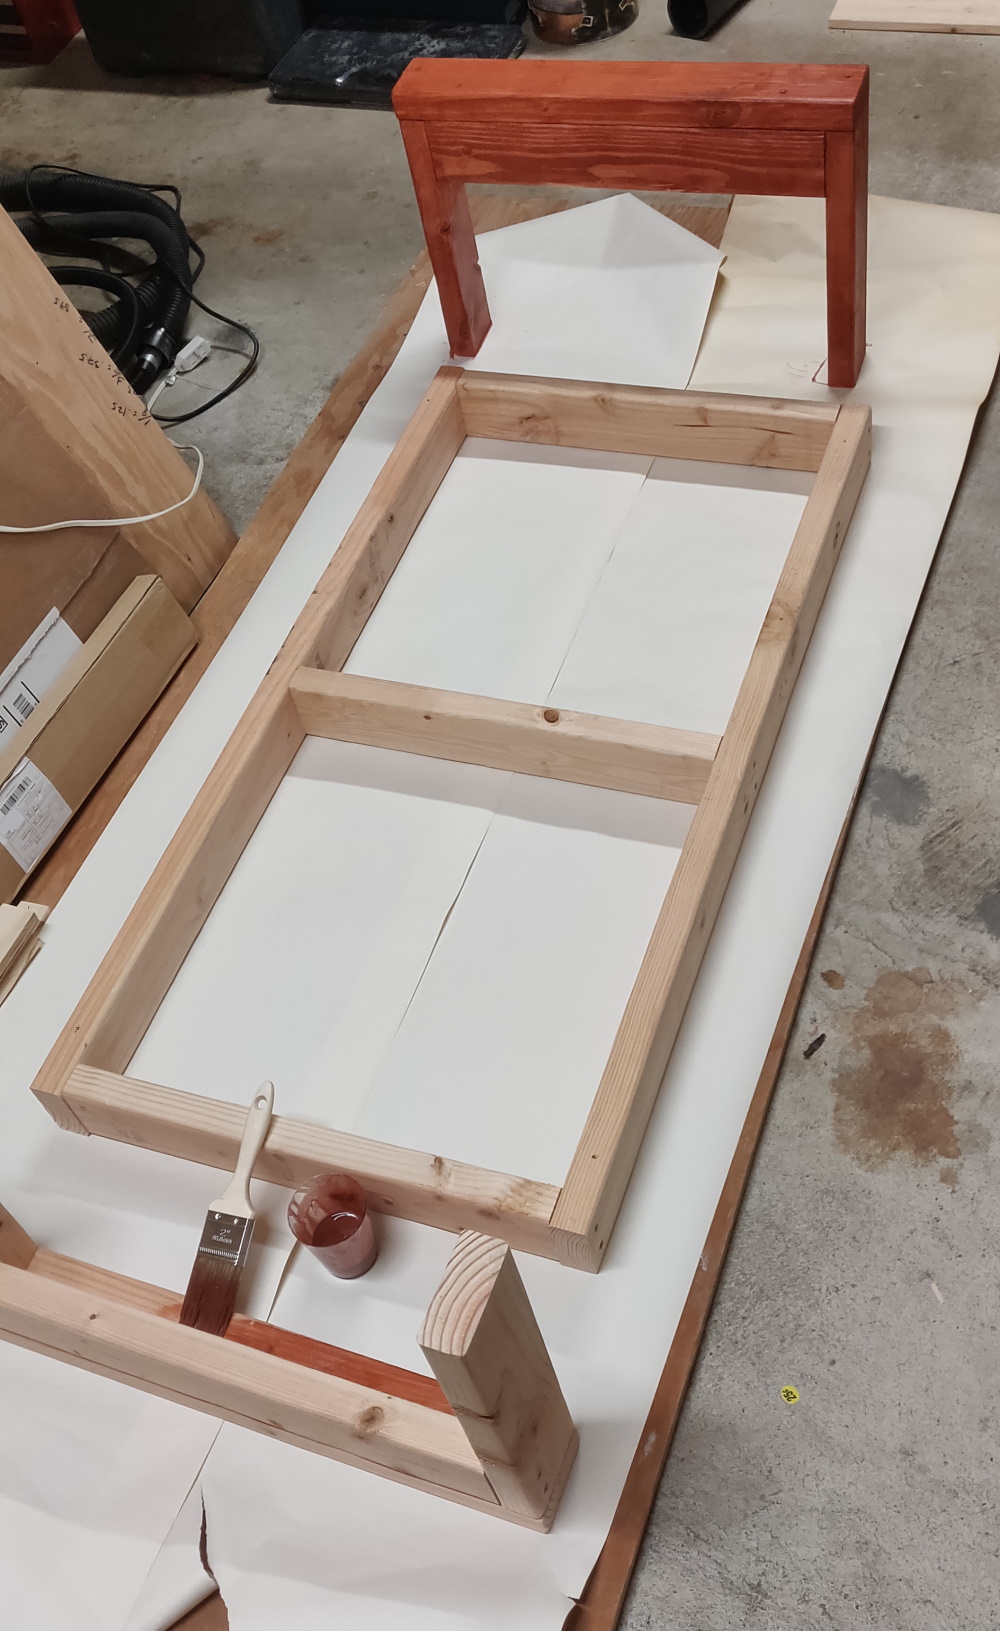
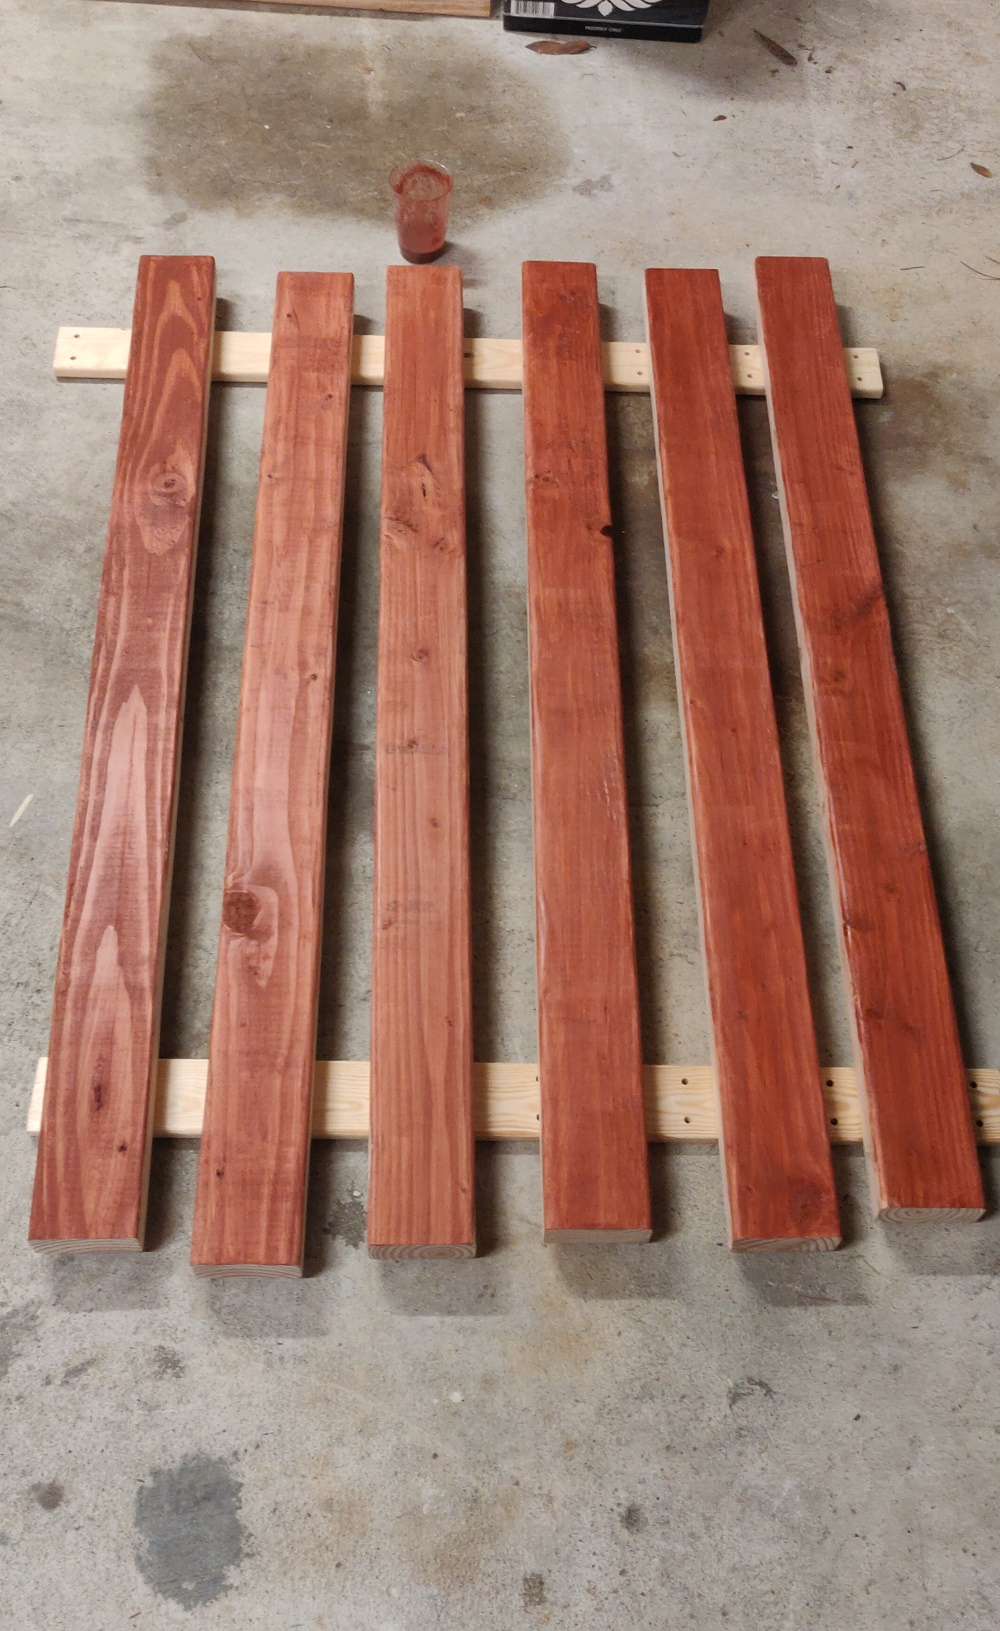
Color
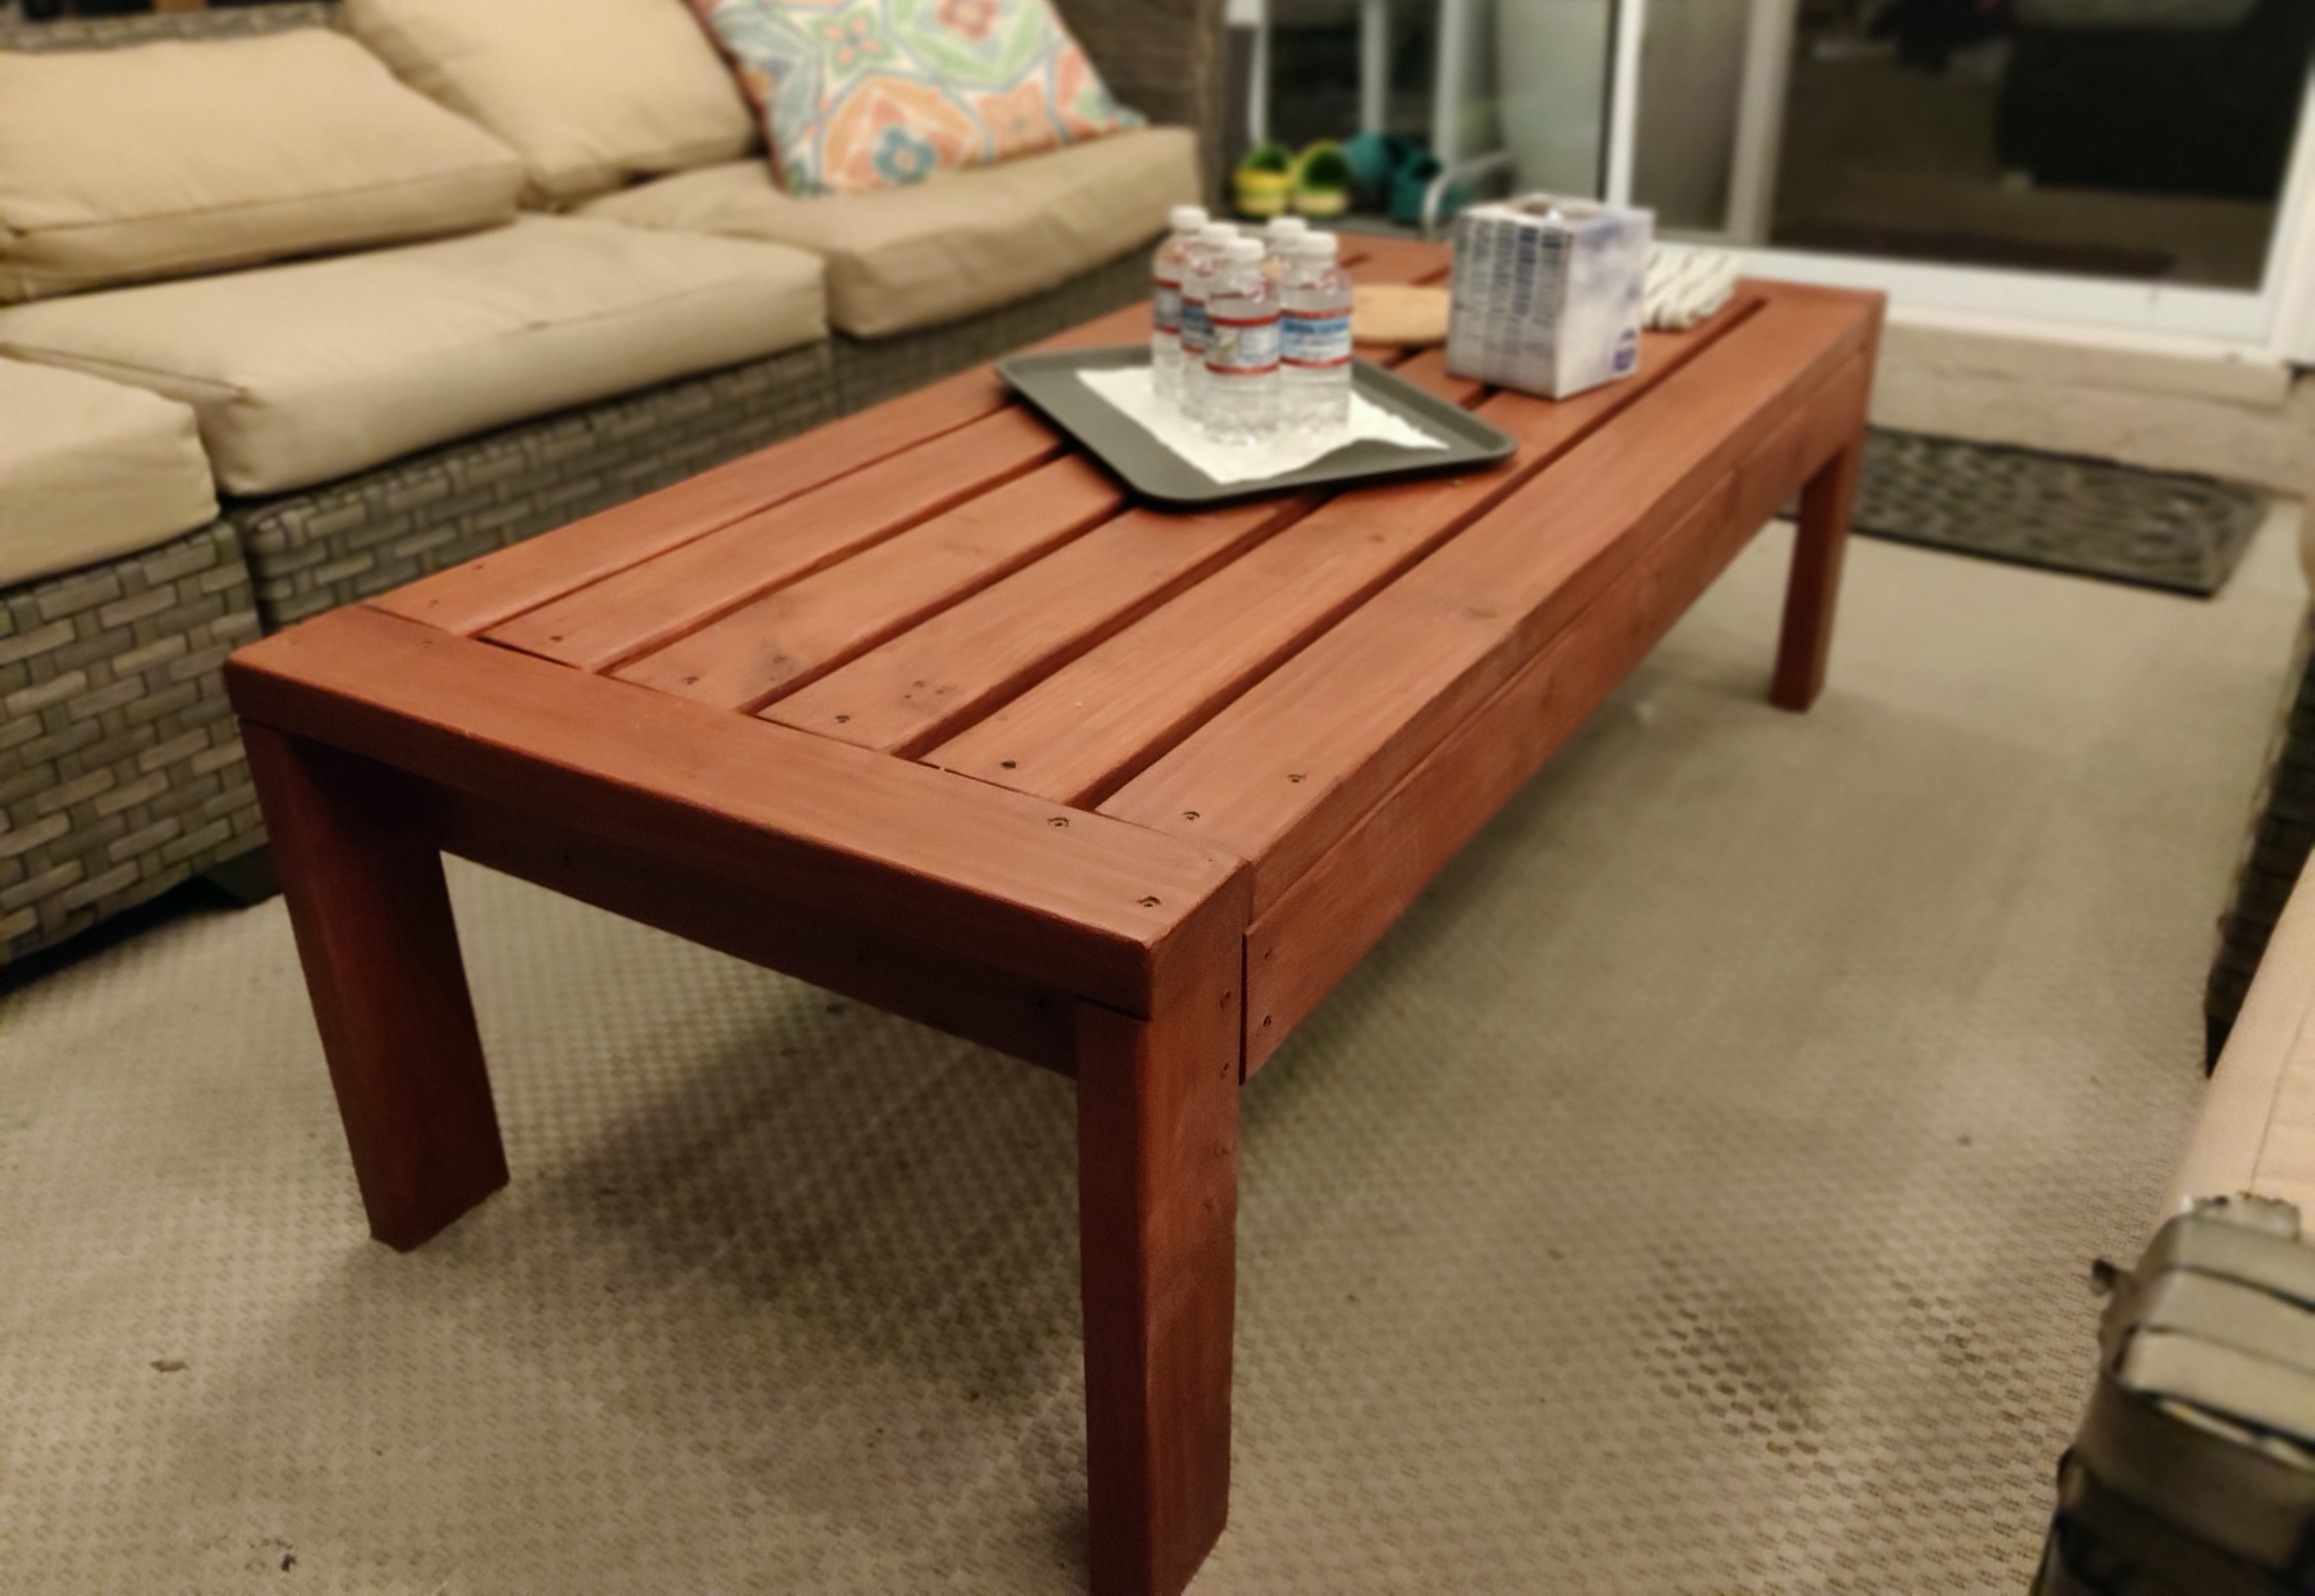
One of the cutoffs I used for a colored deckstain “demo”, and my better half eventully decided to go with the rust-like red that you can see in the pictures (I liked both colors equally anyway). So I applied that to the table, and - voila - here we have a nice coffee table, that completes our deck lounge since March 2020. The deck stain seals the wood off to protect it from the weather, though also helps that the table is located underneath an awning, which mean it barely gets wet at all.

The result
Though I still like the outcome of this project - especially given that this was the first ‘real’ woodworking project I finished (hey, another first: I did a woodworking pun!) - I now know a lot more than I did then. When I started this build I had no idea what face, edge and end grain are. I didn’t quite understand why screwing in endgrain usually isn’t the best way to join two boards. I also didn’t know that chamfering the table leg ends would have prevented splintering when moving the table around (sigh). But again, this was the first serious woodworking attempt, and most things don’t go perfect when attempted for the first time, right?
Bottom line
This makes a fantastic project for anyone’s first attempt to get started in woodworking. You can pick any wood, color or finish, a really simple set of basic tools is all that’s needed to build the table, and the finished result can be put inside or outdoors, can be sold or gifted, and if it get’s messed up it isn’t too expensive to start over.

Comments